
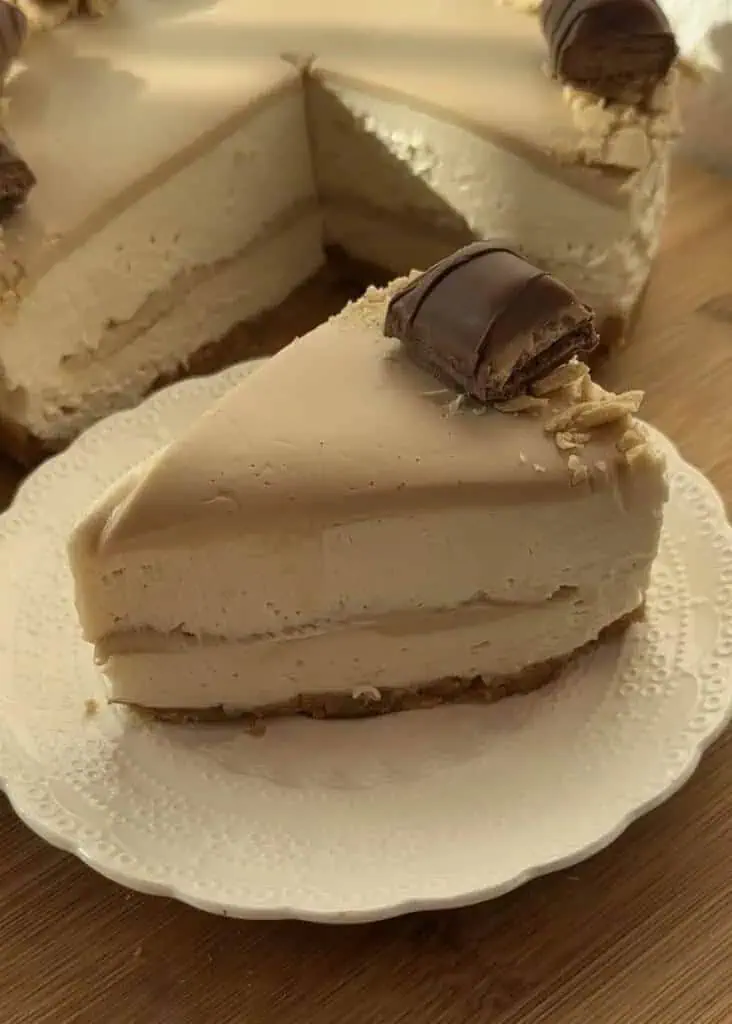
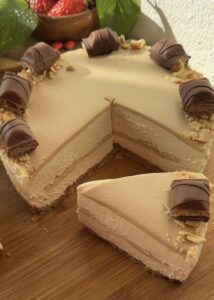
This is the perfect recipe for a no bake Kinder Bueno cheesecake that’s incredibly creamy and easy to make. For this recipe, you won’t need to use any gelatin, and it’s quick, fun, and hassle-free to prepare!
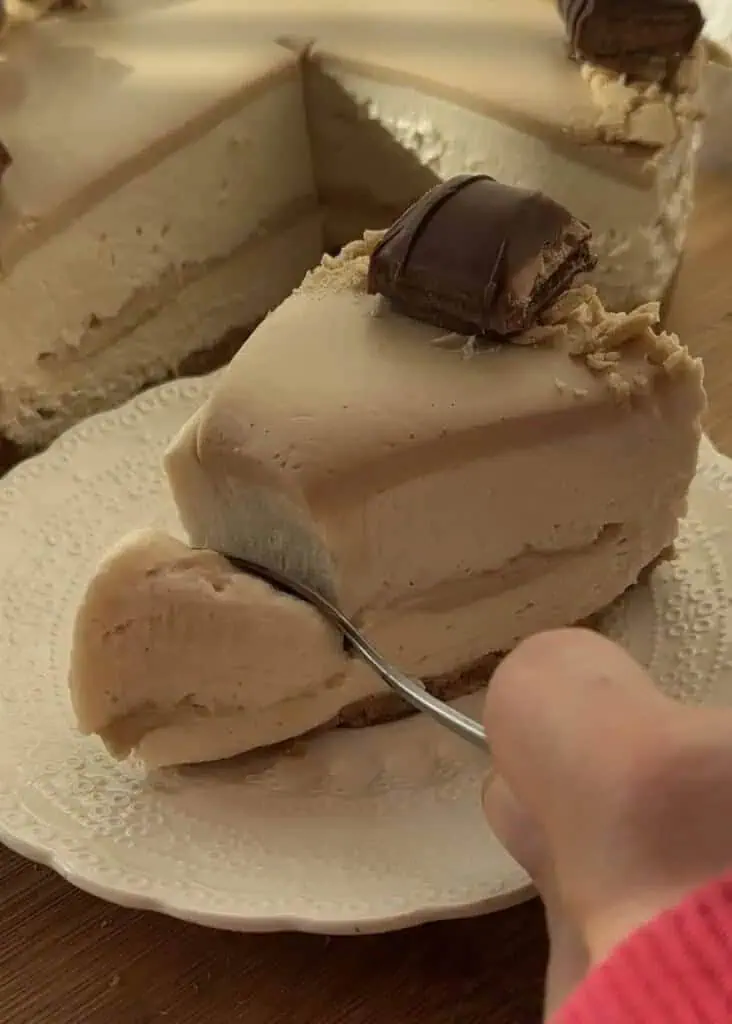
Kinder Buenos are probably my favorite chocolate bars—if you can even call them just a chocolate bar; I’m not entirely sure! Lately, our go-to desserts have been no-bake cheesecakes because they require minimal time and effort. That’s why this no-bake Kinder Bueno cheesecake recipe is absolutely perfect for us.
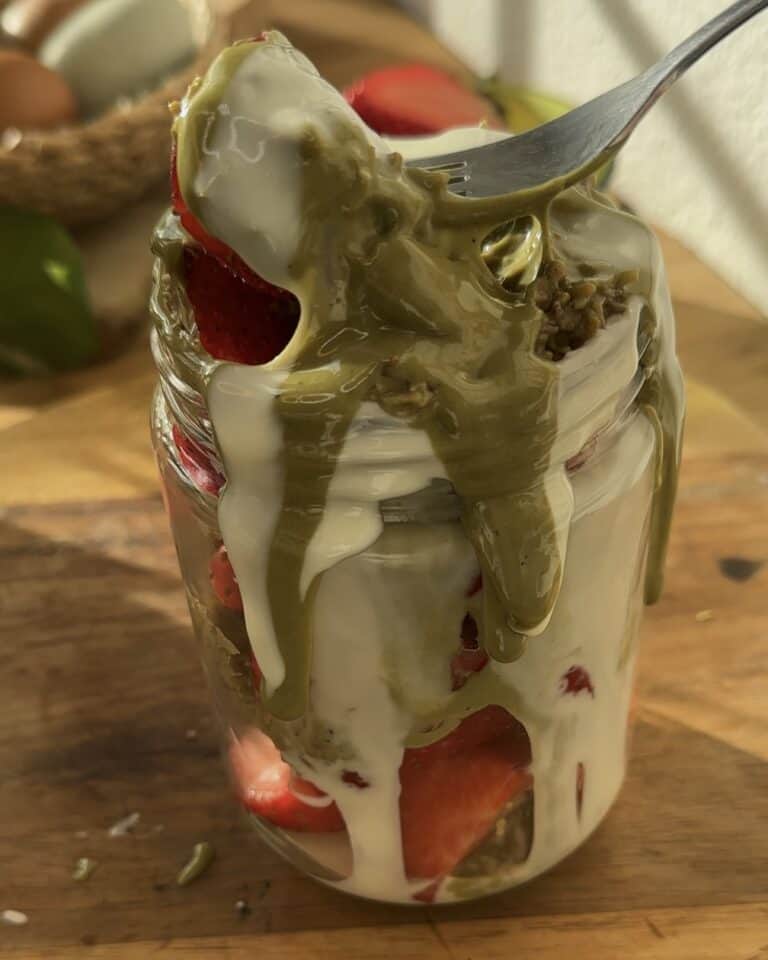
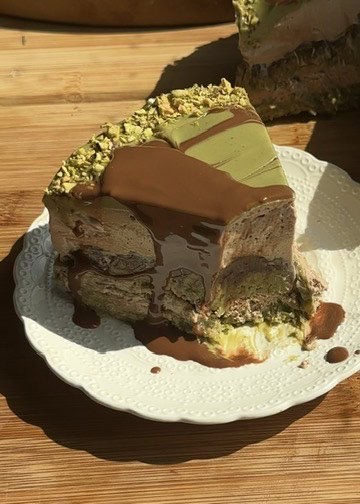
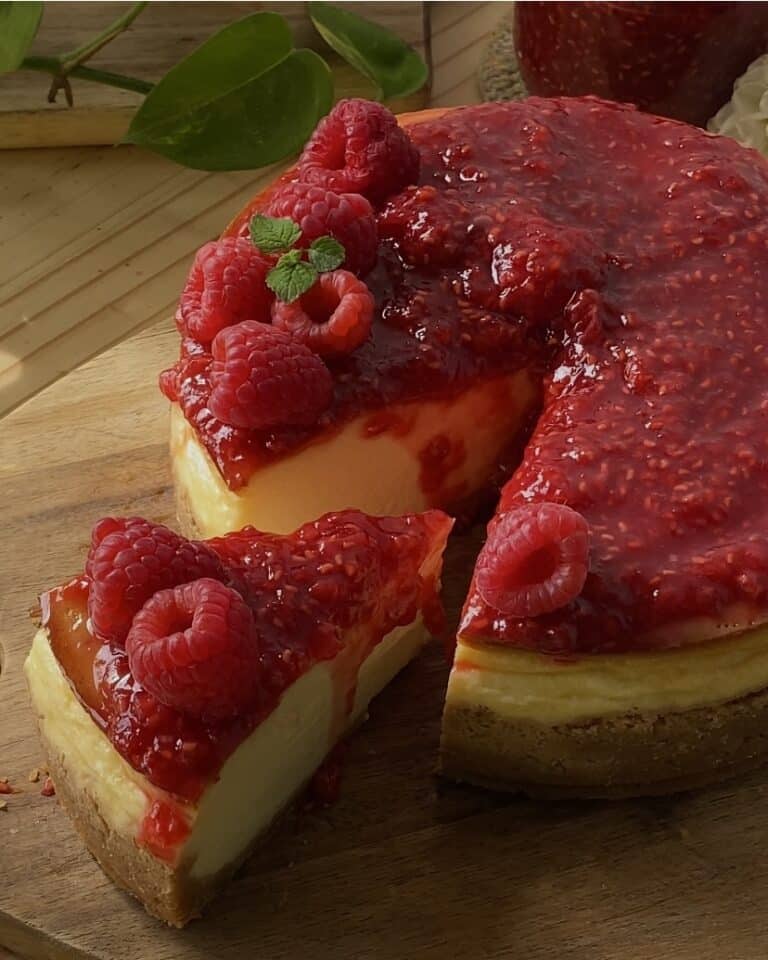
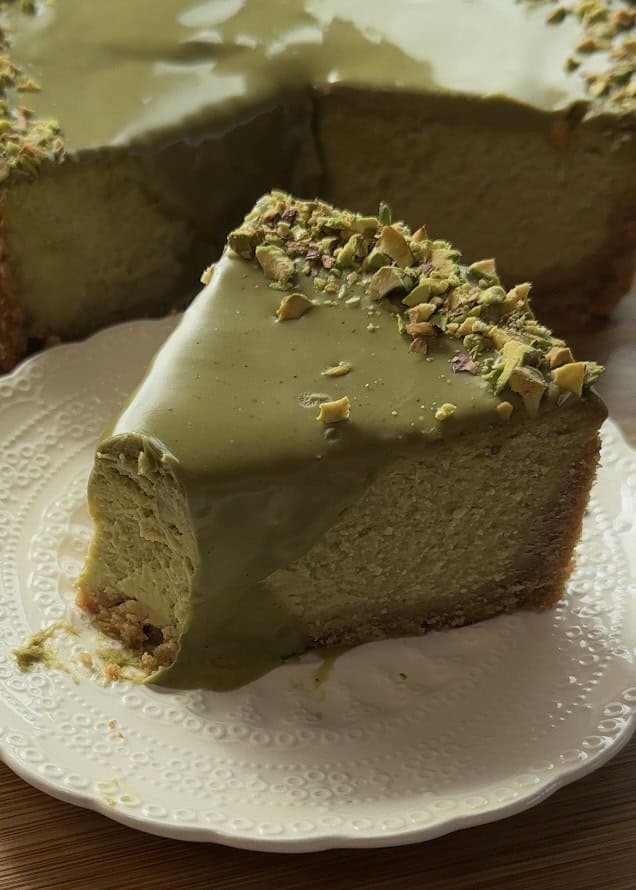
What’s great about this recipe is how versatile it is. We’ve used the same base for so many other no-bake cheesecakes, like a no-bake Nutella cheesecake, a no-bake pistachio cheesecake, a no bake oreo cheesecake or even a no-bake Biscoff cheesecake.
More cheesecake recipes without an oven:
What you’ll love about this recipe
What I love about this recipe—and I’m sure you’ll love it too!
- This is a no-bake Kinder Bueno cheesecake without gelatin. I know many people don’t feel comfortable using gelatin, and it can be expensive too, so this recipe is perfect for anyone looking for a simpler alternative.
- Super creamy texture that’s absolutely irresistible.
- It’s a quick Kinder Bueno dessert—easy to make and an enjoyable process.
- Incredibly versatile—you can adapt it to so many flavors and toppings.
- So fun to decorate—let your creativity shine!

Watch how to make a no bake kinder bueno cheesecake

Before you start with this recipe:
Here’s everything you need to know before starting with this recipe: what equipment you’ll need (and the sizes), why we’re using the ingredients we’re using, and how to substitute them to accommodate different dietary needs.
1. No bake kinder bueno cheesecake ingredients
What Ingredients Do We Need to Make This Easy and Delicious No-Bake Kinder Bueno Cheesecake and no bake cheesecake variations
- Biscuits: Crush these to form the base. You’ll need melted butter (or margarine as a cheaper alternative—we’ve used margarine for the last two cheesecakes, and the result is almost the same, though butter tastes better!).
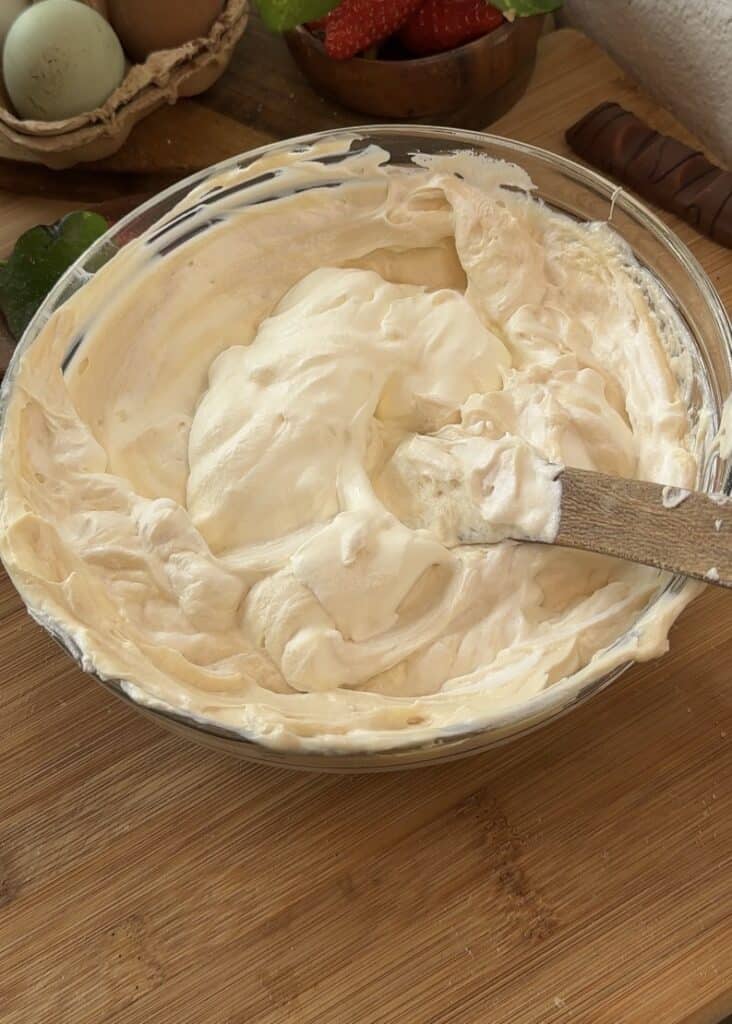
- Cream Cheese: Make sure it’s softened—this will be the base of the rich and creamy cheesecake filling.
- Kinder Bueno Spread: You can find this on Amazon. If unavailable, melt Kinder Maxi Bars until the color becomes slightly more intense.
- Sugar: Use either powdered sugar or granulated sugar—both work well, and the texture remains the same since it’s used to whip the cream. This will sweeten the cheesecake perfectly.
- Whipped Cream: Ensure you’re using cream with at least 35% fat content. Anything less won’t whip properly.
- Kinder Buenos: For decorating the top.
- Wafer rolls: Use these for the sides, or substitute with crushed biscuits if preferred.
2. Necessary equipment
- Food processor for crushing the biscuits, or a rolling pin with a ziplock bag as an alternative.
- A spatula to combine all the ingredients smoothly.
- An electric mixer or whisk to whip the heavy cream to perfection.
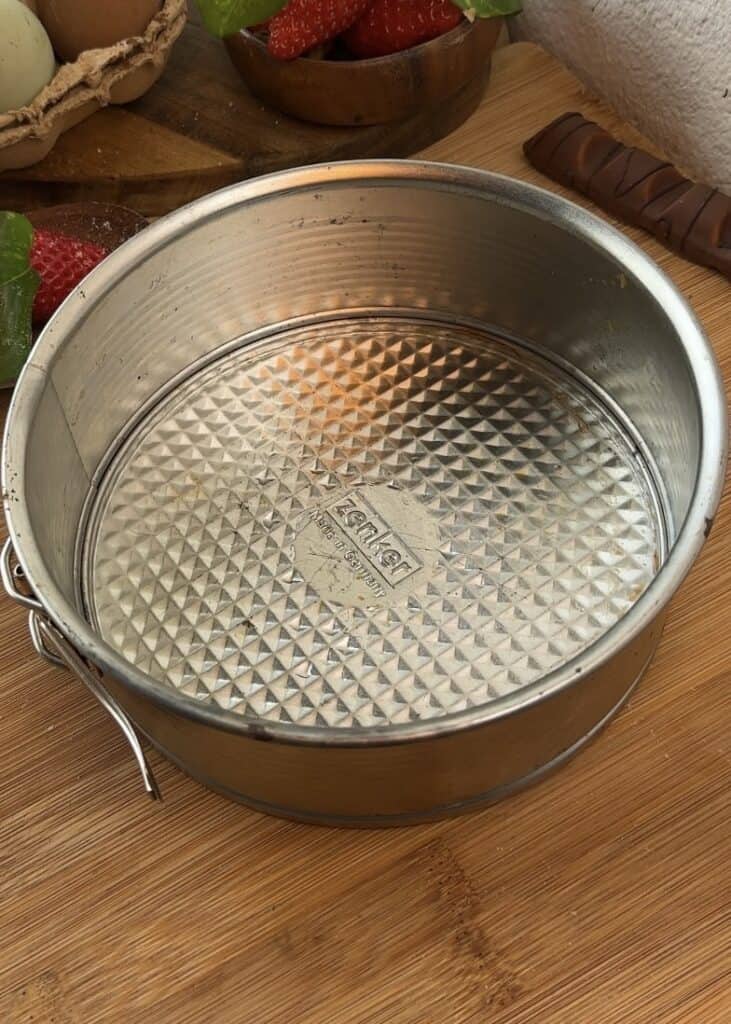
- A cake pan—make sure it’s leak-proof! My favorite size to use is 17 cm in diameter and 6 cm in height.
- Two mixing bowls: one for combining all the ingredients and another for whipping the cream.
*I’ve found that mixing the cream cheese with a wooden spoon or spatula helps prevent it from melting. I feel like some European countries struggle with this because, here, we typically need to use gelatin for a cheesecake to hold its shape. However, when I went to Canada, I noticed that no matter what you use, the cream cheese holds its shape much better.*
Pan size for this no bake kinder bueno cheesecake
For this easy no-bake cheesecake recipe, we’re using a pan sized 17 cm in diameter and 6 cm in height (that’s about 6.7 inches in diameter and 2.4 inches in height).
This pan became my favorite almost instantly after I bought it—the brand is Zenker, and we found it at HomeSense Canada. To me, it’s the perfect size, and I can’t recommend it enough!
If you love kinder bueno you should try our kinder bueno crepe rolls, kinder bueno rolls (like a cinnamon roll but in kinder bueno form!?) or our kinder bueno cookies. they’re all easy desserts recipes with kinder bueno.
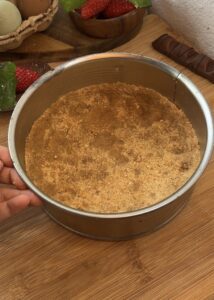
How to prepare the crust
Making a cheesecake crust is so easy, especially if you have a food processor. Honestly, I use my normal blender because it’s more practical for me. Just make sure to blend the biscuits as finely as possible so that when you add the butter, it reaches the perfect consistency.
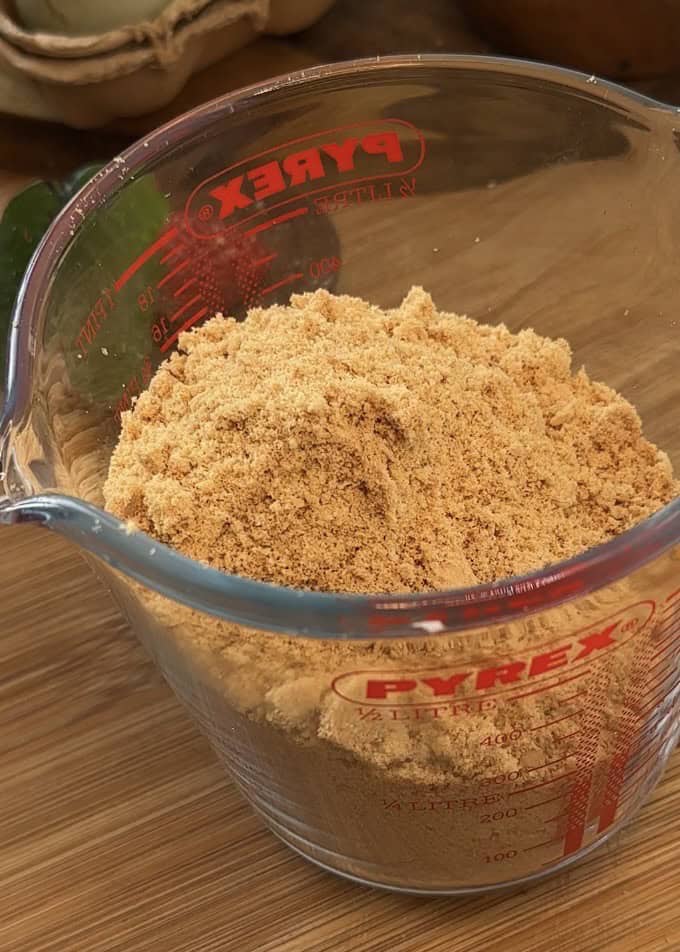
Personally, I find it a struggle every time I have to crush biscuits with a ziplock bag and rolling pin—it burns and itches my hands! Does anyone else feel the same? If you have the same issue and don’t have a food processor or blender, you can buy pre-crushed graham biscuits or even jump on top of the cookies (while they’re locked in a bag, of course!)—you’ll get to exercise and crush the biscuits at the same time!
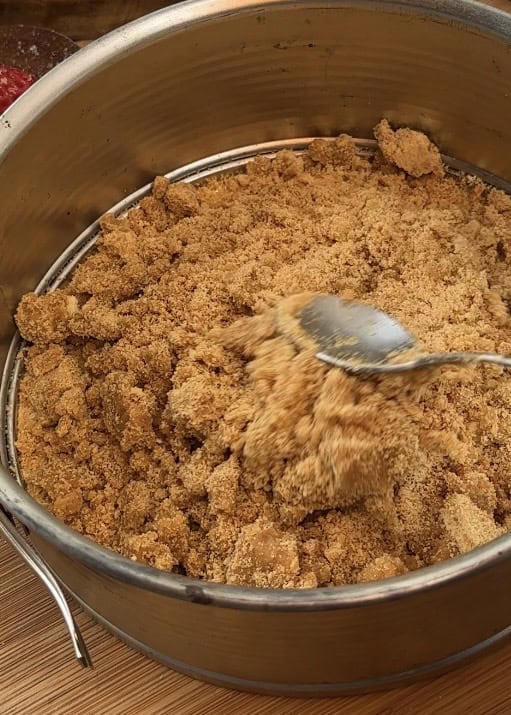
Once you’ve mixed the melted butter or margarine with the biscuits, place the mixture into the pan and press it down using your hands (the best option!) or a glass/spoon. Make sure to let the base chill in the freezer or fridge while you prepare the cheesecake filling for this easy Kinder Bueno dessert recipe. This step ensures the base hardens properly, giving you the perfect foundation for your no-bake Kinder Bueno cheesecake
Check our latest posts:
- Red velvet brookies
- Brownie bottom Nutella cheesecake
- Nutella mini pancakes
- Nutella chocolate chip pull-apart brioche
- Vanilla Biscoff Cheesecake Bars
Best tips
The best tips I can give you to make a yummy and simple no-bake cheesecake recipe:
- Don’t overwhip the cream: Stop whipping just before it reaches stiff peaks. When you fold the cream into the rest of the ingredients, it will continue to whip, and overwhipping can result in a split-looking cheesecake texture.
- Let the cream cheese (and Kinder Bueno spread, if using) sit at room temperature: This helps avoid lumps and ensures a smooth, creamy filling.
- Use a cold, clean, and dry bowl to whip the cream: I don’t mean you need to refrigerate the bowl, but avoid using it right after it’s warm from the dishwasher.
- Let the cheesecake set for at least 8 hours (preferably overnight): If you try to remove it from the pan before this time, it will collapse.
Follow these tips, and you’ll have the perfect no-bake cheesecake recipe every time!
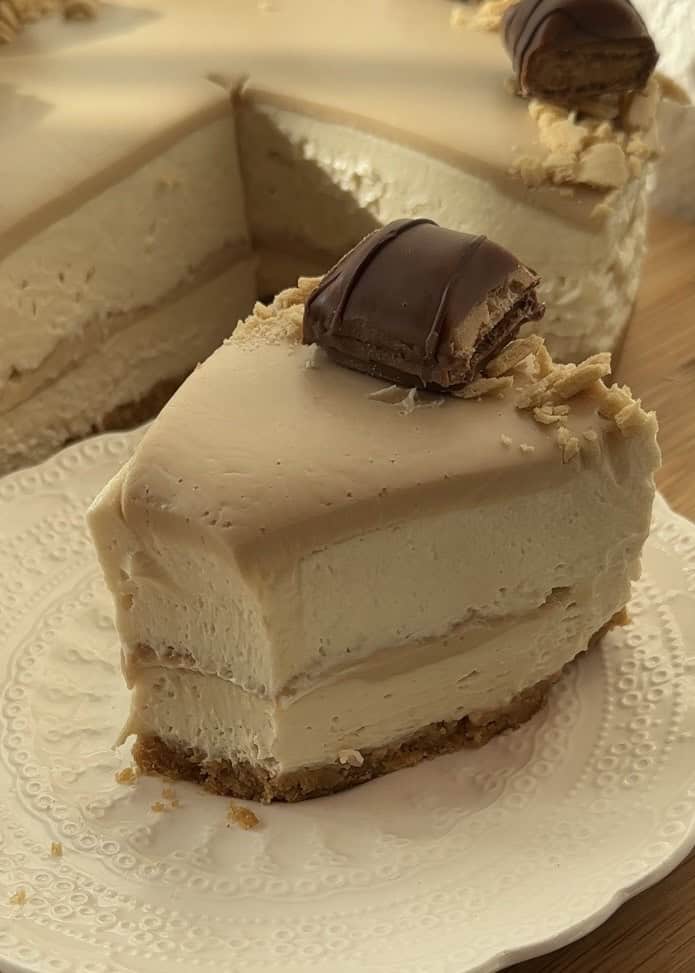
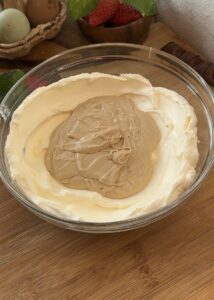
How to make the middle kinder bueno layer
Making the center layer for this decadent Kinder Bueno dessert is easier than you think and will make it look incredibly impressive. You have two options—choose whichever feels more comfortable for you.
For references, this is the middle layer we are talking about.
The first option is simpler: freeze the Kinder Bueno mixture into a disk. The second option is to spread it directly on top of the cheesecake layer. Whichever method you choose, you’ll end up with the same delicious result.
Here’s how to assemble it:
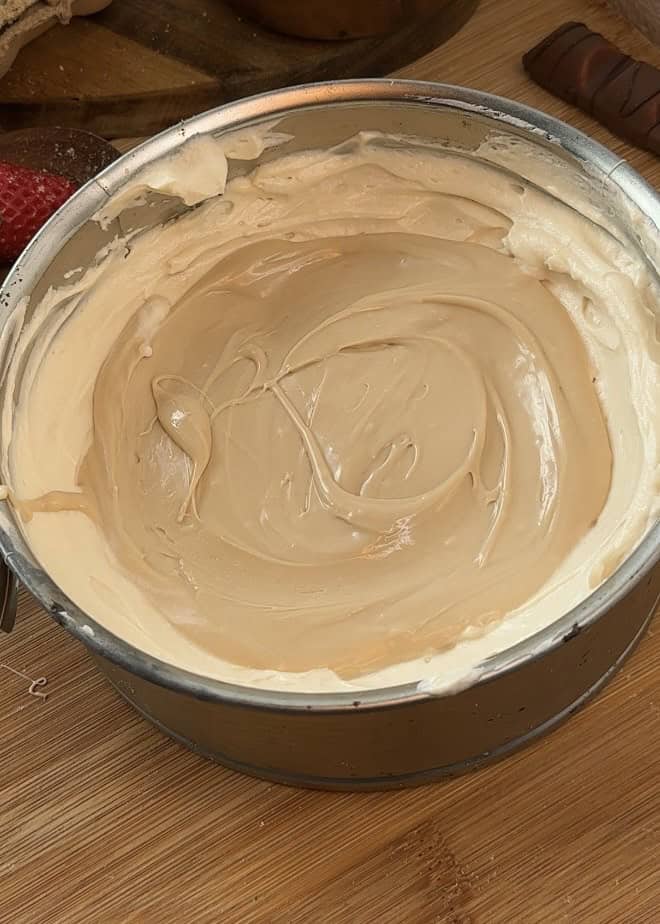
- Add half of the cheesecake filling to the prepared crust and smooth it out.
- For the Kinder Bueno layer, you can either: Carefully spread the Kinder Bueno spread (or melted Kinder Maxi bars if you can’t find the spread) over the cheesecake layer, making sure not to reach the edges of the pan, or place the frozen Kinder Bueno disk on top.
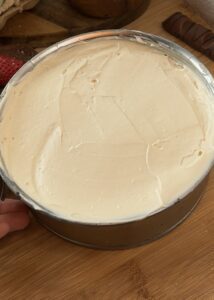
- Add the remaining half of the cheesecake filling and smooth it out again
This is how it will look on the cheesecake.
How to decorate a No bake kinder bueno cheesecake
If you’re like me and struggle to decide how to decorate a cake because you want it to look better than anything you’ve ever made—but also don’t want to risk ruining it by experimenting—I’ve got you covered! I tested out a few decoration ideas on my cheesecake so you can choose the perfect option without the stress. Enjoy!
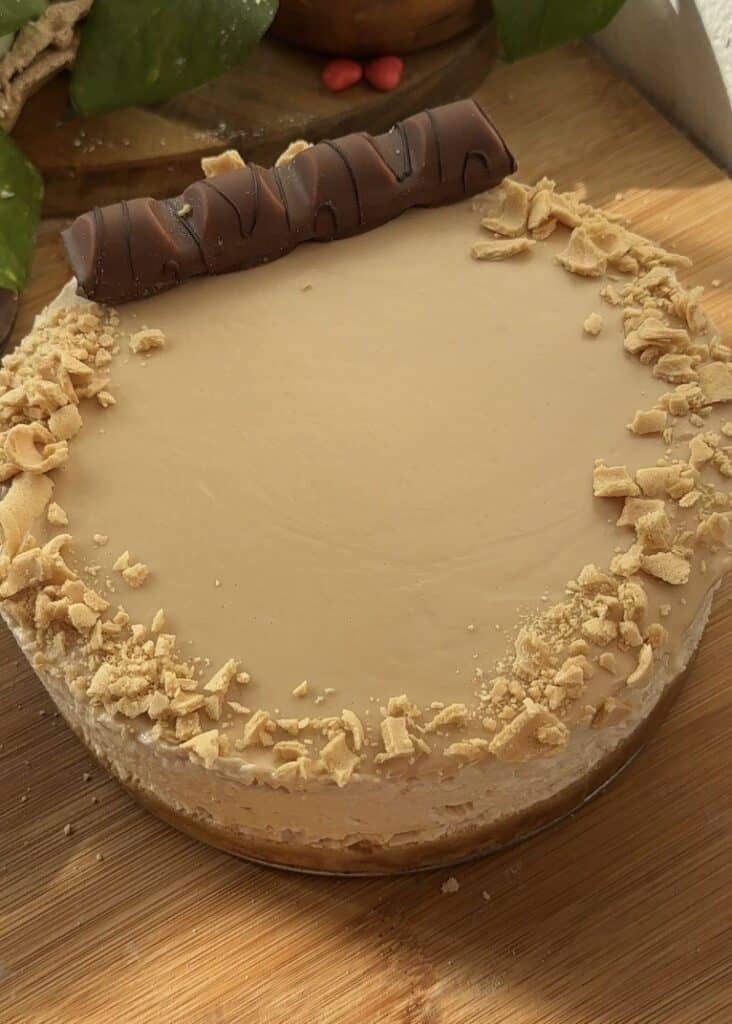
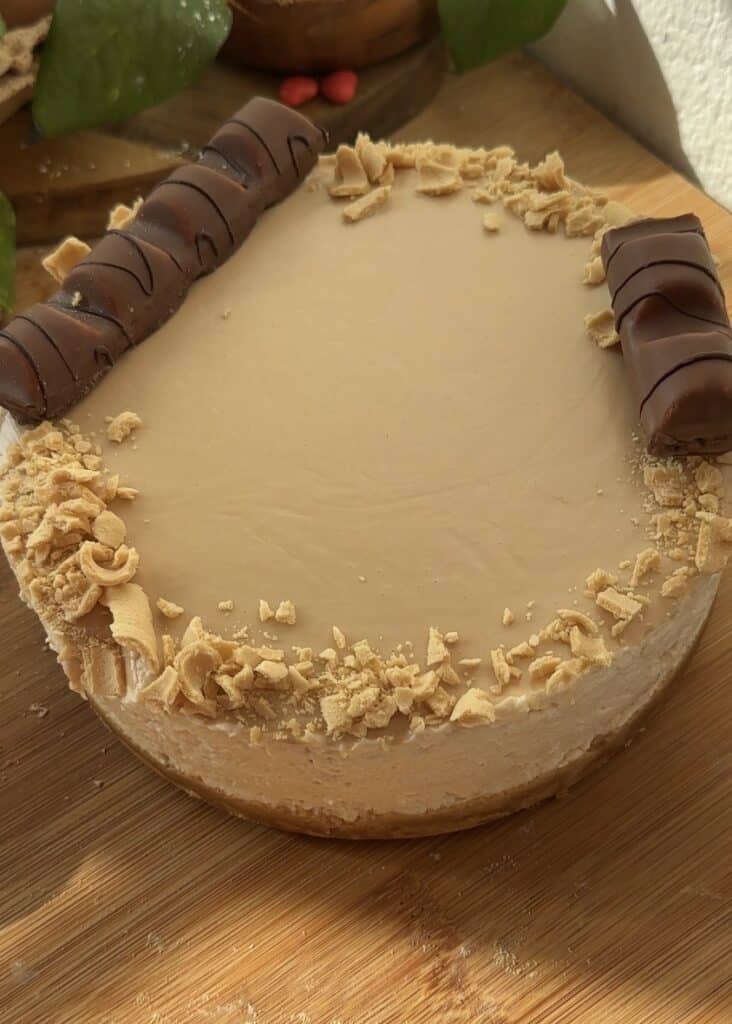
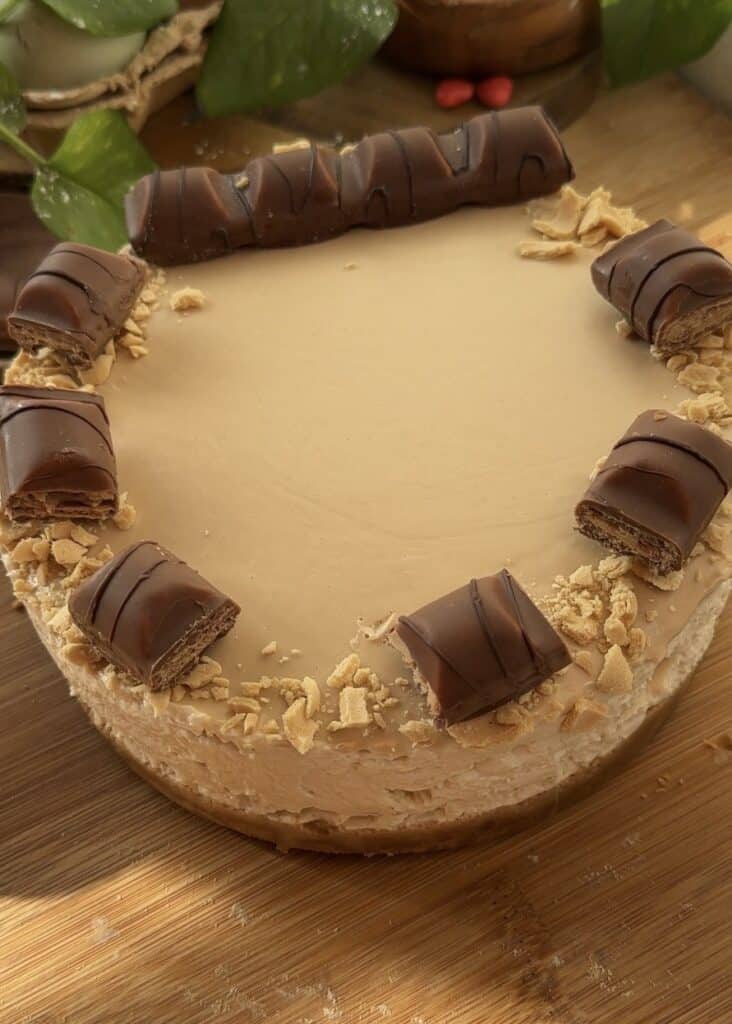
This is the perfect easy no bake kinder bueno dessert for beginners, have fun decorating it!
FAQs: no bake kinder bueno cheesecake
Yes! This no-bake cheesecake is perfect for making ahead. Simply prepare it as instructed, cover it tightly, and store it in the fridge for up to 2 days before serving.
Absolutely! This cheesecake freezes well. Wrap it tightly in plastic wrap or place it in an airtight container before freezing. Thaw it in the fridge overnight before serving.
If you can’t find Kinder Bueno spread, you can melt Kinder Maxi bars or use any chocolate-hazelnut spread as a substitute. The flavor will be slightly different but still delicious!
Of course! While the classic biscuit crust works beautifully, you can experiment with graham crackers, Oreo crumbs, or even a gluten-free alternative if needed.
Yes, this dessert is a hit with kids (and adults too!). Just be mindful of portion sizes, as it’s quite rich and indulgent.
I’d love to hear your thoughts on this cheesecake! If you’ve tried it, let me know if you enjoyed the creamy texture and rich flavor. And if you have any questions, feel free to ask—I’m here to help!
Print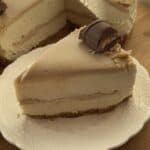
No bake kinder bueno cheesecake: creamy and easy
- Prep Time: 18 minutes
- Total Time: 8 hours 18 minutes
- Yield: 8 portions
- Category: Dessert
- Cuisine: American
Description
This is the perfect recipe for a no bake Kinder Bueno cheesecake that’s incredibly creamy and easy to make. For this recipe, you won’t need to use any gelatin, and it’s quick, fun, and hassle-free to prepare!
Ingredients
crust
- 200 grams biscuits (crushed)
- 45 grams melted butter (or margarine)
Cheesecake filling
- 500 grams cream cheese
- 200 grams kinder bueno spread (or kinder maxi bars (melted))
- 50 grams granulated sugar
- 200 grams heavy whipping cream (35% fat)
Middle center
- 100 grams kinder bueno spread (or melted kinder maxi bars)
Decoration
- 2 Wafer rolls
- 150 grams kinder bueno spread
- 2 kinder buenos
Instructions
Crust
- To make this no bake kinder bueno cheesecake start by crushing the biscuits into fine crumbs, using a food processor or a rolling pan with a ziplock bag. Mix the crushed biscuits with melted butter until the texture resembles wet sand. Press the mixture firmly into the bottom of the pan. Refrigerate.

Cheesecake filling
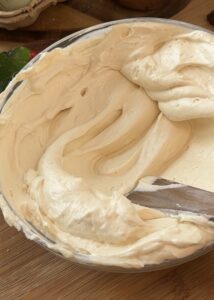
- In a large mixing bow, combine room temperature cream cheese and kinder bueno spread. Use a spatula to combine them together.
- In a separate bowl, whip the heavy cream with the sugar together to soft peaks.
- Gently fold the whipped cream into the cream cheese mixture in two separate times. Fold half of the mixture until its almost fully integrated and then add the other half. Use a spatula to fold the ingredients together until fully combined. The filling should be light, fluffy and smooth.
Assemble the cheesecake
- Pour half of the filling into the prepared pan, smooth it out and add the kinder bueno filling for the center. Then, add the other half of the cheesecake filling, smooth out again.
refrigerate
- Cover the cheesecake with plastic wrap or a baking Tray to protect it from any odor or spills in the fridge, chill the cheesecake for at least 8 hours or over nigh.
Decorate
- Melt some kinder bueno spread and add it on top of the cheesecake, tilt the pan around to spread it evenly. Crush some wafer rolls and add them on the sides. Add kinder buenos on top of it for a nice finishing touch.
ARCHER'S FOOD
Easy and delicious recipes


Se ve super delicioso 😋, amo su página y contenido
Muchísimas gracias!!
I can’t wait to try your recipeeeeeee omg I just know it’s gonna be good I’ll keep you updated!!!!! 🖤
Omg okay! I hope you love it!
I’m making this recipe right now, can’t wait to try it!
I hope you love this recipe! Please update with the results!
Delicioussss
Thank you so much I’m so happy you loved this recipe!
Delicious! It didn’t look as perfect as in your pictures but it tasted soooooo yummy!! More like that!!
Im sure it was beautiful! Thank you!! Im glad you liked it!!!
War echt lecker! Meine Kinder haben es geliebt!!
Thank you so much!
I have tried it and it was amazing! So so delicious! Thanks for sharing the recipe with us😍
Thank you so much I’m so happy you liked it!!