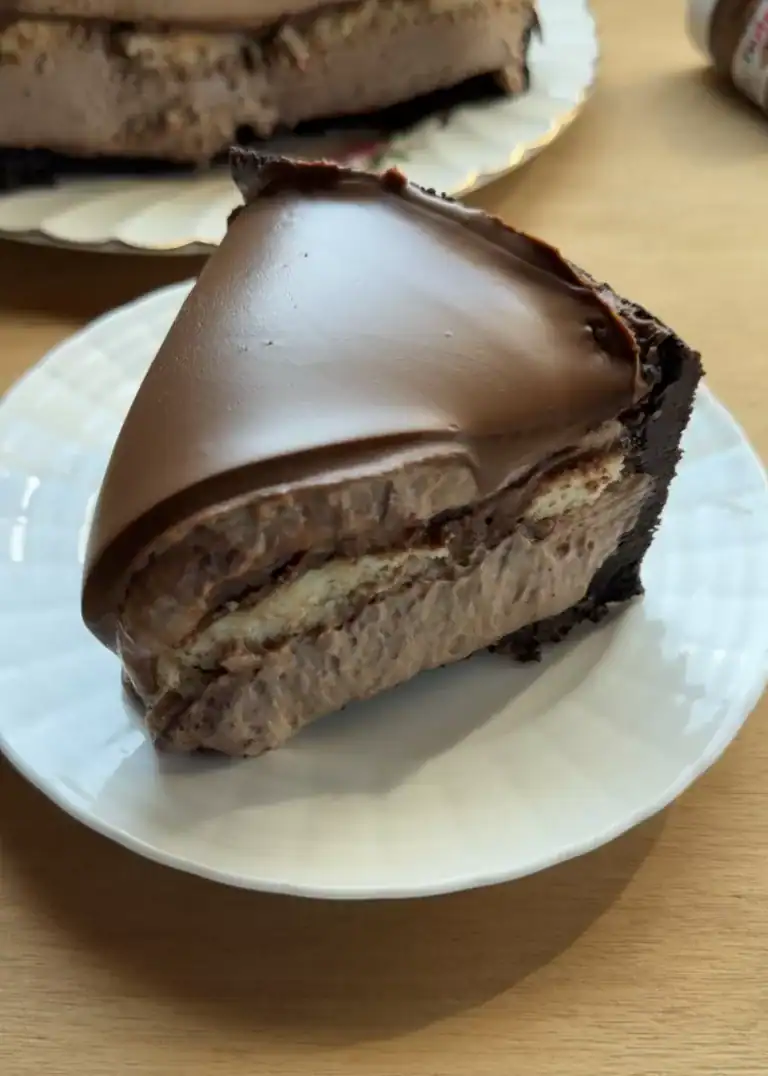
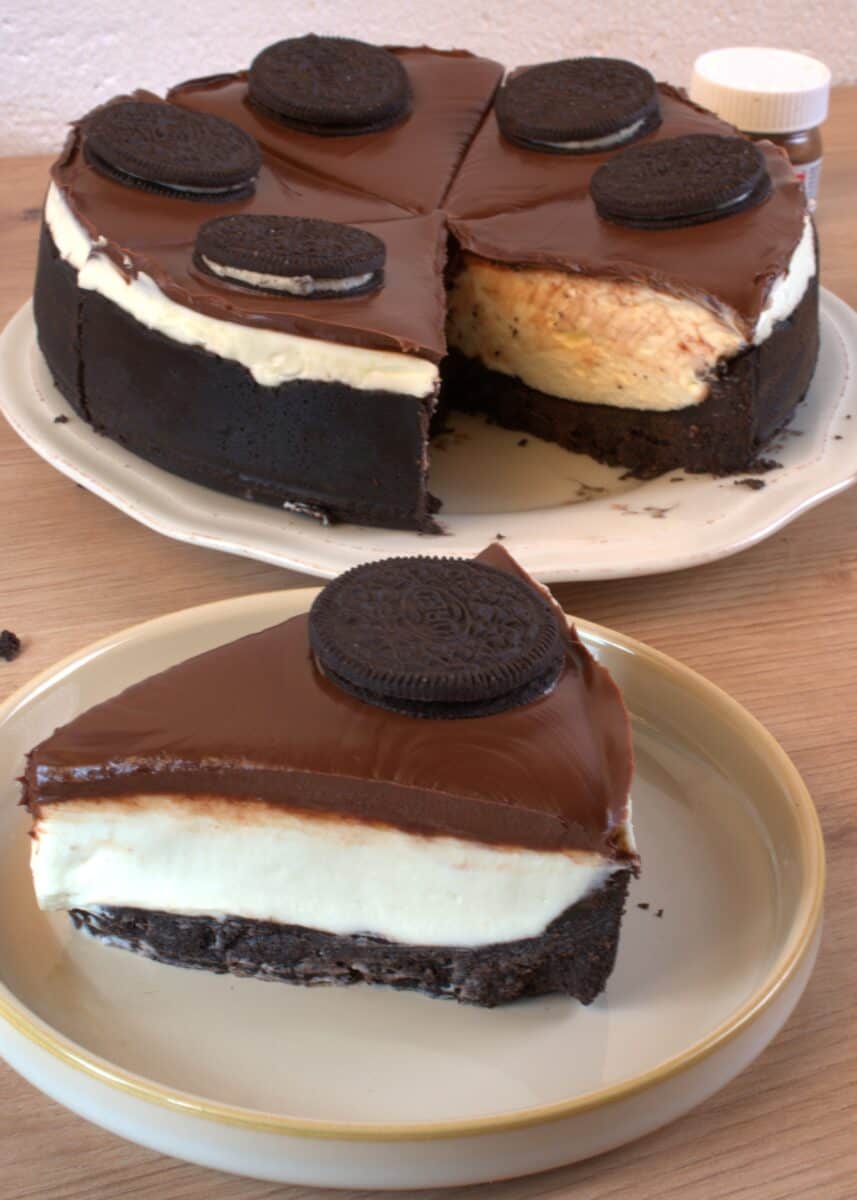
The ultimate easy dessert! This No-Bake Oreo Cheesecake features a crunchy Oreo crust, a smooth and creamy cheesecake filling, and is topped with rich chocolate ganache and extra Oreo cookies. Perfect for any occasion and requires zero baking!
I honestly forgot about posting this recipe, but since so many of you keep asking for it, I’m publishing it now for all of you to enjoy!
I appreciate everyone’s support every single day so much—thank you for every recipe request and for always baking along with me!
We love Oreos, and we love chocolate.
When you put them together, you get this incredibly delicious No-Bake Oreo Cheesecake! If you’re as obsessed as we are, you can find other Oreo cheesecake recipes on our website too—like a rich Chocolate Oreo Cheesecake or a simple, a Nutella Oreo Cheesecake or a classic Oreo Cheesecake.

Why You’ll love this Recipe
- No-Bake & Effortless: No oven needed! This cheesecake comes together quickly with minimal effort—perfect for busy days or last-minute cravings.
- Oreo Crust & Topping: Features a crunchy Oreo crust and is decorated with extra Oreo cookies for that classic cookie-lover’s touch.
- Creamy & Chocolatey: Silky-smooth cheesecake filling meets a rich chocolate ganache. Decadent, but never overly sweet.
- Crowd-Pleasing Favorite: Perfect for parties, potlucks, or treating yourself. It’s a guaranteed hit with both kids and adults.
- Customizable: Easy to adapt! Add crushed Oreos to the filling, swap in different Oreo flavors, or top with whipped cream and chocolate sauce.
Ingredients and Why they Matter
- Oreos: We’re using the whole cookie—creamy filling and all! Crushed into fine crumbs, they create the perfect base. A food processor makes this step quick, but a zip-top bag and rolling pin work too (if you don’t mind a little arm workout!).
- Butter (melted): This is what holds the Oreo crust together, giving it that firm-yet-tender texture. No one wants a crust that falls apart!
- Cream Cheese: Be sure it’s at room temperature—this is key for a silky, lump-free filling. If it’s too cold, it can cause the melted chocolate to seize up. For a slightly richer taste, mascarpone cheese works beautifully as a substitute.
- White Chocolate: Melting white chocolate into the filling adds a sweet, creamy note and helps give the cheesecake its wonderfully smooth and sliceable texture.
- Heavy Whipping Cream: Look for cream with at least 35% milk fat—this ensures it whips up beautifully and gives the filling its light, stable structure. Lighter creams won’t hold up as well.
- Granulated Sugar: A little sugar sweetens the whipped cream and balances the richness of the cream cheese and white chocolate.
shop your ingredients!
 Buy Now →
  Buy Now →
  Buy Now →
  Buy Now →
  Buy Now →
  Buy Now →
 Why does it matter? The high fat content is what allows the cream to trap air and form stiff, fluffy peaks. If you try to use a lighter alternative like half-and-half (10-18% fat) or light cooking cream, it simply won’t work. Whipping a low-fat cream is like trying to whip milk—you’ll end up with a liquid mess that never thickens. So check that label; your perfect, stable whipped cream depends on it!

Special Tools You’ll Need
Here’s a short list of tools to make this no-bake Oreo cheesecake a success, plus handy alternatives!
- Springform Pan (6.5-inch or 17 cm): Essential for a clean release! The removable sides allow you to easily unmold the beautiful cheesecake without damaging it.
- Food Processor or Blender: The easiest way to crush your Oreos into fine, even crumbs for the perfect crust. (Alternative: a zip-top bag and a rolling pin.)
- Electric Mixer (Stand or Handheld): Highly recommended for whipping the heavy cream to soft peaks with minimal effort. (Alternative: a manual whisk and some elbow grease.)
- Mixing Bowls: You’ll need these for combining the crust, preparing the filling, and whipping the cream.
- Rubber or Silicone Spatula: Essential for gently folding the whipped cream into the cheesecake filling without deflating it, keeping the texture light and airy.
- Wooden Spatula or Spoon: Perfect for stirring the melted chocolate into the cream cheese, as its sturdiness helps smooth out any lumps effectively.
Tools!
 Buy Now →
  Buy Now →
  Buy Now →
 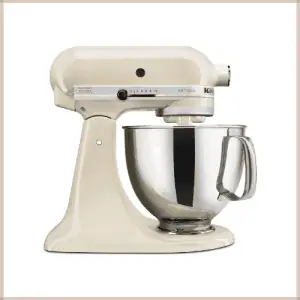 Buy Now →
  Buy Now →
  Buy Now →
  Buy Now →
  Buy Now →
 Oreo Cheesecake Step by Step Overview
We’re starting with the cheesecake base. While we’re using Oreos, feel free to swap in any cookies and cream-style cookie you love.
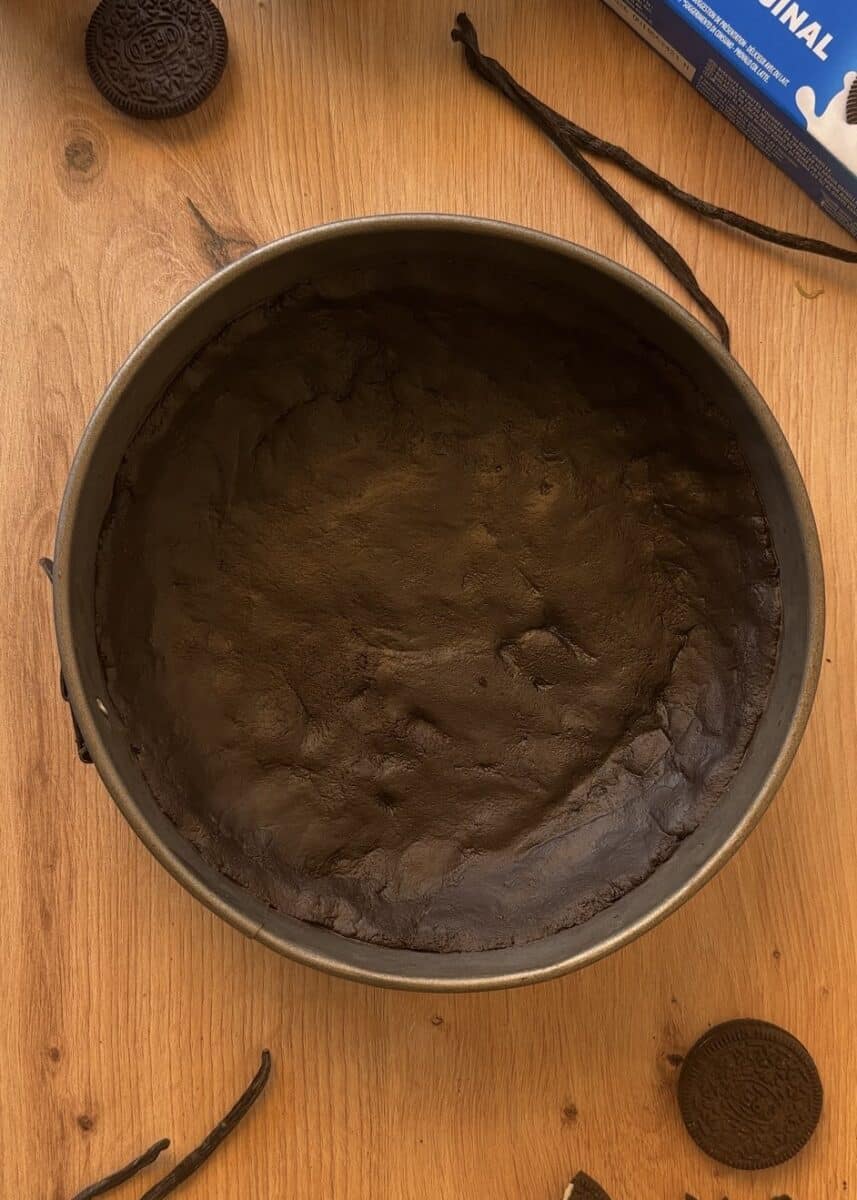
Next, mix the crushed cookies with melted butter until fully combined. Press the mixture firmly and evenly into the bottom of a springform pan—this time, we’re keeping the crust just on the base, not bringing it up the sides.
Once pressed flat and smooth, refrigerate the crust while we move on to the creamy cheesecake filling.
Now, let’s make the cheesecake filling. In a large bowl, work the room-temperature cream cheese with a wooden spatula until it’s completely soft and creamy.
Next, pour in the melted white chocolate and stir gently until the mixture is smooth and fully combined.


In a separate clean, dry bowl, whip the cold heavy cream and granulated sugar together until it forms soft peaks.
Using a flexible spatula, gently fold the whipped cream into the white chocolate and cream cheese mixture until just combined and no white streaks remain. This is your cheesecake filling.

Pour the filling over the chilled Oreo base and use a spatula or the back of a spoon to smooth the top evenly.
Refrigerate the cheesecake until it is completely firm and set.

To decorate, gently warm the Nutella until it is slightly fluid and easy to pour. Drizzle or spread it evenly over the fully set cheesecake. Add whole or halved Oreo cookies on top for a decorative finish, then refrigerate for about 10 minutes to let the topping set slightly before serving.

Variations & Flavors
- Extra Cookies & Cream: For an even stronger Oreo flavor, fold ½ cup of crushed Oreos into the cheesecake filling before pouring it over the crust.
- Chocolate Lovers: Swap the white chocolate in the filling for dark or milk chocolate for a richer, deeper flavor.
- Cookie Swap: Use different Oreo flavors like mint, peanut butter, or strawberry instead of the original.
- Mocha Version: Add 1-2 teaspoons of instant espresso powder to the melted white chocolate for a mocha flavor.
How to Store a Oreo Cheesecake
Here’s how to make sure every slice of your no-bake Oreo cheesecake stays as delicious as the first:
- For Refrigerator Storage: Simply cover your cheesecake tightly with plastic wrap or transfer it to an airtight container before placing in the fridge. It will stay wonderfully fresh and maintain its ideal texture for 4-5 days.
- For Freezer Storage: Good news—this cheesecake freezes beautifully! Wrap it securely in plastic wrap and then in foil, or place it in a heavy-duty freezer bag. Stored this way, it will keep for up to 2 months. When you’re ready to serve, just transfer it to the refrigerator to thaw overnight. This makes it the perfect make-ahead dessert for any celebration!
The key is protecting it from air exposure, whether in the refrigerator or freezer, to prevent dryness and preserve that amazing creamy texture.

The Bain Marie Method, the Secret for Perfect Melted Chocolate
If you’ve ever struggled with seized, grainy chocolate or a lumpy cheesecake filling, the bain-marie (or double boiler) will be your new best friend.
This gentle heating technique is the key to perfectly melted white chocolate for our no-bake Oreo cheesecake. It ensures a smooth, fluid consistency every single time, completely eliminating the risk of scorching.
Here’s how to do it:
- Bring a small pot of water to a gentle simmer.
- Place a heatproof bowl on top, ensuring the bottom of the bowl does not touch the water below.
- Add your white chocolate to the bowl. As the steam from the simmering water gently heats the bowl, stir occasionally until the chocolate is completely melted and smooth.
That’s it! You’ll have perfectly melted white chocolate ready to blend seamlessly into your cream cheese for the ultimate creamy filling.
Pro Tips for a Perfect No Bake Oreo Cheesecake
- Check Your Cream’s Fat Content: For the whipped cream layer, your heavy whipping cream needs at least 35% milk fat. Lighter creams won’t hold their structure and can leave you with a runny filling.
- Watch for Soft Peaks: When whipping the cream and sugar, stop as soon as you reach “soft peaks”—the moment the peaks curl gently when you lift the whisk. Going further can make your cheesecake filling grainy.
- Patience is Key: Let the cheesecake chill for a full 8 hours, or ideally overnight. This isn’t just about cooling it down; it’s what gives the structure time to firm up so your slices come out perfectly clean.
- Start with Room-Temperature Cream Cheese: Taking the cream cheese out of the fridge ahead of time is crucial. If it’s too cold, it can cause the melted white chocolate to clump up instead of blending smoothly.
- Fold, Don’t Stir: When adding the whipped cream to the cheesecake filling, use a spatula to fold it in gently. This keeps all the air in the cream, giving you a light and fluffy texture instead of a dense one.
- Keep Your Toppings Crisp: If you’re adding extra Oreo chunks on top, press them in just before serving. This keeps them from getting soft in the fridge.
- Slice with a Hot Knife: For beautifully clean slices, dip your knife in hot water and wipe it dry before cutting each piece.

Oreo Cheesecake
- Prep Time: 30 minutes
- Total Time: 8 hours 30 minutes
- Yield: 10 servings
- Category: Dessert
- Method: No-Bake
- Cuisine: American
- Diet: Vegetarian
Description
Indulge in the ultimate no-bake dessert! This creamy Oreo cheesecake features a buttery cookie crust, a smooth white chocolate filling, and a rich Nutella topping. Topped with extra Oreos, it’s an easy, crowd-pleasing treat that requires no oven and delivers maximum chocolate flavor in every bite. Perfect for special occasions or whenever cravings strike!
Ingredients
Cookie Crust:
- 200g Oreo cookies (whole, with filling)
- 65g melted butter (1/4 cup)
Cheesecake Filling:
- 400g cream cheese, softened (14 oz)
- 280g white chocolate (1¾ cups)
- 40g granulated sugar (3 tbsp)
- 175g heavy whipping cream (35% fat) (¾ cup)
Decoration:
- 6 Oreo cookies
- 200g Nutella, melted (¾ cup)
Instructions
Prepare the Cookie Crust
- Place the whole Oreo cookies in a food processor and pulse until they form fine, even crumbs, or place them in a sturdy zip-top bag and crush with a rolling pin.
- In a medium bowl, combine the Oreo crumbs with the melted butter, mixing thoroughly until the texture resembles wet sand and all crumbs are moistened.
- Transfer the mixture to a 6.5-inch springform pan and press it down firmly and evenly across the base to create a compact crust.
- Place the pan in the refrigerator to chill and set while you proceed with the filling.
Prepare the Cheesecake Filling
- Melt the white chocolate gently using a double boiler, stirring frequently until completely smooth and liquid, then set aside to cool slightly.
- In a large mixing bowl, beat the room-temperature cream cheese with a spatula until it becomes soft, smooth, and free of lumps.
- Pour the slightly cooled melted white chocolate into the cream cheese and stir until the mixture is fully combined and uniform in color and texture.
- In a separate clean, dry bowl, whip the heavy cream and granulated sugar together until soft peaks form—this means the peaks should gently curl when the whisk is lifted.
- Carefully fold the whipped cream into the white chocolate and cream cheese mixture using a spatula, using gentle motions until fully incorporated and no white streaks remain.
Assemble the Cheesecake
- Remove the springform pan with the chilled crust from the refrigerator.
- Pour the prepared cheesecake filling over the crust, using a spatula to spread it evenly and smooth the top.
- Cover the pan tightly with plastic wrap and refrigerate for at least 8 hours, or ideally overnight, to allow the cheesecake to set completely.
Decorate and Serve
- Gently warm the Nutella in a heatproof bowl until it becomes slightly fluid and easy to drizzle or spread.
- Pour or drizzle the melted Nutella over the fully set cheesecake, and decorate with additional Oreo cookies as desired.
- For neat and clean slices, dip a sharp knife into hot water, wipe it dry, and then cut the cheesecake into portions.
- Store the cheesecake in the refrigerator until ready to serve.
Notes
- For best results, ensure all ingredients are at room temperature before beginning.
- Use high-quality white chocolate for optimal flavor and texture.
- Heavy cream must contain at least 35% fat to whip properly.
- When folding whipped cream into the filling, be gentle to maintain airiness.
- Cheesecake can be made 1-2 days in advance – flavor improves overnight.
- For clean slices, dip knife in hot water and wipe dry between cuts.
- If using different cookies for crust, adjust butter amount as needed.
- Decorate just before serving to keep Oreo cookies crisp.
- Store covered in refrigerator for up to 5 days.
- Freeze without decoration for up to 2 months.
Nutrition
- Serving Size: 1 slice
- Calories: 585
- Sugar: 45g
- Sodium: 280mg
- Fat: 40g
- Saturated Fat: 22g
- Unsaturated Fat: 14g
- Trans Fat: 0g
- Carbohydrates: 52g
- Fiber: 2g
- Protein: 8g
- Cholesterol: 65mg