
Today, we are making another delicious cheesecake recipe: a Happy Hippo no bake cheesecake! Everyone’s childhood favorite in a creamy and easy-to-make cheesecake. No gelatin needed.

I love everything Kinder Bueno—I just can’t get enough of it! Recently, we made a no-bake Kinder Bueno cheesecake, and everyone loved it so much that we decided to create this different version with delicious Happy Hippos.
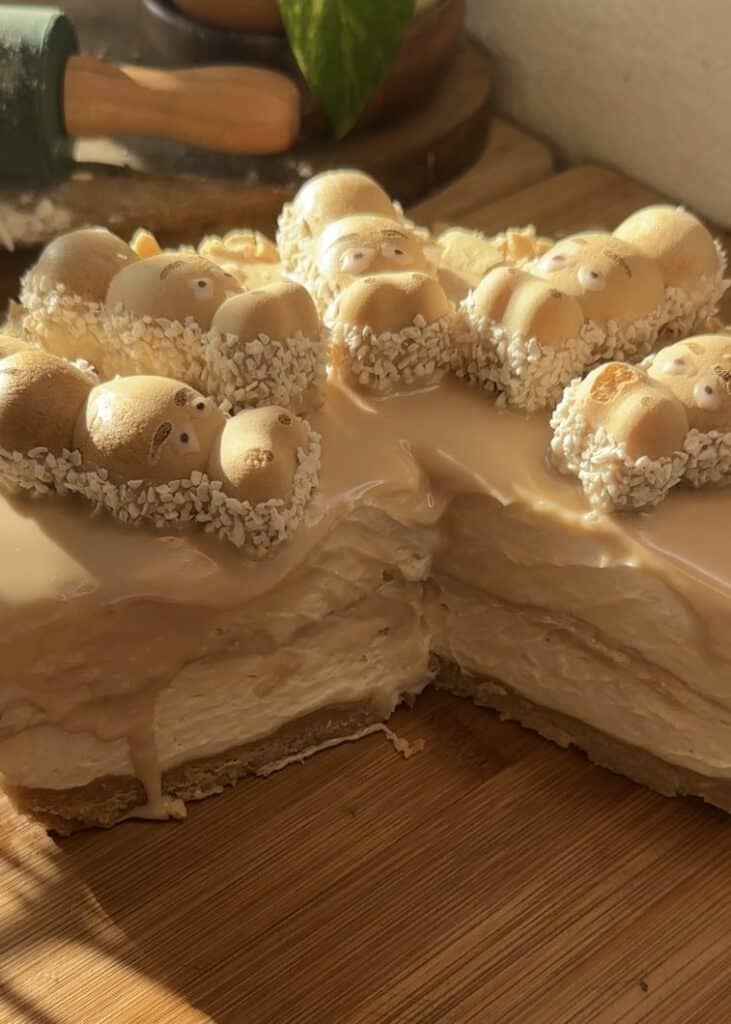
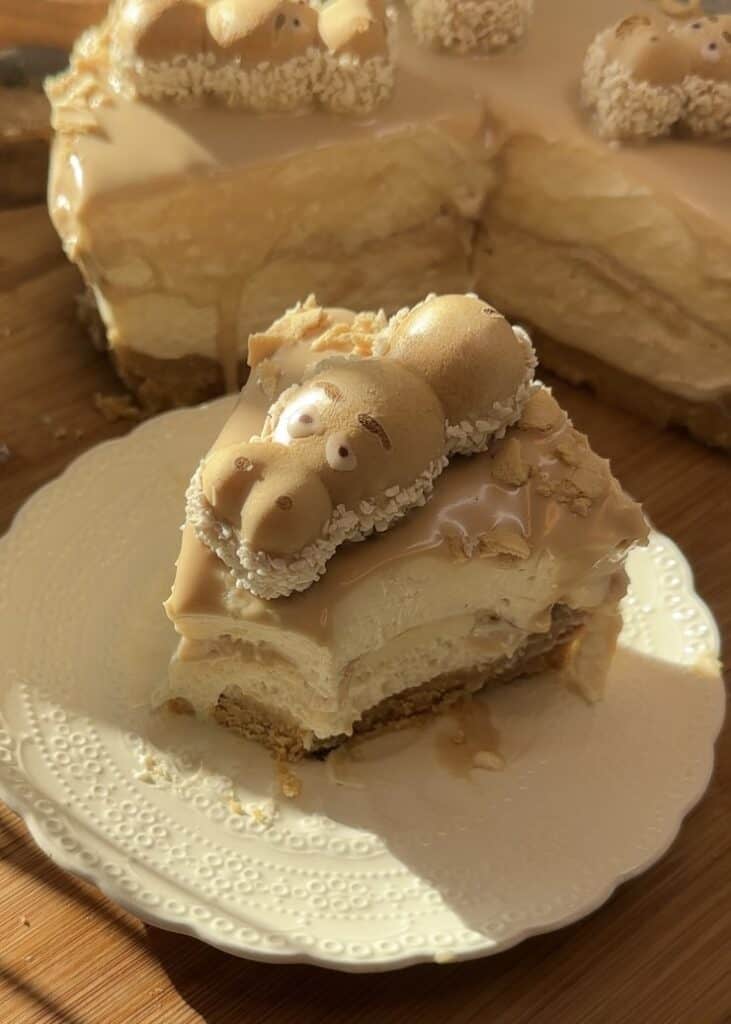
This cheesecake is incredibly creamy, delicious, and downright addictive. It features a crunchy biscuit base, a creamy hazelnut cheesecake filling, a Kinder-filled interior, and even more cheesecake goodness.
To top it all off, it’s decorated with Kinder Bueno spread, wafer rolls, happy hippo and pearl sugar. Trust me, you’re going to love it!
More no bake cheesecake recipes:
- no-bake Nutella cheesecake
- no-bake pistachio cheesecake
- no bake oreo cheesecake
- No bake oreo cheesecake bar
- No bake kinder bueno cheesecake
- No bake apple pie cheesecake
- Peanut butter cheesecake
- Chocolate oreo cheesecake
What you’ll love about this recipe

What I love about this recipe—and what I know you’ll love too:
- This is a no-bake Kinder Bueno cheesecake without gelatin. I know many people don’t feel comfortable using gelatin, or it can be quite expensive, so we created a recipe that’s easy to make without it.
- It’s super creamy and flavorful, with a rich hazelnut taste that’s absolutely delicious.
- It’s a quick Kinder Bueno dessert—all you need to do is mix the ingredients and let it set in the fridge. It’s that simple!
- It’s incredibly versatile. As you can see, we’ve used this cheesecake base for so many recipes. Check out all our no-bake cheesecakes here!
- Everyone will love it because, let’s be honest, who doesn’t love Happy Hippos?

Watch how to make a No bake happy hippo cheesecake

Everything important about a kinder cheesecake
- yield: 10-12 portions
- time to prepare: less than 30 minutes
- resting time: 8h to overnight
- pan size: 17 cm x 6 cm (6.7 inch x 2.4 inch)
- happy hippos needed: 4

List of ingredients
Here’s the list of ingredients and possible substitutions for this recipe. Remember, the exact quantities are in the recipe card—you can either scroll down to find it or click “Jump to Recipe” at the top if you’re ready to get started right away (and skip the tips, equipment, FAQs, and more).

- Biscuits: Crush them and mix with melted butter to form the crust. You can use graham crackers instead of regular biscuits.
- Cream cheese: Make sure it’s softened, as it will be the base of the creamy cheesecake filling. You can substitute it with mascarpone cheese.
- Kinder Bueno spread: If it’s not available in your country, use melted Kinder Maxi. If you’re in Spain, use “Nocilla, Leche y Avellanas”—it tastes just like Kinder Bueno spread.
- Sugar: You can use powdered sugar or granulated sugar. We’ll use it to whip the cream until soft peaks form.
- Whipped cream: Make sure it has at least 35% fat content—anything less won’t whip properly.
- Happy Hippos: We’ll use these to decorate the top of the no-bake Kinder Bueno cheesecake.
- Wafer rolls: Use these for decoration, along with pearl sugar.
Necessary equipment

- Food processor: For crushing the biscuits. Alternatively, you can use a rolling pin with a ziplock bag.
- Spatula: To combine all the ingredients smoothly.
- Electric mixer or whisk: To whip the heavy cream to perfection.
- Cake pan: Make sure it’s leak-proof! My favorite size to use is 17 cm in diameter and 6 cm in height.
- Two mixing bowls: One for combining all the ingredients and another for whipping the cream.
Pan size for this happy hippo cheesecake
To make a happy hippo dessert there’s no specific pan size required for this recipe, but we highly recommend the one we use because it’s amazing.
(Just to clarify, this isn’t sponsored—though I wish it were, because I could really use more pans!) We use a Zenker brand pan that we bought at HomeSense Canada.
The size is 17 cm x 6 cm(about 6.7 inches x 2.4 inches), and it’s absolutely perfect for this recipe. We’ll be using this pan A LOT—literally until it falls apart! You can also use any styrofoam mold of this size.
If you love kinder bueno you should try our kinder bueno crepe rolls, kinder bueno rolls (like a cinnamon roll but in kinder bueno form!?) or our kinder bueno cookies. they’re all easy desserts recipes with kinder bueno.
How to prepare the crust
Making a cheesecake crust is so easy, especially if you have a food processor.
Honestly, I use my normal blender because it’s more practical for me. Just make sure to blend the biscuits as finely as possible so that when you add the butter, it reaches the perfect consistency.

Personally, I find crushing biscuits with a ziplock bag and rolling pin to be a bit of a struggle—it leaves my hands burning and itchy!
Does anyone else feel the same way? If you’re dealing with the same issue and don’t have a food processor or blender, you can always opt for pre-crushed graham crackers.
Or, if you’re feeling adventurous, you can even jump on top of the cookies (while they’re sealed in a bag, of course!)—it’s a great way to crush the biscuits and get a little workout at the same time!

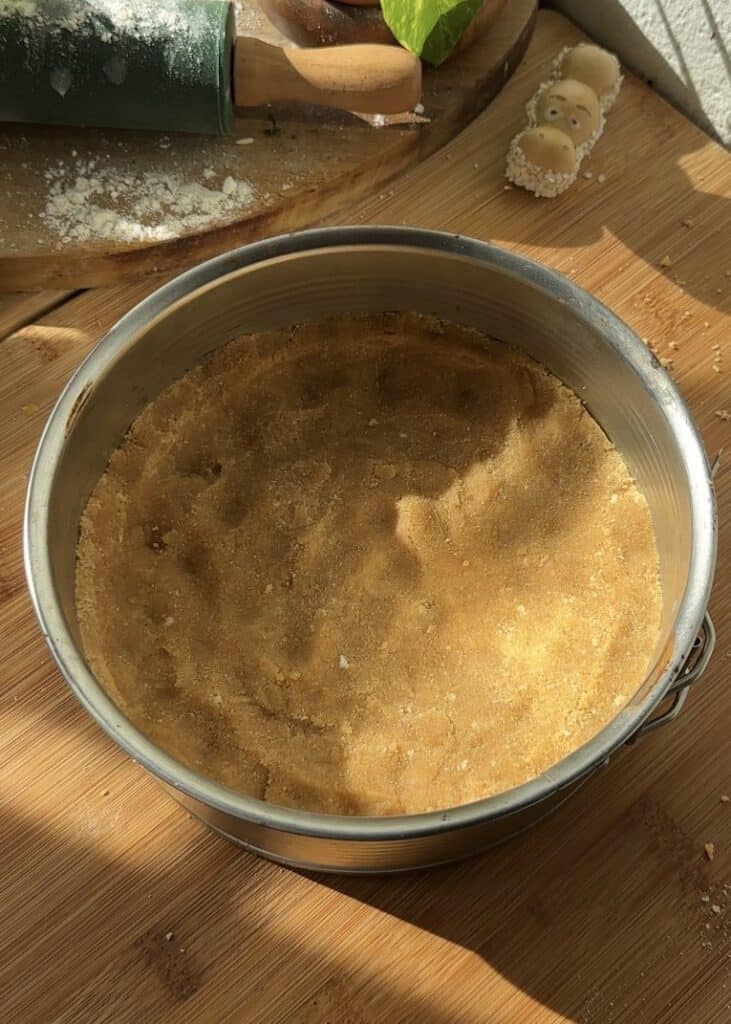
Once you’ve mixed the melted butter with the biscuits, place the mixture into the pan and press it down using your hands (the best option!) or a glass/spoon.
Make sure to let the base chill in the freezer or fridge while you prepare the cheesecake filling for this easy Kinder Bueno dessert recipe.
this step ensures the base hardens properly, giving you the perfect foundation for your no-bake Kinder Bueno cheesecake.
Check our latest posts:
- Red velvet brookies
- Brownie bottom Nutella cheesecake
- Nutella mini pancakes
- Nutella chocolate chip pull-apart brioche
- Vanilla Biscoff Cheesecake Bars
- Funfetti tiramisu
- Nutella sweet brioche
- Fluffy Nutella Knots
- Nutella Duo Rolls
How to prepare the kinder bueno center
Making the center layer for this decadent Kinder Bueno dessert is easier than you think and will make it look incredibly impressive.
You have two options—choose whichever feels more comfortable for you.
The first option is simpler: freeze the Kinder Bueno mixture into a disk. The second option is to spread it directly on top of the cheesecake layer.
Whichever method you choose, you’ll end up with the same delicious result.

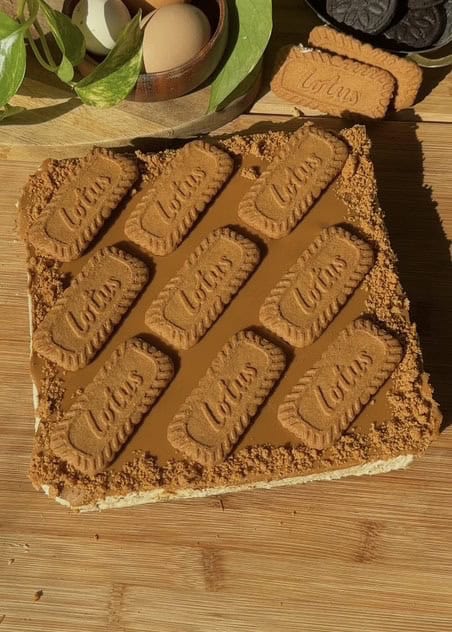
- Add half of the cheesecake filling to the prepared crust and smooth it out.
- For the Kinder Bueno layer, you can either: Carefully spread the Kinder Bueno spread (or melted Kinder Maxi bars if you can’t find the spread) over the cheesecake layer, making sure not to reach the edges of the pan, or place the frozen Kinder Bueno disk on top.
- Add the remaining half of the cheesecake filling and smooth it out again

Best tips for happy hippo cheesecake
The best tips I can give you to make a yummy and simple no-bake cheesecake recipe:

- Don’t overwhip the cream: Stop whipping just before it reaches stiff peaks. When you fold the cream into the rest of the ingredients, it will continue to whip, and overwhipping can result in a split-looking cheesecake texture.
- Don’t mix the ingredients with a whisk: I’ve found that using a whisk can cause the cream cheese to melt. Instead, mix everything with a spatula for the best results.
- Let the cream cheese (and Kinder Bueno spread, if using) sit at room temperature: This helps avoid lumps and ensures a smooth, creamy filling.
- Use a cold, clean, and dry bowl to whip the cream: You don’t need to refrigerate the bowl, but avoid using it right after it’s warm from the dishwasher.
- Let the cheesecake set for at least 8 hours (preferably overnight): If you try to remove it from the pan before this time, it may collapse.
How to decorate a kinder cheesecake
For this Kinder Bueno cheesecake, we’re keeping the decoration simple.
Once it has refrigerated long enough, we’ll decorate it by pouring Kinder spread or any hazelnut cream all over the top. Tilt the pan to the sides so the spread reaches every corner.
Then, add crushed wafer rolls on the sides, pearl sugar, and Happy Hippos. This creates the perfect decoration for a Happy Hippo Kinder cheesecake!

FAQs for happy hippo cheesecake
If Happy Hippos aren’t available, you can use Kinder Buenos, Ferrero Rocher, or any other chocolate treats for decoration.
Ensure you’re using full-fat cream cheese and whipped cream with at least 35% fat content. Also, avoid overmixing the filling, as this can affect the texture.
Make sure the cream cheese and Kinder Bueno spread are at room temperature before mixing. Use a spatula to combine the ingredients gently.
Yes, this recipe is completely gelatin-free, making it perfect for those who prefer not to use gelatin.
Yes, you can use any pan size, but adjust the ingredient quantities accordingly. A 17 cm x 6 cm pan is recommended for this recipe.
Yes, a food processor works great for crushing the biscuits. Alternatively, you can use a rolling pin and a ziplock bag.
Step by step to make happy hippo cheesecake
- Start by crushing the biscuits into fine crumbs using a food processor or a rolling pin with a ziplock bag. Mix the crushed biscuits with melted butter until the texture resembles wet sand. Press the mixture firmly into the bottom of the pan and refrigerate.
- In a large mixing bowl, combine room-temperature cream cheese and Kinder Bueno spread. Use a spatula to mix them together until smooth.
- In a separate bowl, whip the heavy cream with sugar until soft peaks form.
- Gently fold the whipped cream into the cream cheese mixture in two parts. First, fold in half of the whipped cream until almost fully integrated, then add the other half. Use a spatula to fold the ingredients together until fully combined. The filling should be light, fluffy, and smooth.


5. Pour half of the filling into the prepared pan and smooth it out. Add the Kinder Bueno filling for the center, then top with the remaining cheesecake filling and smooth it out again.
6. Cover the cheesecake with plastic wrap or a baking tray to protect it from any odors or spills in the fridge. Chill for at least 8 hours or overnight.
7. Melt some Kinder Bueno spread and pour it over the cheesecake, tilting the pan to spread it evenly. Crush some wafer rolls and sprinkle them on the sides, along with pearl sugar. Add Happy Hippos on top for a beautiful finishing touch.

If you try this recipe, please leave us a review on our website! And if you have any questions, feel free to ask in the comments—I’ll try to reply as fast as I can. Happy baking!
Print
Happy Hippo No Bake cheesecake
- Prep Time: 30 minutes
- Total Time: 8 hours 30 minutes
- Yield: 10
- Category: Dessert
- Cuisine: American
Description
Today, we are making another delicious cheesecake recipe: a Happy Hippo no bake cheesecake! Everyone’s childhood favorite in a creamy and easy-to-make cheesecake. No gelatin needed.
Ingredients
Crust
- 200 grams biscuits
- 45 grams melted butter
cheesecake filling
- 500 grams cream cheese
- 200 grams heavy whipping cream (35% fat)
- 150 grams kinder bueno spread (Or melted kinder maxi)
- 35 grams granulated sugar
interior
- 125 grams Kinder bueno spread (or use melted kinder maxi instead)
decorate
- 150 grams kinder bueno spread (or use melted kinder maxi instead)
- 4 happy hippos
- 2 wafer rolls (crushed)
- pearl sugar (just a pinch)
Instructions
- crust Start by crushing the biscuits into fine crumbs using a food processor or a rolling pin with a ziplock bag. Mix the crushed biscuits with melted butter until the texture resembles wet sand. Press the mixture firmly into the bottom of the pan and refrigerate.

- cream cheese filling In a large mixing bowl, combine room-temperature cream cheese and Kinder Bueno spread. Use a spatula to mix them together until smooth.
- Whipped cream In a separate bowl, whip the heavy cream with sugar until soft peaks form.
- make filling Gently fold the whipped cream into the cream cheese mixture in two parts. First, fold in half of the whipped cream until almost fully integrated, then add the other half. Use a spatula to fold the ingredients together until fully combined. The filling should be light, fluffy, and smooth.
- build cheesecake Pour half of the filling into the prepared pan and smooth it out. Add the Kinder Bueno filling for the center, then top with the remaining cheesecake filling and smooth it out again.
- refrigerate Cover the cheesecake with plastic wrap or a baking tray to protect it from any odors or spills in the fridge. Chill for at least 8 hours or overnight.
- decorate Melt some Kinder Bueno spread and pour it over the cheesecake, tilting the pan to spread it evenly. Crush some wafer rolls and sprinkle them on the sides, along with pearl sugar. Add Happy Hippos on top for a beautiful finishing touch.


Notes
If you try this recipe, please leave us a review on our website! And if you have any questions, feel free to ask in the comments—I’ll try to reply as fast as I can. Happy baking!
ARCHER'S FOOD
Easy and delicious recipes


Guess it‘s a tasty cake but a recipe with ingredients but without the exact meassurements is just not replicable
Hm…..check the recipe card?