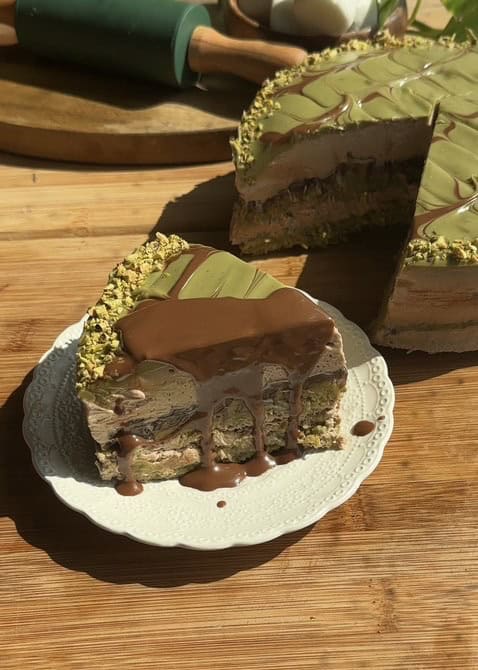
Let me show you how to make this delicious No-Bake Dubai Chocolate Cheesecake! It’s super easy to make, requires no oven or gelatin, and is the perfect sweet treat for chocolate lovers in Dubai (like me!).
If you love Dubai-inspired chocolate recipes, you’re in the right place! Discover how to make Dubai chocolate bars and kataifi for Dubai chocolate desserts, they’re all super simple to make and so much cheaper than store bought.
More no bake cheesecake recipes:
- no-bake Nutella cheesecake
- no-bake pistachio cheesecake
- no bake oreo cheesecake
- No bake oreo cheesecake bar
- No bake kinder bueno cheesecake
- No bake apple pie cheesecake
- Peanut butter cheesecake
- Chocolate oreo cheesecake
- ferrero Rocher no bake cheesecake
- Happy hippo cheesecake
- tiramisu cheesecake
What you’ll love about this Dubai chocolate cheesecake:
- It’s the perfect dessert if you love cheesecakes and the famous Dubai chocolate bar.
- It’s so creamy and tasty-and doesn’t need an oven, making it very simple to prepare.
You don’t need gelatin for this recipe. - We know not everyone feels comfortable using gelatin (and it can be expensive), so we’ll show you the perfect trick for a creamy, perfectly-set cheesecake without it.
Watch how to make a Dubai chocolate cheesecake

Everything about Dubai chocolate cheesecake
- Refrigerate: 8 h to overnight
- Yield: 12 portions
- Level of difficulty: Easy to medium.
- Pan size: 17 cm x 6 cm
List of ingredients for Dubai chocolate cheesecake
For this creamy Dubai-style cheesecake, you’ll need the following ingredients (with possible substitutions):
*Remember: You’ll find detailed explanations of these ingredients below. If you want to go straight to the measurements, either:*
- Click “Jump to Recipe” at the top of the page.
- Or scroll down to the recipe card.
- Kataifi Dough: Store-bought or homemade kataifi dough *(click for recipe)
- Butter: or Ghee works as an excellent alternative
- Pistachio Butter/Spread: Choose a quality product with 40-50% pistachio content for optimal flavor
- Cream Cheese: Mascarpone cheese makes a delicious substitute (this forms the cheesecake base)
- Sugar: We use just a small amount since the chocolate adds sweetness
- Milk Chocolate: Melted for a rich, smooth chocolate flavor
- Heavy Whipping Cream: Minimum 35% fat content for proper whipping
- Pistachios: Crushed for garnish – adds crunch and vibrant flavor
Necessary equipment for this Rich chocolate cheesecake without baking
- Pan – For toasting the kataifi until beautifully golden brown and crunchy
- Cheesecake pan 17 cm x 6 cm- Preferably springform for easy removal
- Electric hand mixer or stand mixer – To whip the heavy cream to perfect soft peaks
- Spatula (silicone preferred) – For gently folding ingredients until smooth and creamy
This is the list of all the Equipment Needed for This Dubai-Inspired Dessert
Best tips for this no bake cheesecake
- Whip the heavy cream only to soft peaks – overwhipping will cause curdling when mixed.
- Use cream with minimum 35% fat for proper texture.
- Use the whisk only for whipping cream, fold ingredients together with a spatula to maintain structure.
- Toast the kataifi until golden brown – raw kataifi has an unpleasant flavor.
FAQ for Dubai chocolate cheesecake
Absolutely! This no-bake cheesecake needs at least 8 hours to set, making it perfect for preparing a day in advance.Store it covered in the refrigerator for up to 3 days.
Overwhipping is the main culprit. Stop at soft peaks (when the cream holds its shape but still looks glossy). If it curdles, add 1-2 tablespoons of cold cream and gently fold to revive it.
Use a regular cake pan lined with parchment paper (let the paper overhang for easy removal). Or serve it as individual jars/glasses for a no-fuss option.
Yes! Freeze without toppings for up to 1 month. Thaw overnight in the fridge before decorating. Note: The texture may be slightly denser.
That happens when the cream cheese is too cold. Make sure its at room temperature.
Check our latest posts:
- Red velvet brookies
- Brownie bottom Nutella cheesecake
- Nutella mini pancakes
- Nutella chocolate chip pull-apart brioche
- Vanilla Biscoff Cheesecake Bars
- Funfetti tiramisu
- Nutella sweet brioche
- Fluffy Nutella Knots
- Nutella Duo Rolls
Step by step how to prepare a Dubai chocolate cheesecake
How to prepare the crust
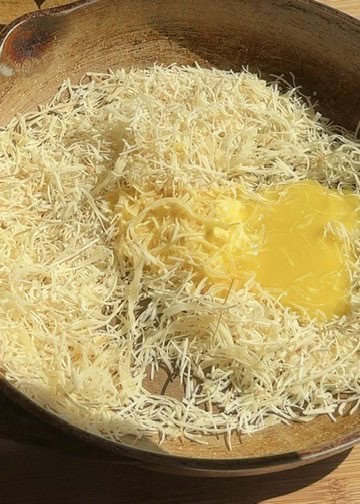
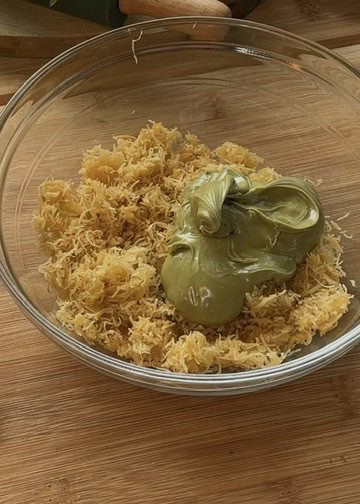
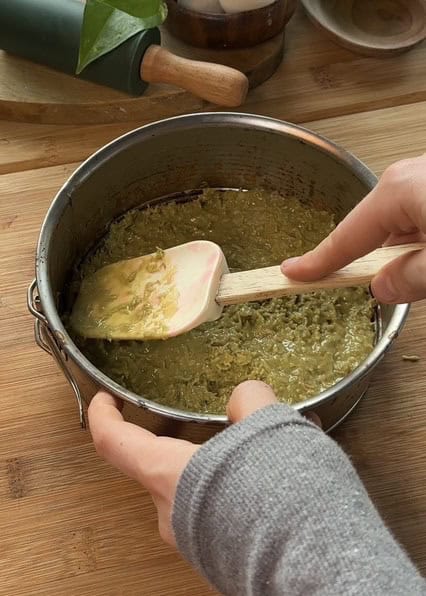
- Prepare the Kataifi Mixture, Begin by cutting the kataifi pastry into small, even pieces. Melt butter or ghee in a pan over medium heat, then add the kataifi pieces. Toast them while stirring constantly for 3-5 minutes until they turn a beautiful golden brown and become fragrant.
- Remove from heat and thoroughly mix in the pistachio spread until every strand is evenly coated. Set aside half of this mixture for later use in the recipe.
- Take the remaining half of the kataifi mixture and press it firmly into the bottom of a pan.
Use the back of a spoon to compact it into a uniform, even layer that covers the entire base. This will create the foundation for your cheesecake. Once pressed, place the pan in the refrigerator to chill and set while you prepare the filling.
How to prepare the filling
4. Chop your milk chocolate into small, even pieces for even melting. Place them in a microwave-safe bowl and heat in 20-second intervals, stirring well after each interval, until completely smooth and liquid.
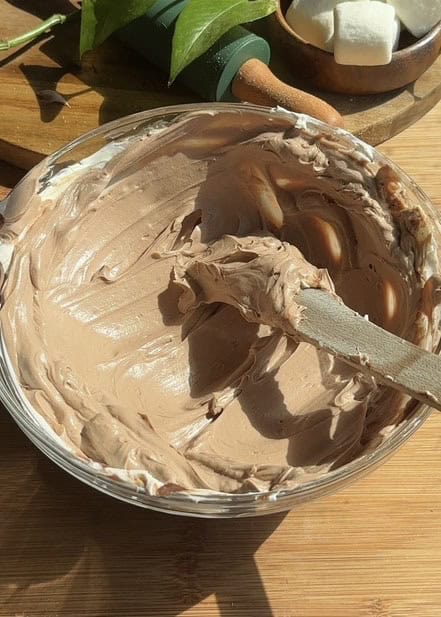
5. In a large mixing bowl, use a spatula to work the cream cheese until it becomes perfectly smooth and creamy, about 2-3 minutes of mixing. Gradually add the melted chocolate to the cream cheese, stirring constantly with the spatula. Reserve some for later to add on top of the middle layer.
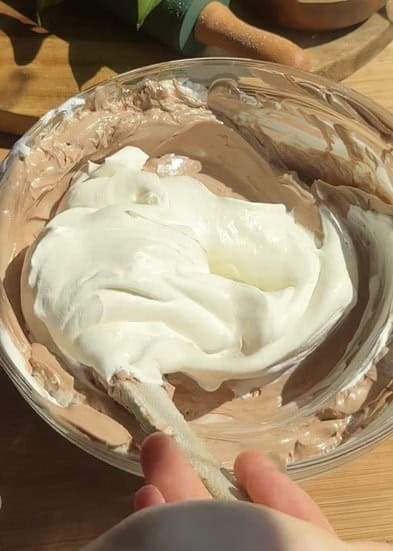
6. In a separate, chilled bowl, combine the cold heavy whipping cream and sugar. Using an electric mixer, whip the mixture just until soft peaks form – be careful not to overwhip.

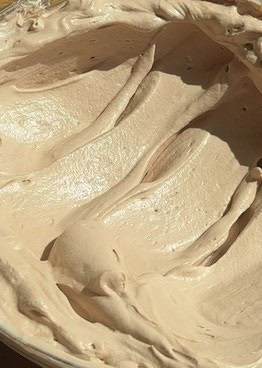
7. Gently fold the whipped cream into the chocolate cream cheese mixture in three separate additions.
How to layer
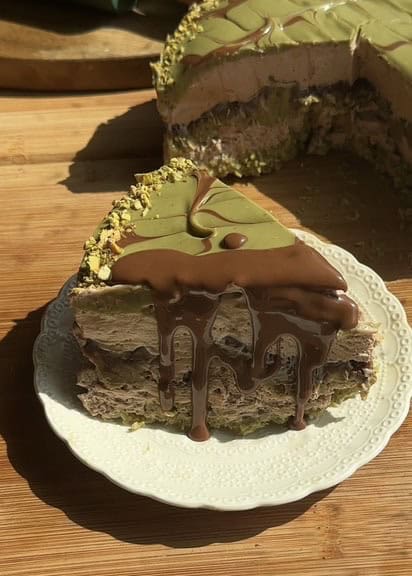
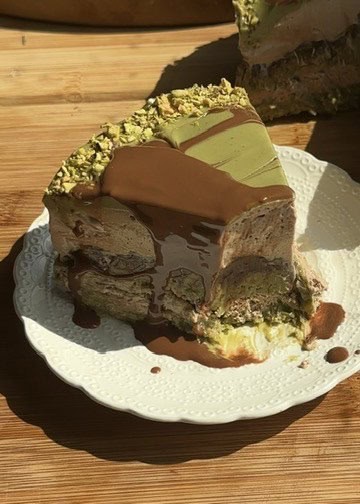
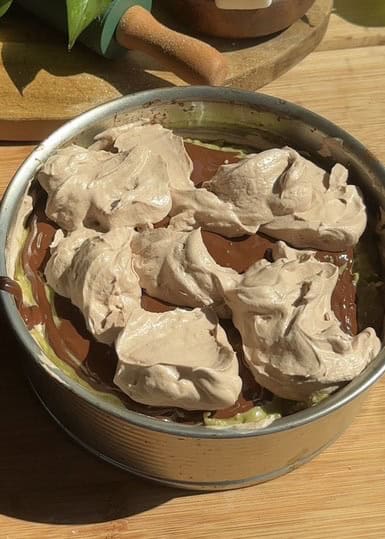
8. Remove the prepared crust from the refrigerator. Pour half of the cheesecake filling over the chilled kataifi base.
9. Evenly add all of the reserved kataifi mixture over the first layer of cheesecake filling, and add melted chocolate.
10. Add the remaining cheesecake filling over the kataifi layer, smoothing the top with your spatula to create a perfectly flat surface. Cover lightly with plastic wrap and refrigerate for at least 8 hours, though overnight is ideal for the best texture and clean slicing.


How to decorate the Dubai chocolate cheesecake
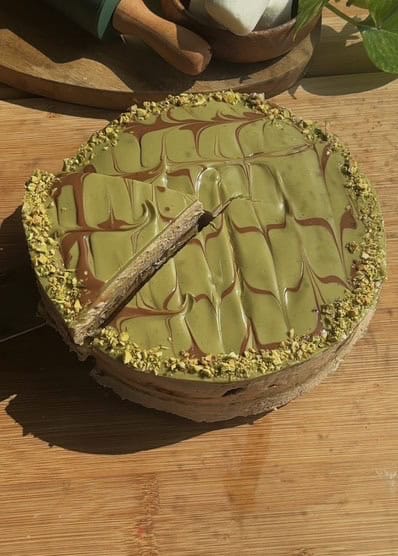
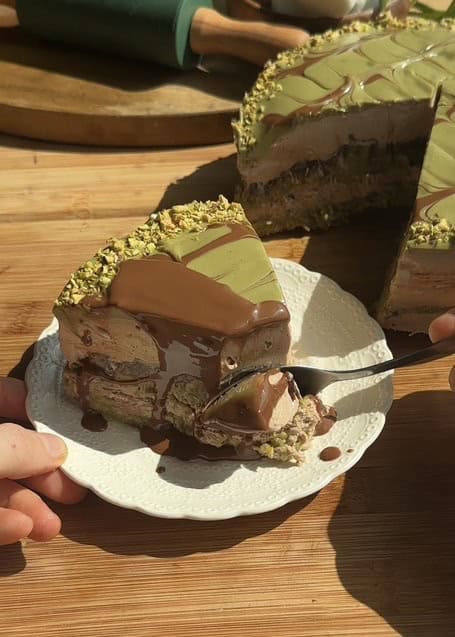
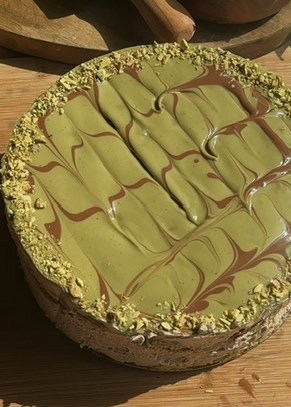
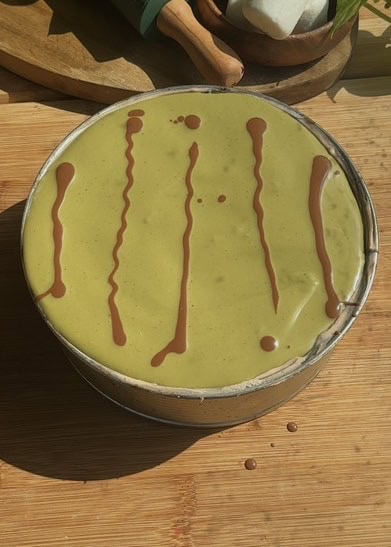
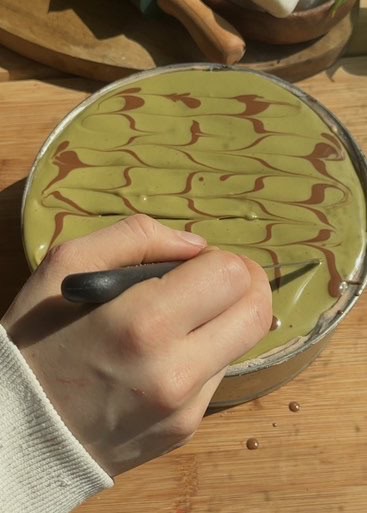
11. When ready to serve, warm the pistachio spread slightly for easier handling. Spread it evenly over the top of the set cheesecake. Create decorative chocolate lines, then use a toothpick or knife to swirl them into an attractive pattern. It doesn’t have to be perfect. Finish by pressing chopped pistachios along the sides.

No bake Dubai chocolate inspired cheesecake
- Yield: 12
- Category: cheesecakes
- Method: no oven
- Cuisine: American
Description
This is the perfect no bake cheesecake recipe for all Dubai chocolate lovers. No gelatin needed.
Ingredients
Kataifi mixture
- 240 g kataifi dough
- 70 g butter
- 160 g pistachio butter
Cheesecake filling
- 500 g cream cheese
- 50 g sugar
- 200 g heavy whipping cream
- 200 g milk chocolate
Decorate
- 100 g milk chocolate
- 20 g milk chocolate
- 100 g pistacho spread
- 45 g crushed pistachios
Instructions
Crust
- Prepare the Kataifi Mixture, Begin by cutting the kataifi pastry into small, even pieces. Melt butter or ghee in a pan over medium heat, then add the kataifi pieces. Toast them while stirring constantly for 3-5 minutes until they turn a beautiful golden brown and become fragrant.
- Remove from heat and thoroughly mix in the pistachio spread until every strand is evenly coated. Set aside half of this mixture for later use in the recipe.
- Take the remaining half of the kataifi mixture and press it firmly into the bottom of a pan.
Use the back of a spoon to compact it into a uniform, even layer that covers the entire base. This will create the foundation for your cheesecake. Once pressed, place the pan in the refrigerator to chill and set while you prepare the filling.
Filling
- Chop your milk chocolate into small, even pieces for even melting. Place them in a microwave-safe bowl and heat in 20-second intervals, stirring well after each interval, until completely smooth and liquid.
- In a large mixing bowl, use a spatula to work the cream cheese until it becomes perfectly smooth and creamy, about 2-3 minutes of mixing. Gradually add the melted chocolate to the cream cheese, stirring constantly with the spatula. Reserve some for later to add on top of the middle layer.
- In a separate, chilled bowl, combine the cold heavy whipping cream and sugar. Using an electric mixer, whip the mixture just until soft peaks form – be careful not to overwhip.
- Gently fold the whipped cream into the chocolate cream cheese mixture in three separate additions.
Build the cheesecake
- Remove the prepared crust from the refrigerator. Pour half of the cheesecake filling over the chilled kataifi base.
- Evenly add all of the reserved kataifi mixture over the first layer of cheesecake filling and add melted chocolate.
- Add the remaining cheesecake filling over the kataifi layer, smoothing the top with your spatula to create a perfectly flat surface. Cover lightly with plastic wrap and refrigerate for at least 8h. Overnight is ideal.
Decorate
- When ready to serve, warm the pistachio spread slightly for easier handling. Spread it evenly over the top of the set cheesecake. Create decorative chocolate lines, then use a toothpick or knife to swirl them into an attractive pattern. It doesn’t have to be perfect. Finish by pressing chopped pistachios along the sides.
If you try this recipe, please leave us a review on our website! And if you have any questions, feel free to ask in the comments—I’ll try to reply as fast as I can. Happy baking!
ARCHER'S FOOD
Easy and delicious recipes