
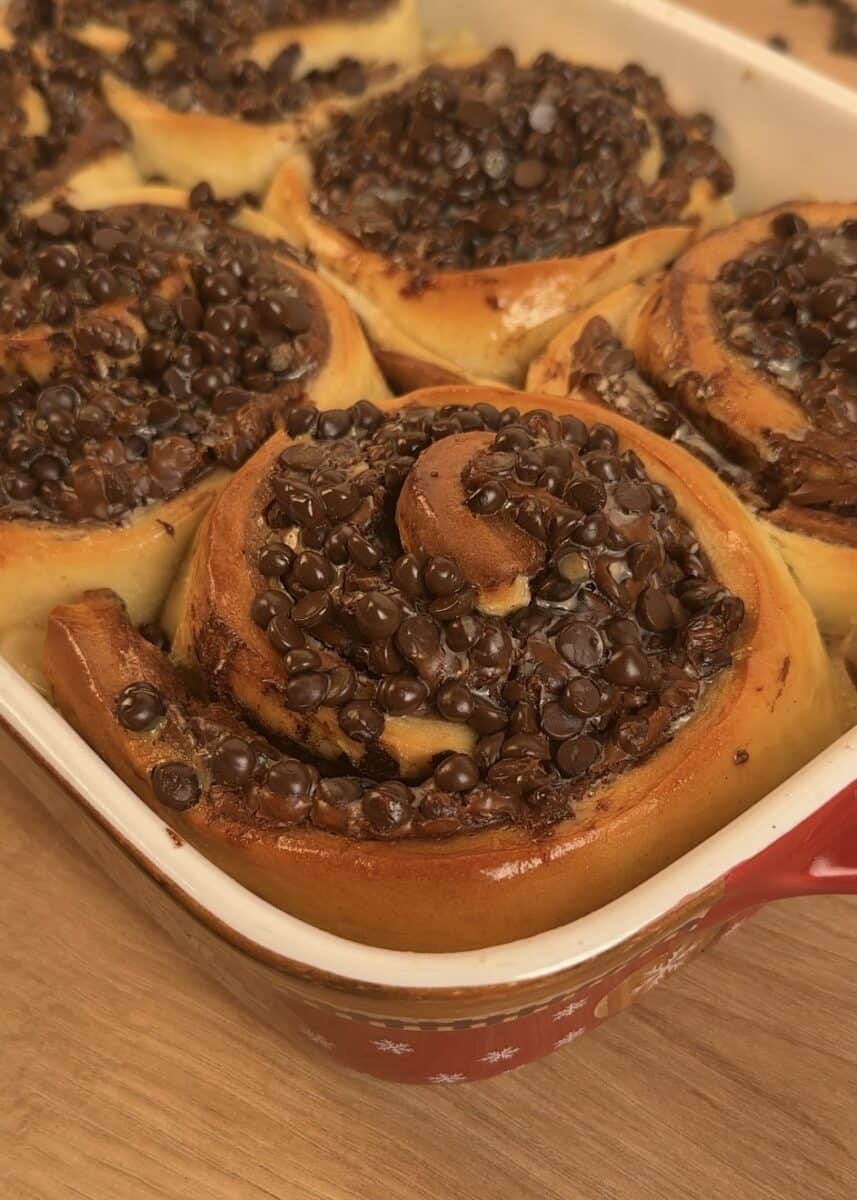
Today we are making double chocolate rolls! They’re fluffy, delicious, and packed with super chocolate flavor. They’re so fun to make and even better to eat. Yes, they’re really messy to enjoy, but it’s so worth it!

We’ve made Nutella rolls, cinnamon rolls, Biscoff flavor, Kinder Bueno, and even Ferrero Rocher and birthday cake rolls. But recently, we were craving something that screamed chocolate! Since we just bought the most perfect chocolate chips—ideal for any chocolatey recipe—we knew just what to do. I think we did them justice, as they came out incredibly fluffy and delicious.
To achieve the perfect rolls, we tried three times before finalizing the recipe. Here’s how it went:
- The first time, the dough became overworked. There was just too much force applied to it, which was a complete fail. But we weren’t going to give up!
- For the second try, we added all the flour at once, and that was a mistake. The dough became too tough and dry.
It’s so important to remember that baking requires experimentation. The type of flour you use, the humidity, or how you incorporate ingredients can all affect a recipe dramatically.
Chocolate Rolls
Why is this recipe a double chocolate roll if the dough isn’t chocolate? Some of you are probably wondering the same thing—or maybe not!
Here’s our method: we divided the dough into two portions. We kneaded it until it was soft and perfect, then we removed one-third of it and mixed that portion with cocoa powder. Once it’s kneaded and the cocoa powder is fully incorporated, it’s ready to go.
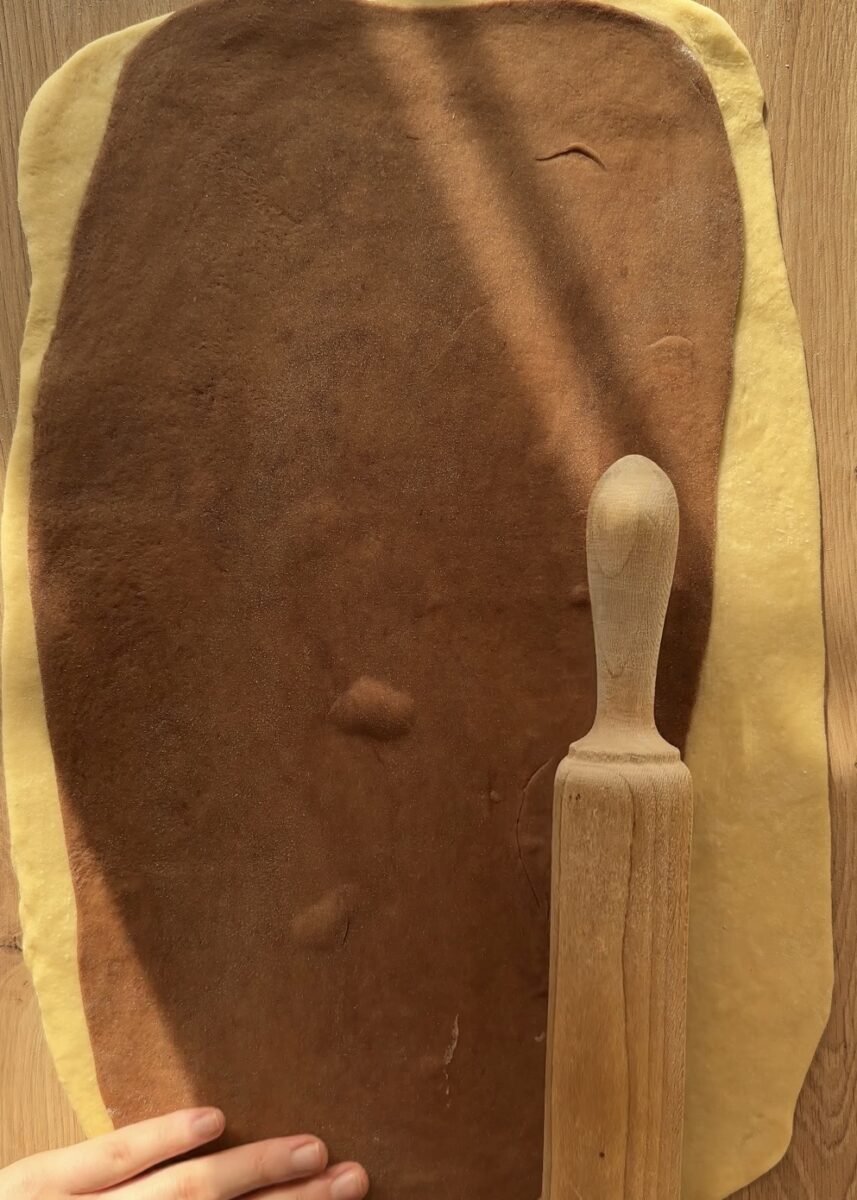
So, why are we doing this? Just for a fun pattern? Absolutely! We roll out the plain dough first, then we roll out the chocolate dough thinly and place it directly on top. (Now that I think about it, you could do it the other way around, and that would look even better)
Then, we add a layer of Nutella and lots and lots and lots of chocolate chips. This is what makes it so incredibly chocolatey.
Imagine a good chocolate roll with a glass of cold milk—perfection!
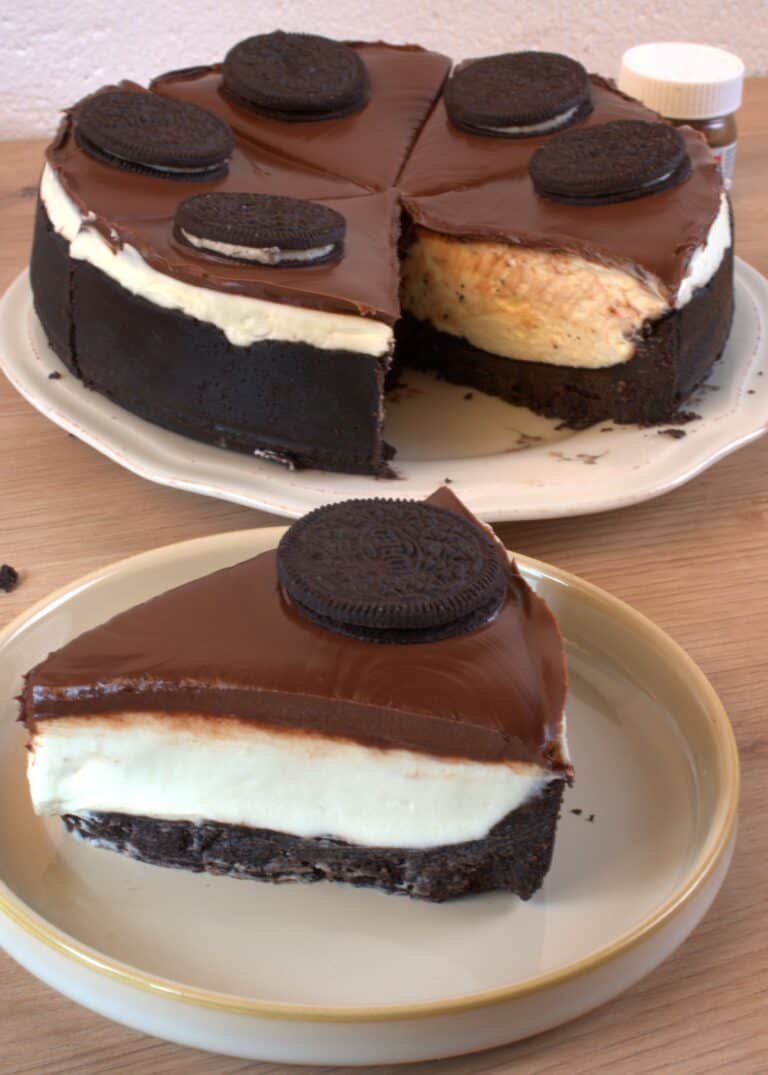
I’ve been craving chocolate desserts lately! Tomorrow, we are posting the most delicious and flavorful no-bake chocolate cheesecake. Everyone is going to love it!
Why You’ll Love These Double Chocolate Rolls
Here’s why you’ll love this delicious double chocolate rolls recipe:
- Chocolate Lover’s Dream: If you love chocolate, this recipe is for you. It’s packed with rich chocolate flavor in every single bite.
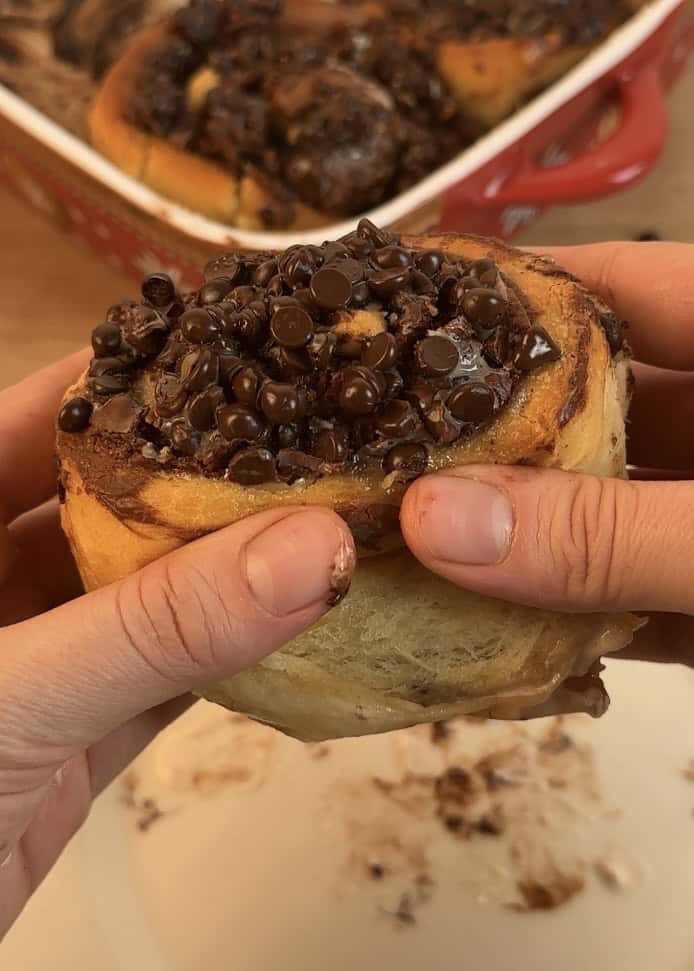
- A Joyfully Messy Treat: They are incredibly fun to eat. Yes, they’re messy, but it’s so worth it!
- The Perfect Twist: If you love cinnamon rolls but are looking for a delicious and fun variation, this is it.
- Surprisingly Easy Brioche: Once you understand the basic method for brioche, you’ll find that almost all recipes are similar and easy to master.
- Endlessly Versatile: This recipe is a fantastic base. You can easily experiment with other flavors and fillings, and it will always be a hit!
Ingredients and Why they Matter
Here you’ll find a quick explanation of all the ingredients we’re using, including why they’re important and some possible substitutions. For exact quantities, please check the recipe card—you’ll find the measurements in both cups and grams.
- Warm Milk: We use this to prepare the yeast mixture. Make sure it’s warm, not hot, as a high temperature can kill the yeast. If it’s too cold, the yeast won’t activate properly.
- Active Dry Yeast: My biggest tip for storage is to keep it fresh so it doesn’t go bad. I recommend storing it in a sealed container in the fridge; this will keep it active and reliable.
- Granulated Sugar: This is used for two reasons: to activate the yeast (it feeds it!) and to sweeten the dough.
- Egg and Egg Yolk: Using both gives the best, richest results. You can substitute the one egg and one yolk with one whole egg and half of another, but I love the extra richness the yolk provides.
- All-Purpose Flour: This is our versatile, go-to flour for this recipe. It creates the perfect structure for soft, fluffy rolls.
- Butter: Keep it at room temperature! Adding cold butter is not a good idea, as it’s difficult to incorporate fully and can leave cold bits throughout the dough.
- Cocoa Powder: We incorporate this into one-third of the dough to create a fun, swirled pattern and a double-chocolate flavor.
- Heavy Cream: We pour this over the rolls just before baking. It helps the dough become incredibly soft and fluffy and adds richness.
- Nutella: Any chocolate spread will work here. We’ll spread a generous layer to create that gooey, chocolatey center.
- Chocolate Chips: We went a little crazy with these and used a lot—and we don’t regret it one bit! They add delicious pockets of melted chocolate.
Shop your ingredients!
 Buy Now →
  Buy Now →
  Buy Now →
  Buy Now →
  Buy Now →
  Buy Now →
  Buy Now →
  Buy Now →
  Buy Now →
  Buy Now →
 Special Tools You’ll Need
To make these rolls, you’re going to need the following tools:
- Mixing Bowls: You’ll use these to combine all the ingredients.
- Stand Mixer (Optional but highly recommended): This will help immensely with the kneading process. I recommend using one if you have it, as it will save you so much time and effort.
- Oven Pan: This is the pan you’ll bake the chocolate rolls in. If you’re worried they might stick, lightly grease the pan with oil or line it with parchment paper.
- Rolling Pin: Essential for rolling out the dough. If you don’t have one, get creative—a clean glass bottle can work in a pinch!
- Sharp Knife: You’ll need this to slice the dough into even strips before rolling them up.
- Spoon or Pastry Spatula: Use this to spread the Nutella evenly over the rolled-out dough.
Tools you need!
 Buy Now →
  Buy Now →
 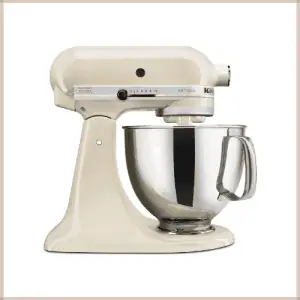 Buy Now →
 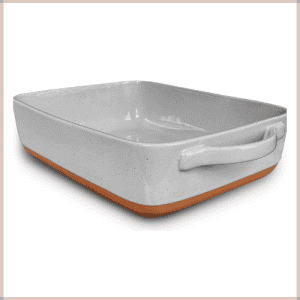 Buy Now →
 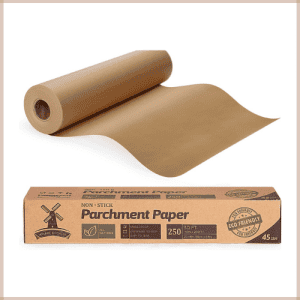 Buy Now →
  Buy Now →
  Buy Now →
  Buy Now →
 What’s the Best Way to Cut Your Rolls Dough?
If you had asked me a few months ago, I would have said to use a piece of string or kitchen twine. A few years ago, I would have just told you to roll up the dough and use a knife.
But now, I’ve realized how easy and satisfying it is to spread your filling first, then cut the dough into strips, and finally roll each strip into an individual roll.
It’s just so much better! I highly recommend you try this method. Even if you’re in love with the string technique, give this one a try. It gives you so much more control over the shaping, leading to perfectly neat rolls.


How to Make Bread-like Recipes and Not Fail
Here are my top tips for baking success, learned from plenty of trial and error in my own kitchen!
- Test Your Yeast: Always make sure your yeast is active. Sometimes, yeast can be dead even if it’s not expired. It’s always better to throw out a failed yeast mixture than an entire batch of dough.
- Knead to the Right Consistency: Knead the dough enough, but not too long. You’re aiming for a soft, fluffy dough—you don’t want it to be tough, but it also needs to be worked enough to develop structure.
- Lean Towards a Wetter Dough: I always prefer to keep my doughs on the slightly wetter side. You can always use extra flour when you shape it later. It’s much easier to work with a wet dough than to fix a dry one.
- Add Flour Gradually: Follow a recipe, but don’t be a slave to it. If a recipe calls for X amount of flour, don’t pour it all in at once. I might do it because I know my base recipes, but factors like humidity or the brand of flour can change things. It’s best to add most of the flour and then incorporate the rest slowly until the desired consistency is reached.
- Respect Resting Times & Temperatures:
- Time: A standard dough usually has a first proof of about 1 hour 30 minutes, followed by a second proof of 30 minutes after shaping. These times are crucial for developing a soft, fluffy texture.
- Temperature: This is critical! Proofing time changes drastically with temperature. In the fridge, a dough can take 8 hours or more.
- On a warm counter, it might be ready in 1-2 hours.
- In a hot place (like in the sun), it can ferment and be ruined in just an hour! I’ve learned this the hard way by trying to rush the process.
Dough proofer link: (not sponsored)https://amzn.to/3IJb7Nr
Double Chocolate Rolls Step by Step Overview
Alright, let’s walk through how these gorgeous rolls come together! Think of this as our baking roadmap before you dive into the recipe card.

- We’ll start by mixing our yeast with warm milk and a little sugar. Let it sit until it gets all foamy and active—this is your sign that you’re good to go!

2. In a large bowl, we’ll mix our other ingredients. Now, here’s a key tip: don’t add all the flour at once! Start with about two-thirds of it. We’re aiming for a soft, slightly sticky dough, because a wetter dough leads to fluffier rolls. You can always add a bit more flour as you knead, but you can’t take it out!

3. We’ll knead until the dough is super smooth and elastic. This is where a stand mixer is a lifesaver, but you can definitely do it by hand, it’s a great arm workout!

4. This is the “double” in double chocolate! We’ll take about one-third of the plain dough and knead cocoa powder right into it. This gives us a separate chocolate dough for that beautiful marbled effect.
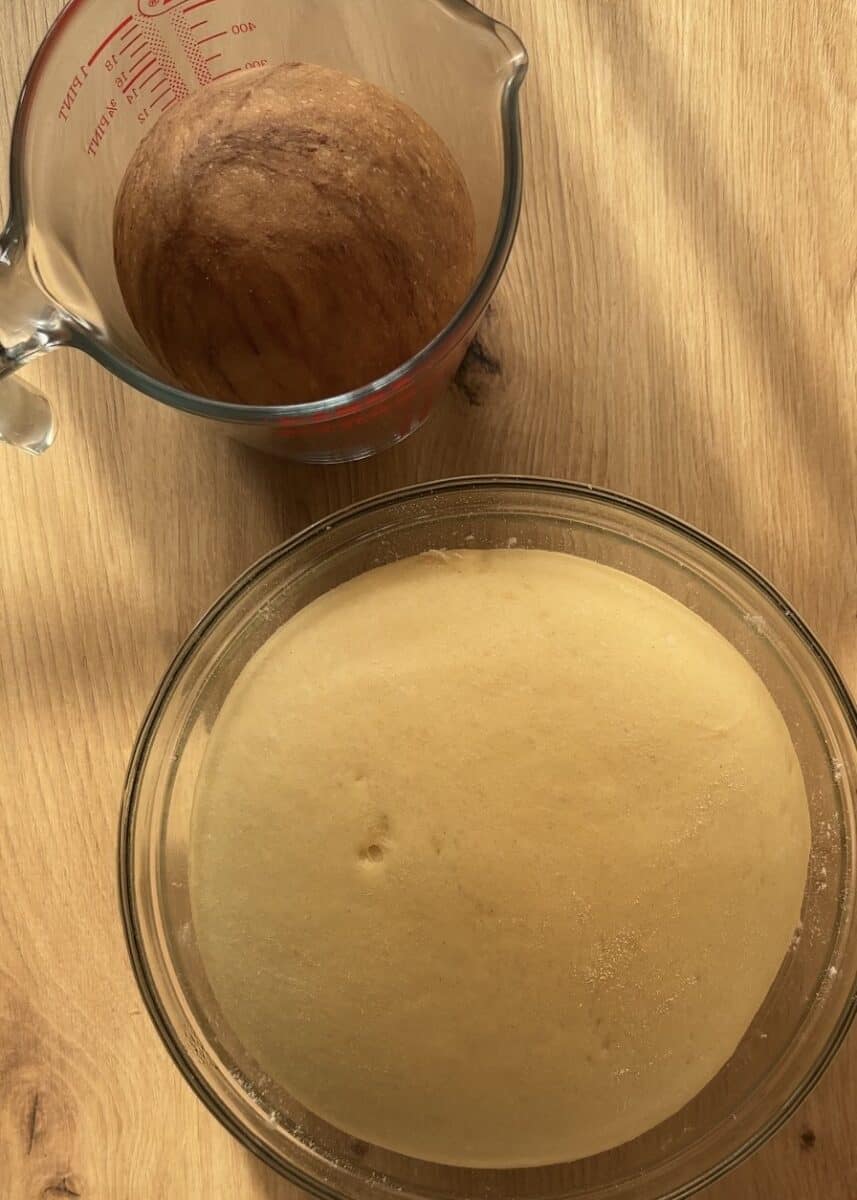
5. We’ll let both our dough balls rest in a cozy-warm spot until they double in size. This is where patience (and the right temperature) pays off for that amazing fluffiness!
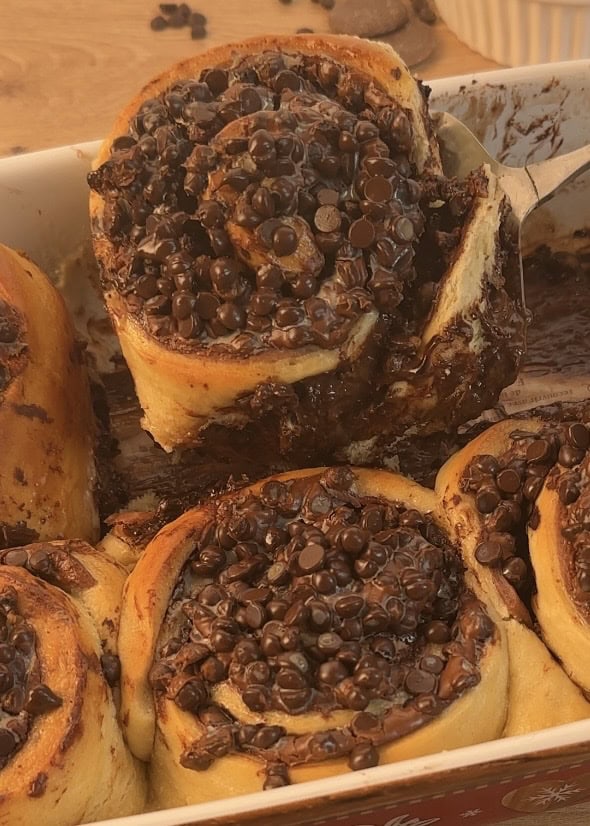
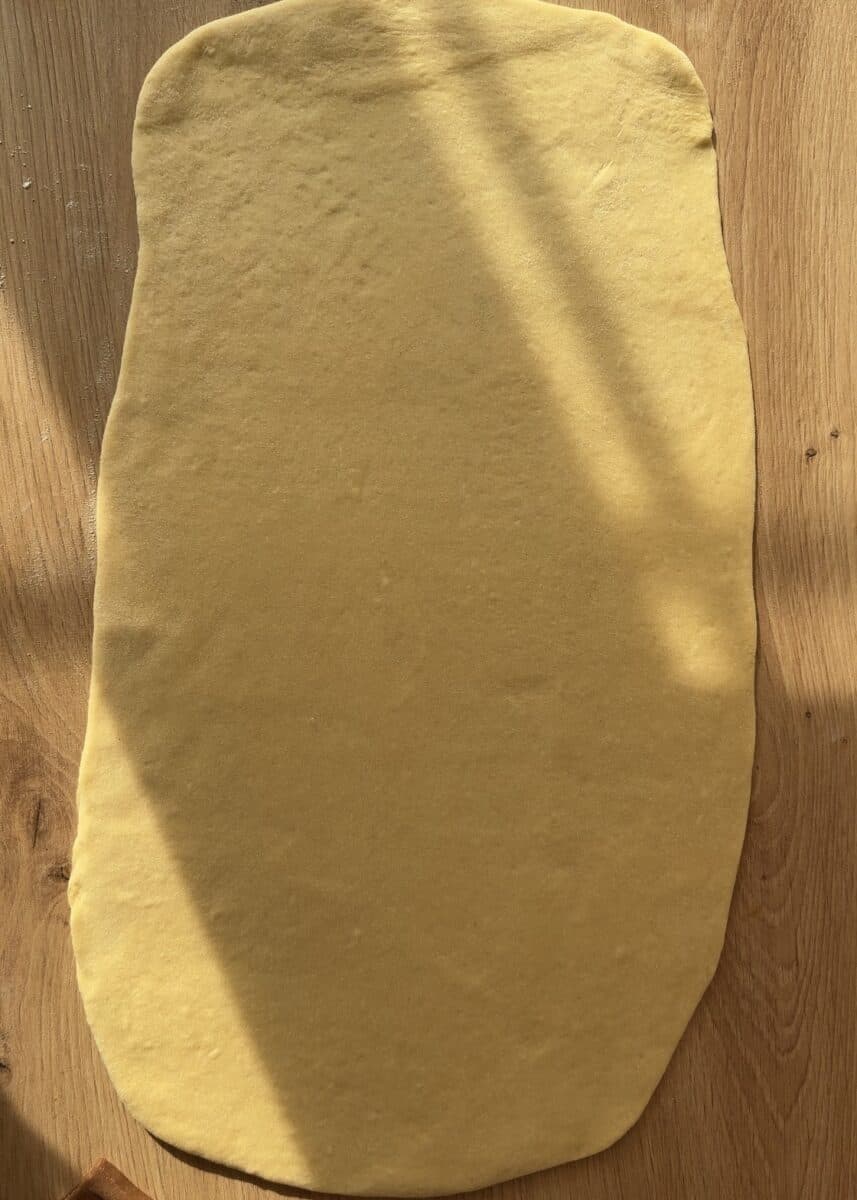
6. Once they’re puffy, we roll them out. First, roll the plain dough, then place the rolled-out chocolate dough right on top. Now for the fun part: slather on that Nutella and a very generous handful of chocolate chips. Don’t be shy!
7. Use a sharp knife to cut the filled dough vertically into strips, each about 3.5 cm or 1.37 inches (or two to three fingers) wide. Then, tightly roll up each individual strip to form a single roll.
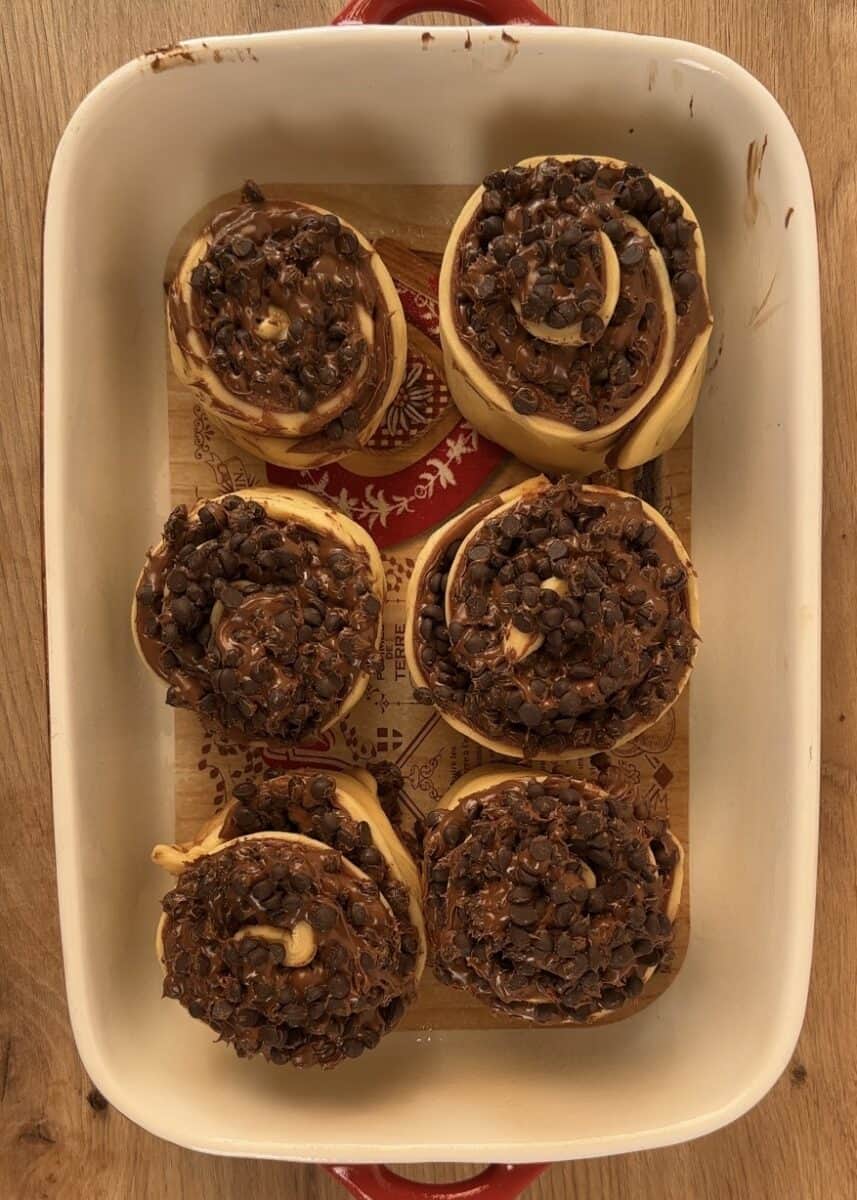
8. We’ll tuck the rolls into a pan and let them get all puffy and cozy with each other one more time.

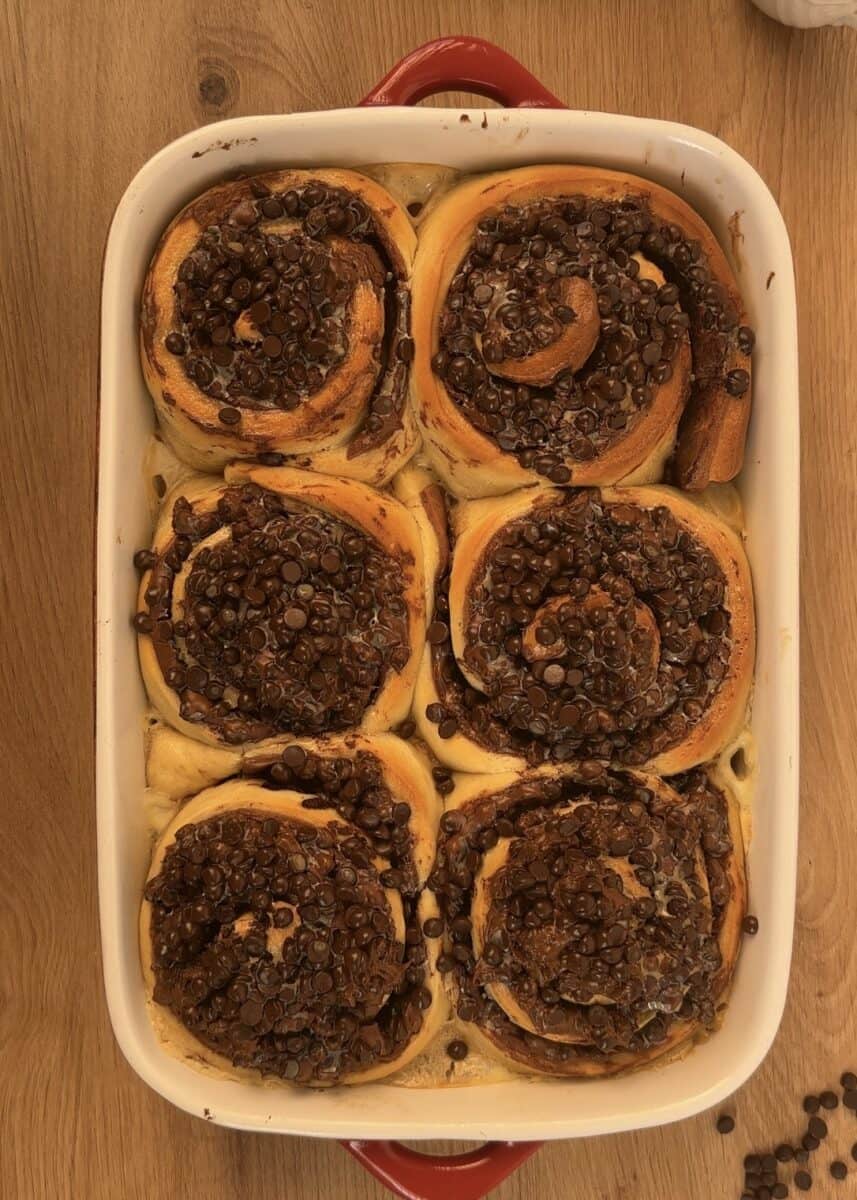
9. Drizzle some cream and into the oven they go until they’re golden brown and your kitchen smells like a chocolate dream.
Ready for the specifics? All the exact amounts and detailed baking times are waiting for you in the recipe card below—let’s get baking
Possible Variations & Flavors
Besides the other delicious rolls we’ve already made, here’s a little twist on this recipe for a different kind of chocolatey delight!
- Chocolate Ganache Filling: Imagine a rich, decadent chocolate ganache inside the softest, fluffiest rolls. I don’t even know what’s better—ganache or Nutella! If I weren’t so lazy, I’d definitely make a smooth ganache every single time.
- Cinnamon-Chocolate Twist: Use a classic cinnamon-sugar butter mixture as the filling instead of Nutella, then top it with a generous handful of chocolate chips before rolling. It would be the perfect warm and spiced chocolate twist.
- Melted Chocolate Bar: Choose your favorite chocolate—white, milk, or dark. Simply melt it, spread it over the dough, and enjoy! Since these rolls are best served warm, the chocolate will always be deliciously melty.
How to Store & Freeze Chocolate Rolls
Let me explain how to store and freeze them so you can always enjoy a roll that tastes fresh-baked. The biggest issue with homemade bread desserts is that they get drier every day. Here’s how to keep them soft and delicious!
For Short-Term Storage (1-2 Days):
- Keep them in an airtight container at room temperature.
- When you’re ready to enjoy one, warm it up in the microwave for a few seconds until it’s soft and warm again.
For Freezing (The Best Method for Long-Term Freshness):
You can absolutely freeze these rolls! Here are two ways:
- Freeze After Baking (Best for Quick Treats):
- Let the baked rolls cool down slightly.
- Place them in a freezer-safe container or bag as soon as they are cool.
- When you want one, thaw it slightly and then microwave it. This method locks in the freshness perfectly!
- Freeze Before Baking (Best for Fresh-from-the-Oven Taste):
- After you’ve shaped the rolls and placed them in the pan, instead of doing the second rise, cover the pan tightly and put it directly in the freezer.
- Once the rolls are frozen solid, you can transfer them to a freezer bag to save space.
- When you’re ready to bake, take the frozen rolls out and place them in a greased pan. Let them thaw and rise in the refrigerator overnight, or at room temperature until they have puffed up (this may take a few hours).
- Once they’ve proofed, bake them as you normally would!

Best Tips for Perfect Double Chocolate Rolls
This is a quick reminder of the tips we mentioned earlier so you can remember!
- Always test your yeast first to make sure it’s active and foamy.
- Add the flour gradually, starting with about two-thirds of the total amount.
- Aim for a dough that is soft and slightly sticky; it’s better to be a little too wet than too dry.
- Use one whole egg plus an extra egg yolk to make the dough richer and more tender.
- Knead the dough until it becomes smooth and elastic to the touch.
- Pour a bit of heavy cream over the rolls just before baking to make them extra soft and fluffy.
- Let the dough proof in a warm, draft-free spot for the best rise.
- Be super generous with the chocolate chips and filling for the ultimate chocolate experience.
- For the neatest shapes, spread the filling, cut the dough into strips, and then roll each one individually.
- You can freeze the rolls after baking, or freeze them after shaping and then bake them fresh later.
But the most important tip of all is to always have fun when preparing a recipe

Rich and Fluffy Double Chocolate Rolls
- Prep Time: 2 hours 15 minutes
- Cook Time: 25 minutes
- Total Time: 2 hours 40 minutes
- Yield: 6 portions
- Category: Breakfast, Dessert
- Method: Baking
- Cuisine: American
- Diet: Vegetarian
Description
These Double Chocolate Rolls are incredibly soft, fluffy, and packed with rich chocolate in every single bite. Featuring a fun swirled dough, a generous layer of Nutella, and plenty of melty chocolate chips, they’re a joyfully messy treat that’s absolutely worth it.
Ingredients
Yeast Mixture
- 100g warm milk ( ⅓ cup + 1 tablespoon)
- 1 ½ teaspoons active dry yeast
- 2 teaspoons granulated sugar
Dough
- 250–300g all-purpose flour ( 2 to 2 ½ cups, see note)
- 60g granulated sugar (¼ cup)
- 46g soft unsalted butter (about 3 tablespoons)
- 1 large egg
- 1 egg yolk
Chocolate Dough
- ⅓ of the prepared plain dough
- 1 tablespoon cocoa powder
- + for sticking one dough to the other we will be using 1/2 teaspoon of water, this will act as glue.
Filling
- 400g Nutella (1 ⅓ cups)
- 300g chocolate chips (1 ½ cups)
For Baking
- 6 tablespoons heavy cream
Instructions
- In a small bowl, combine the warm milk, active dry yeast, and granulated sugar for the yeast mixture. Stir gently and let it sit in a warm place for 5 to 10 minutes until it becomes frothy and bubbly.
- In the bowl of a stand mixer fitted with a dough hook, combine the yeast mixture, 2/3 of the flour, egg, egg yolk, soft butter, and sugar. Mix on low speed for about 5 minutes until the ingredients are combined.
- Gradually add the rest of the all-purpose flour if needed, turn off the stand mixer and scrape the bowl, if its too wet you can add more flour, until the dough pulls away from the sides of the bowl but remains slightly sticky to the touch.
- Increase the mixer speed to medium and knead the dough for 10 minutes until it becomes smooth, elastic, and springs back slowly when gently poked.
- Transfer the dough to a lightly floured surface. Divide it, setting aside one-third of the dough. Knead the cocoa powder into this smaller portion until it is fully and evenly incorporated.
- Place both the plain and chocolate dough balls into separate, lightly oiled bowls. Cover them with a clean kitchen towel or plastic wrap and let them rise in a warm place for 1 h 30 minutes, or until doubled in size. I proof my dough at 28 C
- Once risen, punch down the doughs. On a floured surface, roll the plain dough into a rectangle. Add some drops of water on top of the plain dough. Roll the chocolate dough to the same size and carefully place it on top of the plain dough, the water acts as glue. Spread the Nutella evenly over the surface, then sprinkle generously with chocolate chips.
- Use a sharp knife to cut the filled dough vertically into strips, each about 3.5 cm or 1.37 inches (or two to three fingers) wide. Then, tightly roll up each individual strip to form a single roll.
- Arrange the rolls in a greased baking pan. Cover them and let them proof again for 30 minutes in a warm place until puffy.
- Preheat your oven to 180°C (350°F). Pour the heavy cream over the top of the proofed rolls. Bake for 20-25 minutes, or until the tops are golden brown.

Notes
* Note on Flour: Start with 2 cups (250g) of flour and add the remaining ½ cup (50-60g) gradually during kneading, only until the dough is soft and slightly sticky.
Nutrition
- Serving Size: 1 roll
- Calories: 780
- Sugar: 70g
- Sodium: 85mg
- Fat: 36g
- Saturated Fat: 23g
- Unsaturated Fat: 10g
- Trans Fat: 0g
- Carbohydrates: 105g
- Fiber: 6g
- Protein: 12g
- Cholesterol: 95mg
ARCHER'S FOOD
Easy and delicious recipes


Awesome recipe. Thanks 🙂 ❤️