
Delicious, crispy XXL cookie fries. This recipe has been updated now that I have more knowledge, with more pictures and tips to achieve the perfect cookie recipe.

They have been popular for over a year, and for a good reason. They are the cutest shaped cookies. If you are a big fries lover and anything fried shaped, you’ll love this viral cookie recipe.
Add to your shopping list!
Most of the ingredients you can easily find at stores. I highly recommend using your favorite good-quality chocolate for this recipe.
- Egg: will bind everything together.
- Butter: we will brown it for a deep, delicious caramelized flavor.
- Sugars: a mixture of brown and granulated sugar, one for crispy edges and the other for a chewy cookie.
- Salt: enhances the flavor of the cookie.
- All–purpose flour: gives structure.
- Baking powder: we are not using baking soda for this cookie recipe, like, for example, our sea salt cookie recipe, because we don’t want it to spread when baking.
- Vanilla extract: will elevate the cookie.
- Milk chocolate chips: use your favorite chocolate.
shop the ingredients
 Buy Now →
  Buy Now →
  Buy Now →
  Buy Now →
  Buy Now →
  Buy Now →
  Buy Now →
  Buy Now →
  Buy Now →
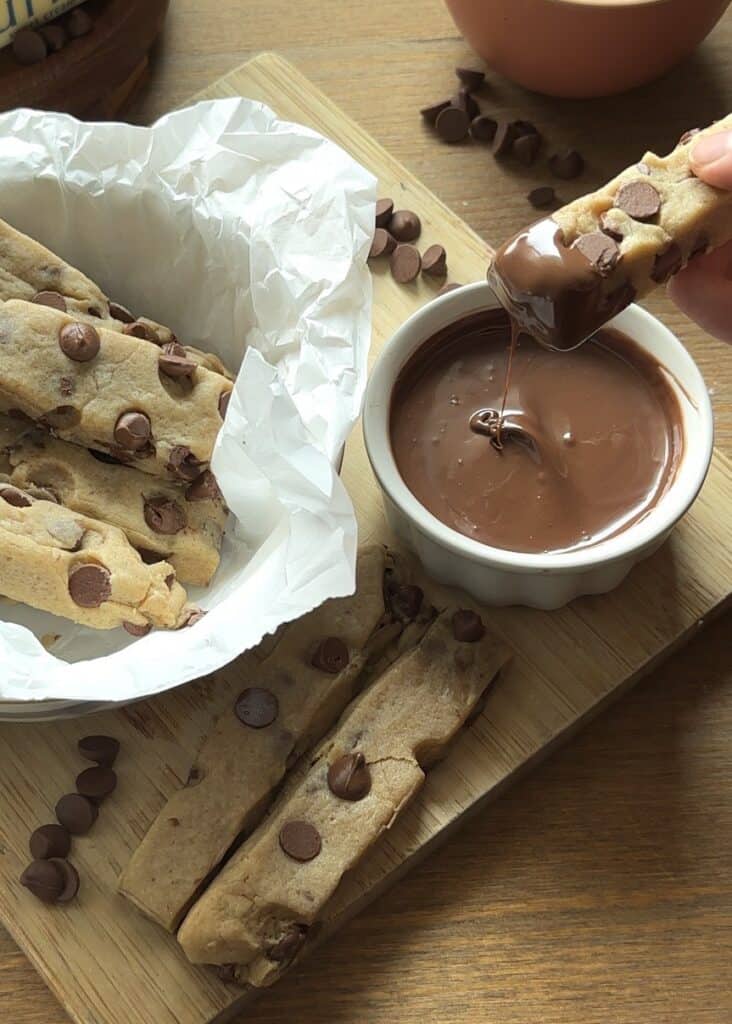
MY LATEST VIDEOS

How to brown butter
In so many recipes, it will ask for brown butter, which is very easy to do.
Start by weighing your butter; in a recipe, it will tell you if it wants the quantity in brown butter or in normal butter. The weight of the butter will reduce as it browns because the water evaporates.
It’s always best to weigh the butter before and after, as the weight of butter you have might be SLIGHTLY different from mine.
Place the butter in a large, light colored pan. The color of the pan matters a LOT because if it’s dark, it might be very difficult to see if it’s ready. First, you will melt the butter. After it’s melted, it will start to bubble. You should stir to make sure it doesn’t burn. After bubbling, it starts browning, and all you need is a nice golden brown color. When you achieve it, you can pass the butter through a sieve to remove any burnt particles from the bottom of the pan.
I recommend you do this using medium-low heat.
Best chocolate to use
For this recipe, we are using milk chocolate, specifically Callebaut 823 milk chocolate. It’s a favorite in our kitchen, and we love using it. I recommend you use a chocolate you love, since it’s a main ingredient in the recipe.

You can use dark chocolate or white chocolate if you’d like to.
How to make the cookies keep their shape and not spread
Two things matter when you make a cookie that you don’t want to spread. 1. The leavening agent you use. 2. Temperature of the cookie.
If you want a cookie that spreads like our chocolate chip cookie recipe, you need to use baking soda and baking powder. Since we want minimal spread for this cookie recipe, we are only using baking powder.
Make sure you freeze or refrigerate the cookies for at least 20 minutes. This will ensure they don’t grow too much.
After they come out of the oven, use a large flat object, like a ruler, for example, and make them straighter.

Key points in this recipe
- Browning butter.
- Refrigerate cookie dough.
- Baking time.
They are all very important for this recipe. Browning butter and making sure you don’t burn it is a very important point. If you want the cookies to keep their shape, they must be chilled in the fridge or freezer. Don’t over-bake them! You want crispy edges, chewy inside.

Best tips to make cookie fries
I think everything I mention here is very important when preparing this recipe.
- Brown the butter, do the extra step to go from a good cookie to a perfect-tasting cookie.
- Before you add the chocolate chips to the cookie dough, make sure it’s not hot or warm, as they will melt and leave streaks.
- Refrigerating the cookie dough or freezing it is very important for this recipe. It will help with keeping the shape so it doesn’t spread too much.
- Right after they leave the oven, reshape them, use a ruler or long flat object, and push it to make straight fries.
- Use a whisk for this recipe until you add the flour and chocolate chips; it must be folded with a silicone spatula. If you whisk it, it will become a liquid cookie and will spread and not hold shape AT ALL.
Baking tools you need
You don’t need fancy tools to prepare this recipe.
- Light colored large pan, to brown the butter.
- Spatula, to stir and combine. Use a silicone one so you can easily fold the ingredients and scrape the bowl easily.
- Whisk, for mixing the wet ingredients. It’s very important you switch from a whisk to a spatula after you add the all-purpose flour.
- Knife, needed to cut the cookie dough into long fries.
- Ruler or long and flat object, we will use it to shape the cookies right after they come out of the oven.
- Parchment paper, use two paper sheets to roll out the dough, super important so it doesn’t stick to the rolling pin.
- Rolling pin, you will use it to roll out the cookie dough to the thickness you want.
- Baking tray lined with parchment paper, to bake the cookies. You can use the same parchment paper you used to roll out the cookies.
shop the tools
 Buy Now →
  Buy Now →
  Buy Now →
  Buy Now →
 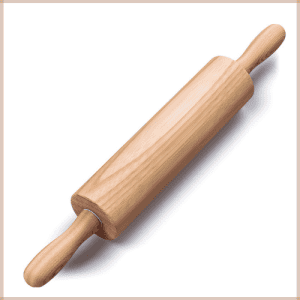 Buy Now →
 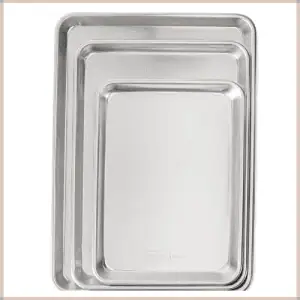 Buy Now →
 How to serve cookie fries
You can add a nice dipping sauce made from chocolate ganache or Nutella. A nice cold glass of milk would go perfectly with this cookie recipe, as they are very easy to dip in a glass.

Can I freeze cookie fries?
Yes! You can freeze the baked cookie fries, and you can also freeze them when they’re in cookie dough form.
Freeze it in cookie dough form. You prepare the cookie dough like normal, roll out the dough, and cut it. After you cut it, make sure all the fries have a little bit of separation so they don’t stick together. You can leave them in the tray with parchment paper, so all you have to do is remove the aluminum foil and bake from frozen. If you transfer them to a freezer bag, they can break. I would recommend you do this method if you know you are going to be baking them in the near future.
Freeze the baked cookies: You can also freeze them after baking, which is what I do, so I can just warm up a cookie whenever I need it. I don’t always want to turn on the oven to bake one cookie, but I can always microwave a cookie to enjoy.

After they bake, let them cool down fully; they will harden slightly with time. Freeze them for 2-3 hours and then transfer them to a large freezer-safe bag. Something to keep in mind is that the cookies need to stay flat; they are very long and might break. Place them inside a large freezer-safe container so they are safe.
Make sure you add the date and name of the food; this way, you can easily identify what it is and also know if it’s safe to eat. They are safe in the freezer for 3-4 months.
Always use food containers or bags made specifically for food and to stay in the freezer. A bag that is not safe might have chemicals or products that should not touch our food. A container that is not safe for the freezer might break in the cold.
Freezer-safe products keep our food safe and make it last longer!
Store leftover cookies
If, after you bake the cookies, you have some extra that you don’t want to enjoy at the moment but also don’t want to freeze because you know you are going to eat it later, you can easily store them in a food-safe container.
Add a layer of kitchen paper towel to absorb any moisture so we don’t have soggy or wet cookies.
You can store them for up to 4 days. Microwave them slightly to enjoy them warm.
Freezing the dough is important to prevent the cookie fries from spreading too much during baking. Skipping this step could result in flatter, less defined cookie fries
And that’s the whole recipe, thank you so much for trusting us with another cookie recipe. You can find us on social media, Instagram, Facebook, YouTube, and TikTok!
Print
Chocolate Chip Cookie “Fries”
- Prep Time: 30 minutes
- Cook Time: 13 minutes
- Total Time: 43 minutes
- Yield: 12 cookie fries
Description
Crispy outside, chewy interior. They are delicious XL cookie fries!
Ingredients
- ½ cup (120 g) brown butter
- 3 ½ tbsp (40 g) granulated sugar
- 1/3 cup (70 g) brown sugar
- ½ tsp salt
- 1 egg
- 1 tsp vanilla extract
- 1 ¼ cups (160 g) all-purpose flour
- 1 tsp baking powder
- 1 cup (150 g) milk chocolate chips
Instructions
- To prepare the best xl cookie fries, start by browning the butter, in a light colored pan place about 2/3 cup (151g) of unsalted butter, melt it over medium heat, stir constantly, once it starts to bubble keep an eye on it as it takes about 8 minutes to brown but it can happen very quickly, you should have left about ½ cup (120g) of brown butter.
- Let the butter cool slightly.
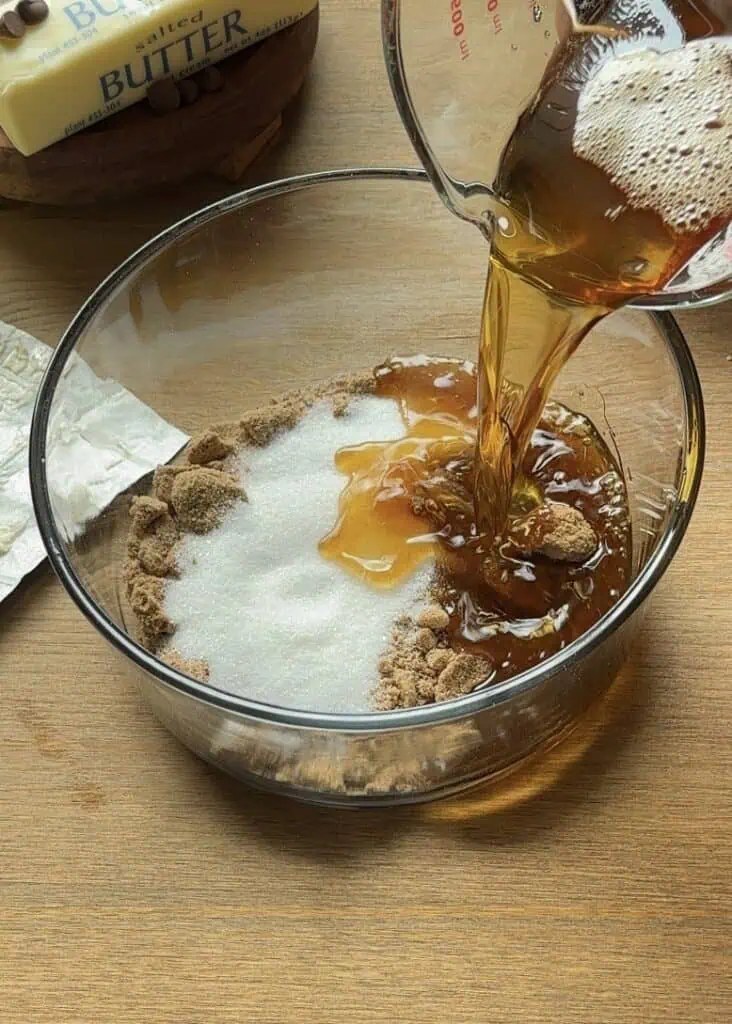
- In a large mixing bowl, whisk together 3 ½ tbsp (40g) granulated sugar, 1/3 cup (70g) brown sugar, and ½ tsp salt.
- Add the cooled butter and whisk for about 3 minutes. Add 1 egg and 1 tsp of vanilla extract and whisk again.
- Switch from the whisk to a spatula. Add 1 ¼ cups (160g) all–purpose flour, and 1 tsp baking powder. Stir until just combined. Add 1 cup (150 g) milk chocolate chips and stir.
- Let the dough chill for 10 minutes. Prepare a sheet of parchment paper and place the cookie dough in the center. Add another sheet of parchment paper on top. Using a rolling pin, roll out the dough. Using a knife, cut the cookie into long strips.
- Place the cookies in a lined tray with parchment paper and refrigerate for about 20-30 minutes.
- Preheat the oven to 355F (180 °C) and bake for 13 minutes. After they come out of the oven, shape them carefully using a ruler or a flat, long object.


ARCHER'S FOOD
Easy and delicious recipes


My first time trying your recipes— I was not disappointed! I definitely WILL be making these again, easy and beginner friendly but very rewarding. The taste is a little dull for me, but it’s nothing extra sugar and chocolate chips can’t fix lol.
thank you for your comment!
yummy
A cookie recipe without vanilla extract and without salt? Super bland. I should have known better.