
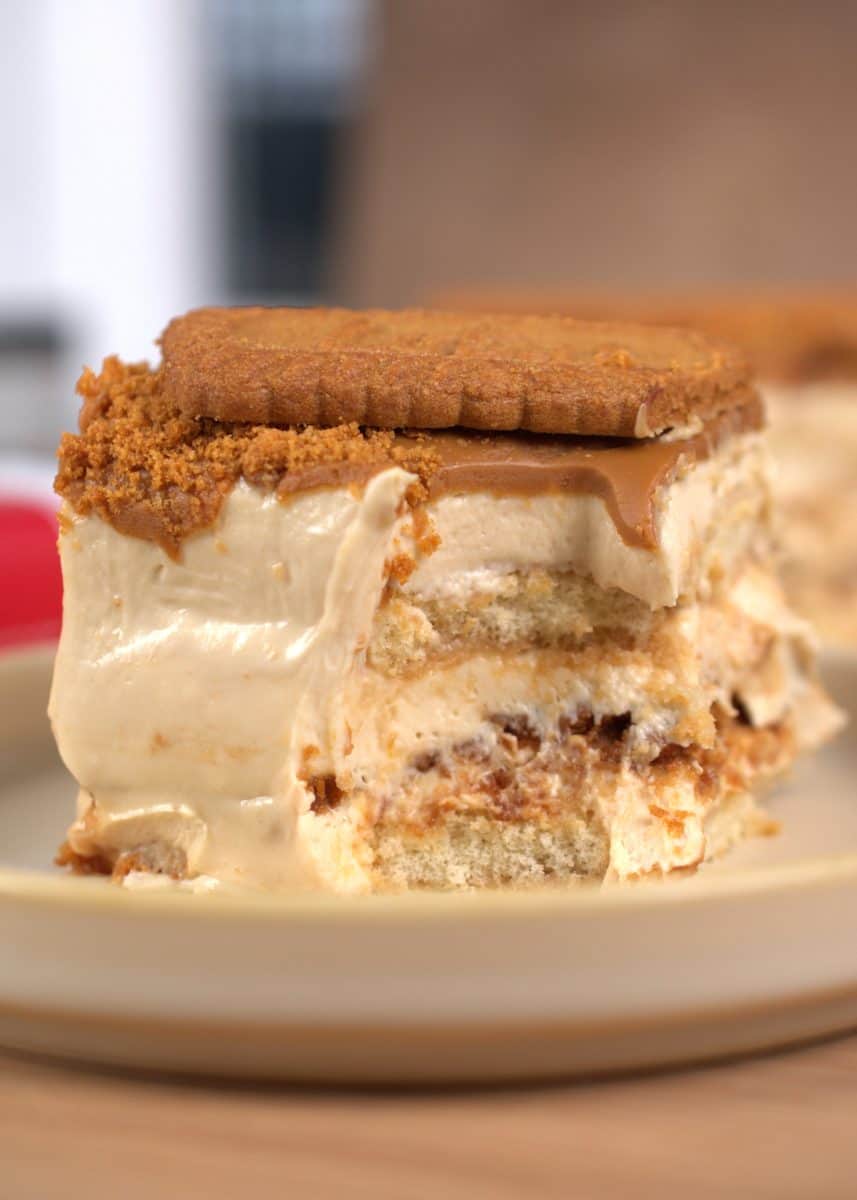
A delicious and creamy no-bake Biscoff tiramisu. This delicious recipe doesn’t use coffee, gelatin, or eggs.
We love easy-to-prepare Biscoff desserts; they’re so many people’s favorite, we have shared so many Biscoff recipes, baked cheesecakes, no baked cheesecake, and many others.
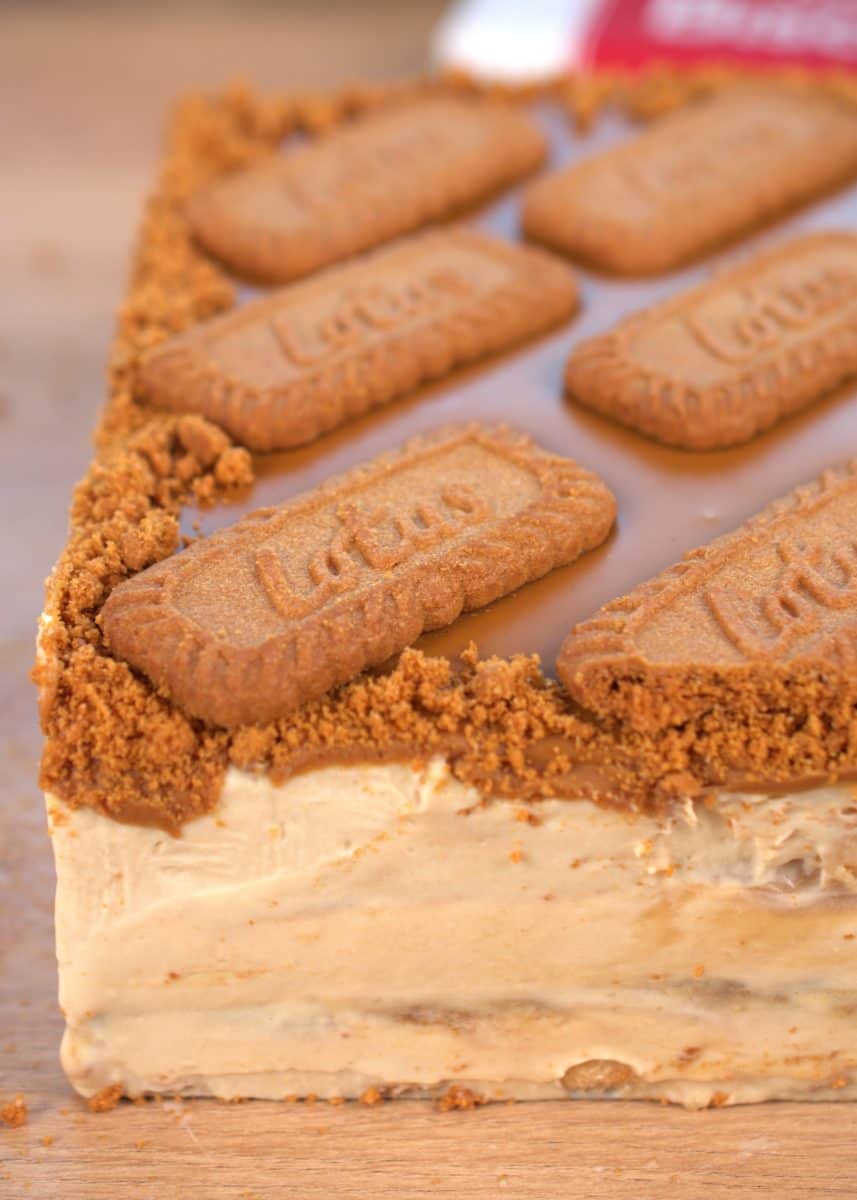
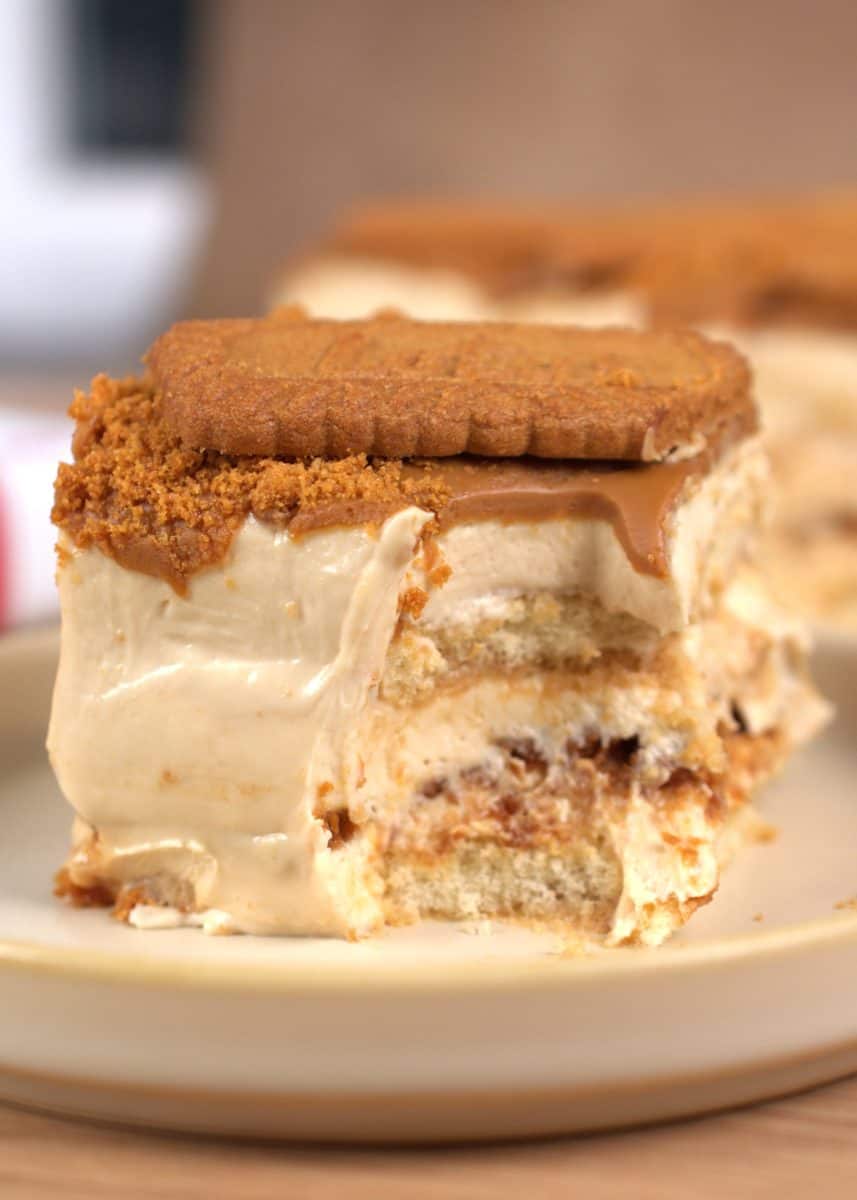
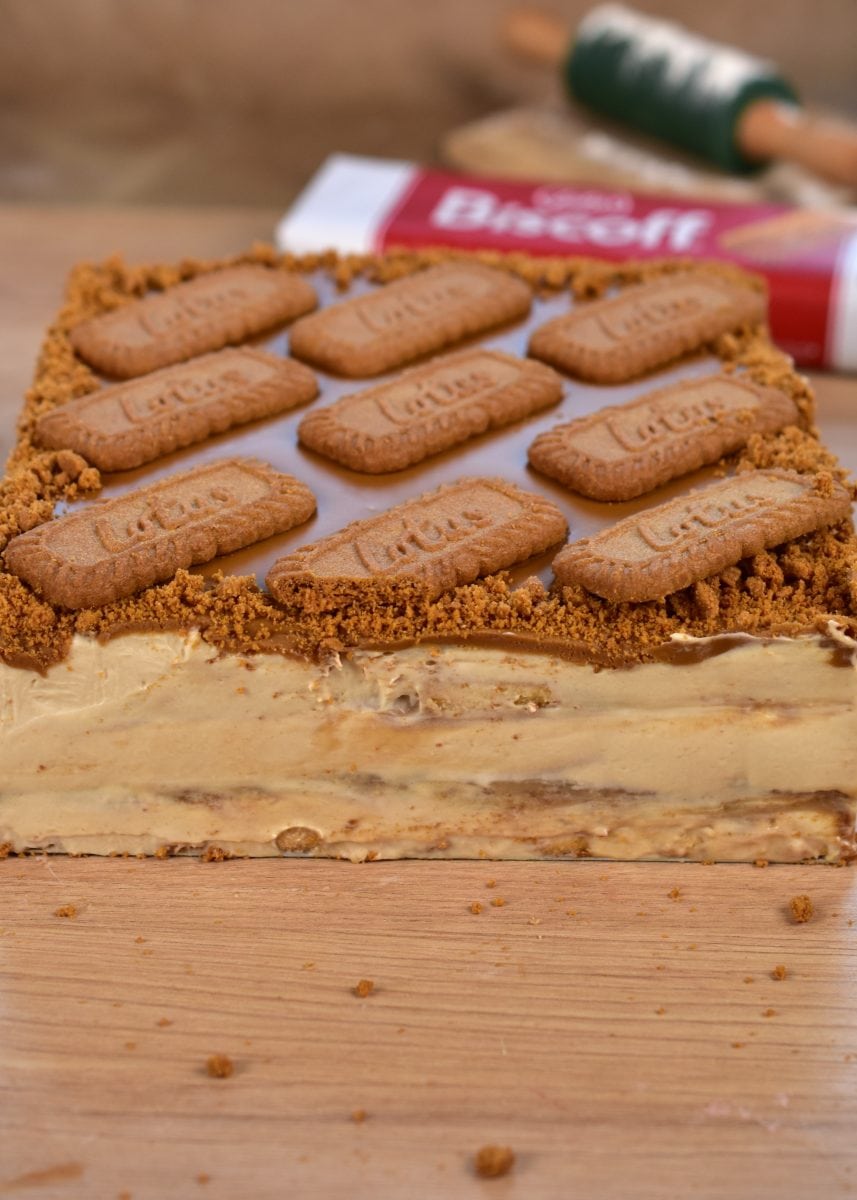
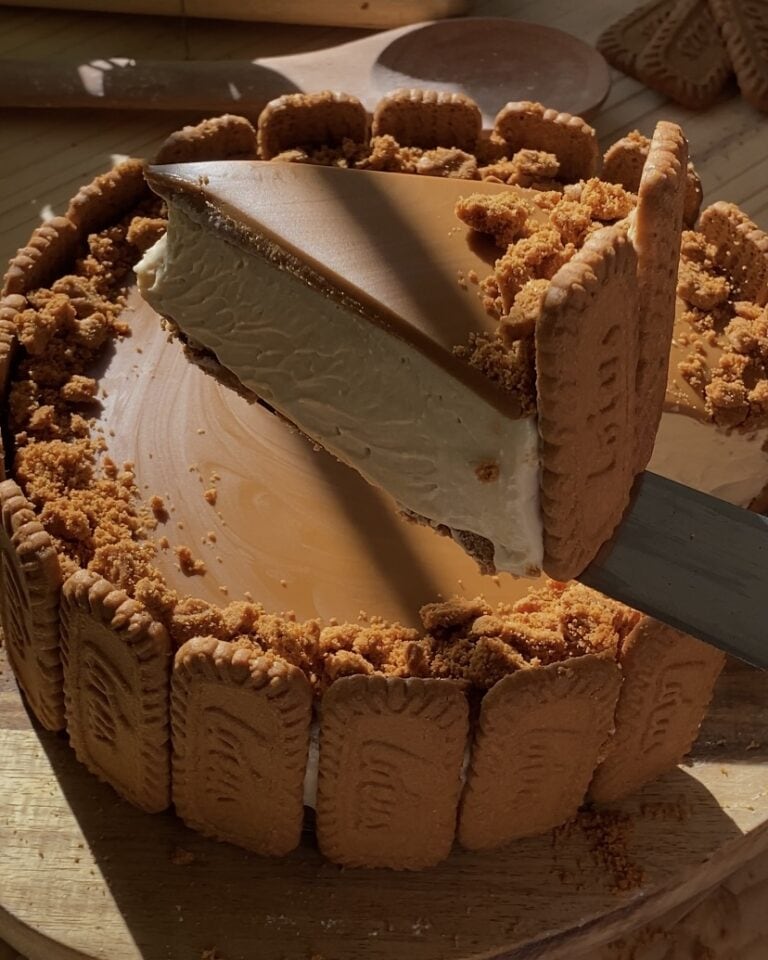
This recipe was so fun to create. We have a soft, soaked ladyfingers base topped with a creamy Biscoff tiramisu filling, soaked Biscoff cookies on top, another layer of filling, more ladyfingers, and a final layer of tiramisu filling. It’s all topped with a creamy Biscoff spread, crushed and whole biscuits.
This makes it a beautiful and delicious dessert for basically any occasion. It has perfect layers, doesn’t take a lot of time to make, and it’s so enjoyable to eat.
Add to your shopping list!
Here is a list of all the ingredients we are going to use to make this delicious Biscoff tiramisu. Some of the ingredients you probably already have at home, and the rest are very easy to find at stores or online.
- Milk: instead of coffee, we are going to use a mixture of milk and Biscoff spread to soak the ladyfingers and Biscoff cookies.
- Biscoff spread: it’s a very smooth and sweet spread made of Biscoff cookies, which you can find at stores or online.
- Mascarpone cheese: gives the tiramisu the ideal texture.
- Cream cheese: since we are not using eggs, a little bit of cream cheese will help achieve a creamy and smooth filling.
- Biscoff cookies: for the delicious biscuit layer.
- Powdered sugar: will sweeten the tiramisu. We are using less than usual because this recipe has other ingredients that are very sweet.
- Heavy whipping cream: at least 35% content in fat. We will whip it to medium peaks and will give it an airy, creamy texture.
 Buy Now →
  Buy Now →
 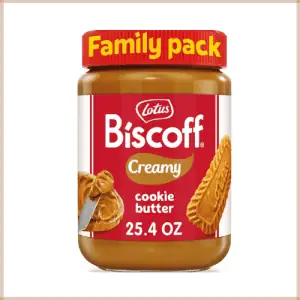 Buy Now →
 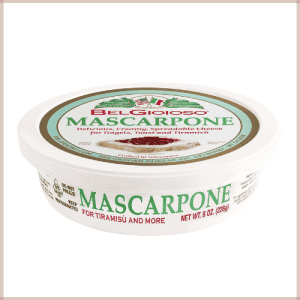 Buy Now →
  Buy Now →
  Buy Now →
  Buy Now →
 Mascarpone cheese with cream cheese
The only reason why we decided to use both is to have the perfect texture on our tiramisu. When you make a tiramisu recipe without eggs, the texture is not quite nice; it looks slightly grainy, like overmixed without even being overmixed.
That’s something we discovered recently, and it changed the texture of all our desserts completely.
Even though we use cream cheese for the perfect texture, you mustn’t overmix the mascarpone.
Things that cause the mascarpone to curdle
Mascarpone is a very delicate type of creamy Italian cheese. There are different things that can cause it to look curdled or have a grainy texture.
- Temperature changes. If it goes from cold to warm to cold again, that can cause it to curdle even if the temperature difference is not that much.
- Overmixing. Think of mascarpone as heavy whipping cream (even if they are completely different). When you overmix heavy cream, it turns into a grainy mixture, then butter. Something similar happens to the mascarpone cheese. It turns into a curdled mixture that won’t turn creamy.
- Mixing it with an acid. That can cause it to split.
Make sure you remove the mascarpone cheese from the fridge about 1 hour before you start making this dessert.
Use a hard wooden spatula to combine it with the rest of the ingredients instead of a whisk.

Gelatin-free desserts
Making gelatin-free desserts is easier than you think, there’s different things you can do to make sure your no-bake dessert has a nice consistency and doesn’t collapse when chilling.
- Don’t over-mix any of the ingredients.
- For this recipe, we are using Biscoff spread. When it cools down, it solidifies a little.
- The heavy whipping cream is whipped to medium peaks, which will help with the texture and structure.
- Use full-fat products, don’t use any ‘light’ products or reduced in fat.
Best tips to make a Biscoff tiramisu
This is a really easy recipe to prepare, but if I can teach you some tricks, it will be even easier, and you will 100% succeed.
- Warm up the Biscoff spread slightly to add it to the cream cheese-mascarpone mixture. It will make it easier to combine.
- Whip the heavy whipping cream in a clean, cold, and dry bowl. That’s very important, as if the bowl is dirty, it will prevent it from whipping. It’s recommended to keep the bowl in the freezer before you whip the cream.
- Don’t over-mix: the mascarpone cheese, heavy whipping cream, and final mixture.
- I recommend you soak the ladyfingers for longer than usual.
Overwhipped heavy cream, what to do?
If by any chance you accidentally over-whip the heavy whipping cream, there’s a point where you can actually fix it, when it’s stiff peaks. If it has reached the curdle stage or you see chunks of fat and liquid, that’s too late to fix it.
- Option 1. Separate ¼ of the whipped cream and microwave it until warm and liquid. Add it carefully using a spatula and folding only.
- Option 2. Add liquid heavy whipping cream to the overwhipped cream. You should start by adding about ¼ of the total weight of the whipped cream.
- Option 3. Combine both methods. Microwave a part of the cream and also add liquid cold cream.
Recipe elaborations and order.
- Prepare the Biscoff-milk mixture.
- Whip the cream until medium peaks.
- Prepare the tiramisu filling mixture.
- Assemble.
- Chill and decorate.
How to assemble a Biscoff tiramisu
For this recipe, we wanted to play with different textures and flavors. That’s why we are using both ladyfingers and Biscoff cookies for the layers.
For more accurate results, weigh the tiramisu filling and divide the total weight by 3.
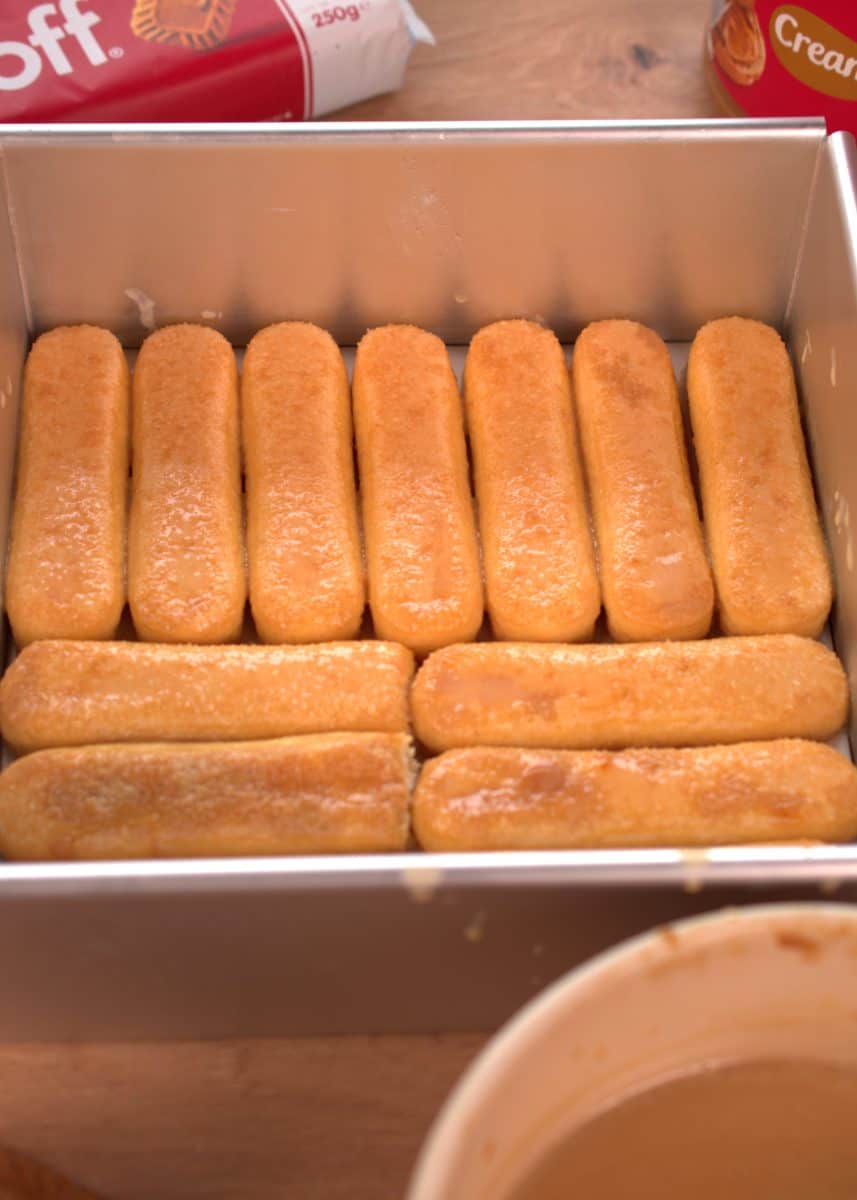
- Start with the base of soaked ladyfingers.
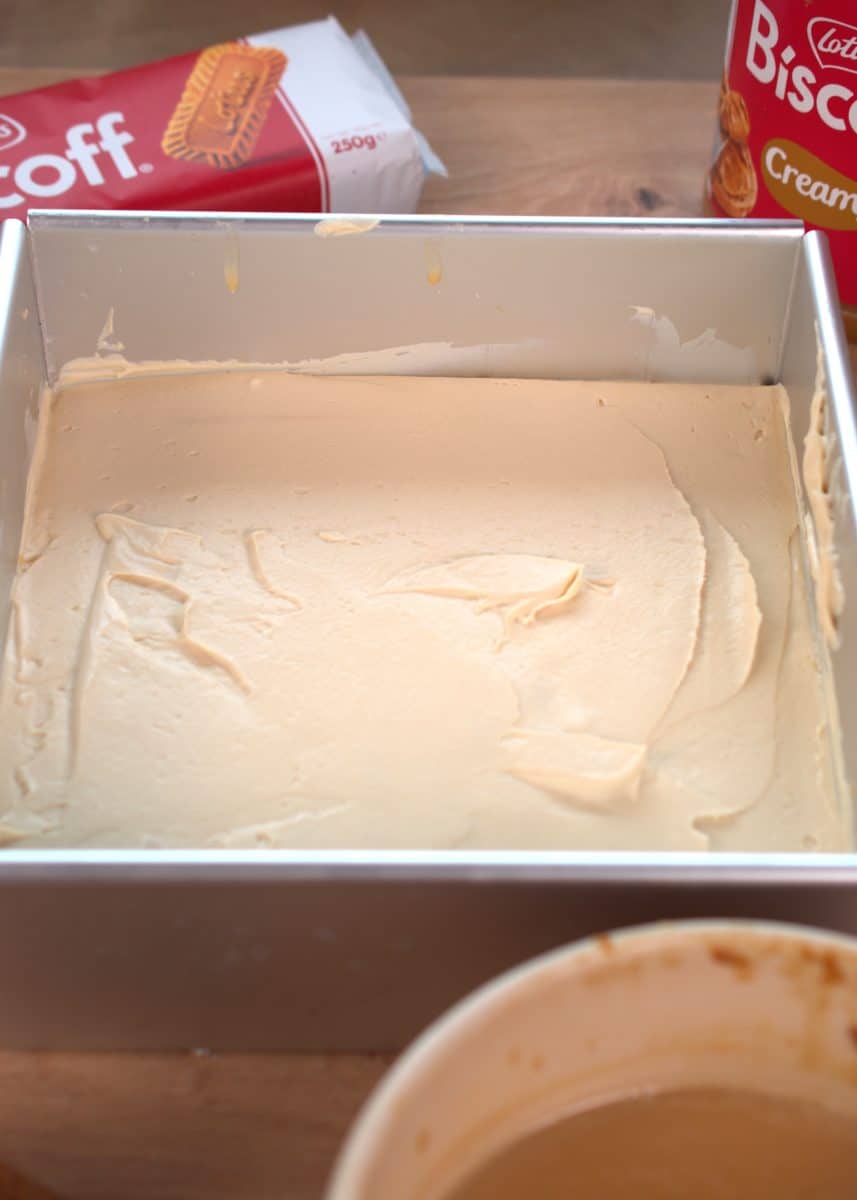
- Add one layer of mascarpone mixture and smooth the top.
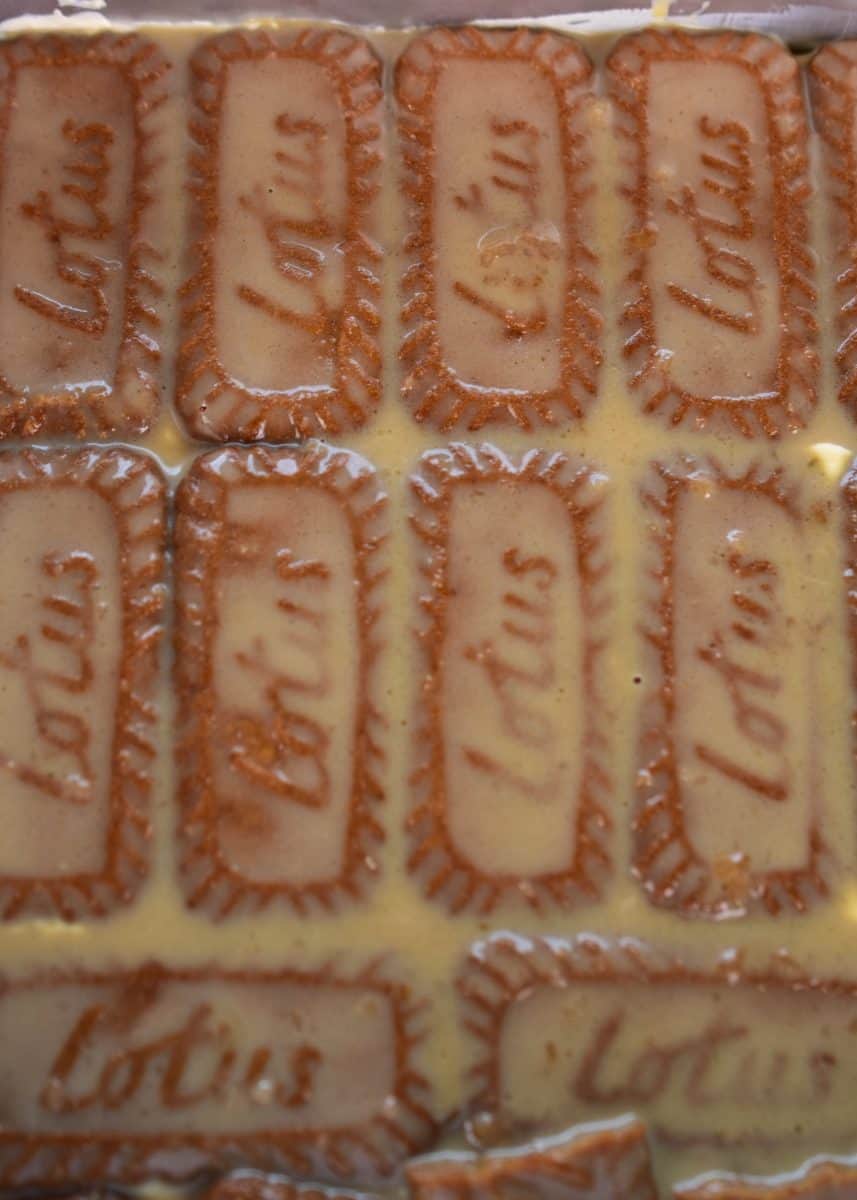
- Soak Biscoff cookies in the milk mixture and add them, covering the mascarpone filling.
- Add half of the tiramisu filling and smooth it out.
- One last layer of soaked ladyfingers to top.
- Finalize with the rest of the filling.
- Add melted Biscoff spread after chilling.
Tools you need!
- Mixing bowls, you will need different bowls to be able to do this recipe.
- Whisk, electric hand whisk, or stand mixer, you will need it to whip the cream to medium peaks. Choose whatever you prefer. I would recommend you use a stand mixer if you have one.
- Spatulas, wooden and silicone. I like to use a hard spatula to first work the ingredients and then a silicone smooth one to fold the ingredients.
- Pan, you need a pan to combine the milk with the Biscoff spread and melt. You can also do it in the microwave using a safe microwave bowl.
- Square pan, I love using a pan with a detachable bottom; it makes it so much easier, but if you don’t have it, you can use a normal square pan lined with parchment paper. You can easily lift the tiramisu by pulling from the sides.
- Offset spatula, to smooth out the tiramisu filling.
- I like to use a chocolate tempering spatula for making the whole surface very flat and smooth.
 Buy Now →
  Buy Now →
  Buy Now →
  Buy Now →
  Buy Now →
  Buy Now →
 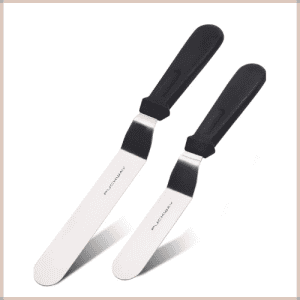 Buy Now →
 How to serve a Biscoff tiramisu
This dessert must be served cold. Once it gets warm, it melts and collapses. It’s also not safe to consume if it has been stored at room temperature.
If you want to add some freshness to this Biscoff dessert, you can add some cut fresh strawberries; they combine perfectly with the Biscoff.
How to store a Biscoff tiramisu
This dessert can be refrigerated, and it’s safe for up to 3-4 days. Keep it in the same square pan and cover it with aluminum foil. Make sure to add a tray or plate under the pan to avoid any spills in the fridge. You can also move it to another container instead.
Freeze a Biscoff dessert.
You can freeze this tiramisu; it can slightly change the final texture, but not too much. It freezes beautifully.
You can freeze the tiramisu whole or in servings.
- Freeze the whole Biscoff tiramisu: in the same square pan or in a plate, cover it with aluminum foil, and place it inside a large enough freezer-safe container.
- Freeze in servings: I recommend you cut the tiramisu into 9 servings. Place them in a prepared tray with parchment paper for easy removal. Make sure to leave some distance between them so you don’t struggle to separate them. Freeze them for 2-4 hours until they are hard; they don’t need to be fully frozen. Add them to a freezer-safe bag and place the bag inside a freezer container.
*Make sure to add the name of the food (Biscoff tiramisu) and the date of the day you made it. This way, you can know if it’s safe to eat, and also you know what it is. Which is not easy if it doesn’t have a name tag.
*Use food-safe and freezer-safe containers and bags. Food containers are for food; other containers contain materials not safe for humans. Freezer-safe products are made to be used in the freezer and keep the product safe.
And that’s the whole recipe. Thank you so much for trusting us with our recipes. We create them with so much love and are very much enjoyed in our family. We will see you again tomorrow with another amazing recipe.
If you try this recipe, make sure to leave us a review! It helps so much. Select as many stars as you think this recipe deserves, and add a little comment. We appreciate any review we can get!
Don’t forget to follow our Facebook page for new videos every day!

Biscoff tiramisu recipe
- Yield: 9 servings
- Category: Dessert, Dessert / Cake
- Method: Layered Dessert, No bake, no oven, No-Bake
Description
A delicious, easy-to-prepare creamy Biscoff tiramisu recipe.
Ingredients
MILK MIXTURE
- 1 ¼ cup (300ml) milk
- 2 tbsp Biscoff spread
BISCOFF FILLING
- 1 cup (240ml) heavy whipping cream
- 2 cups (500g) mascarpone cheese, room temperature
- Slightly over ¾ cup (200g) cream cheese, room temperature
- ½ cup (170g) Biscoff spread
- ½ cup (60g) powdered sugar
ASSEMBLE
- 13 ladyfingers, bottom layer
- 18 Biscoff cookies
- 13 ladyfingers top layer
DECORATE
- 2/3 cup (200g) Biscoff spread
- 9 Biscoff cookies
- 2 Biscoff cookies, crushed
Instructions
- Start by preparing the milk mixture to soak the ladyfingers. In a pan, combine 1 ¼ cup (300ml) milk with 2 tbsp Biscoff spread, and warm it up until the Biscoff is fully melted. Set aside.
- Prepare the Biscoff tiramisu filling. Whip 1 cup (240ml) heavy whipping cream using a stand mixer, with the whisk attachment, set on high speed. You want to whip until you reach medium peaks.
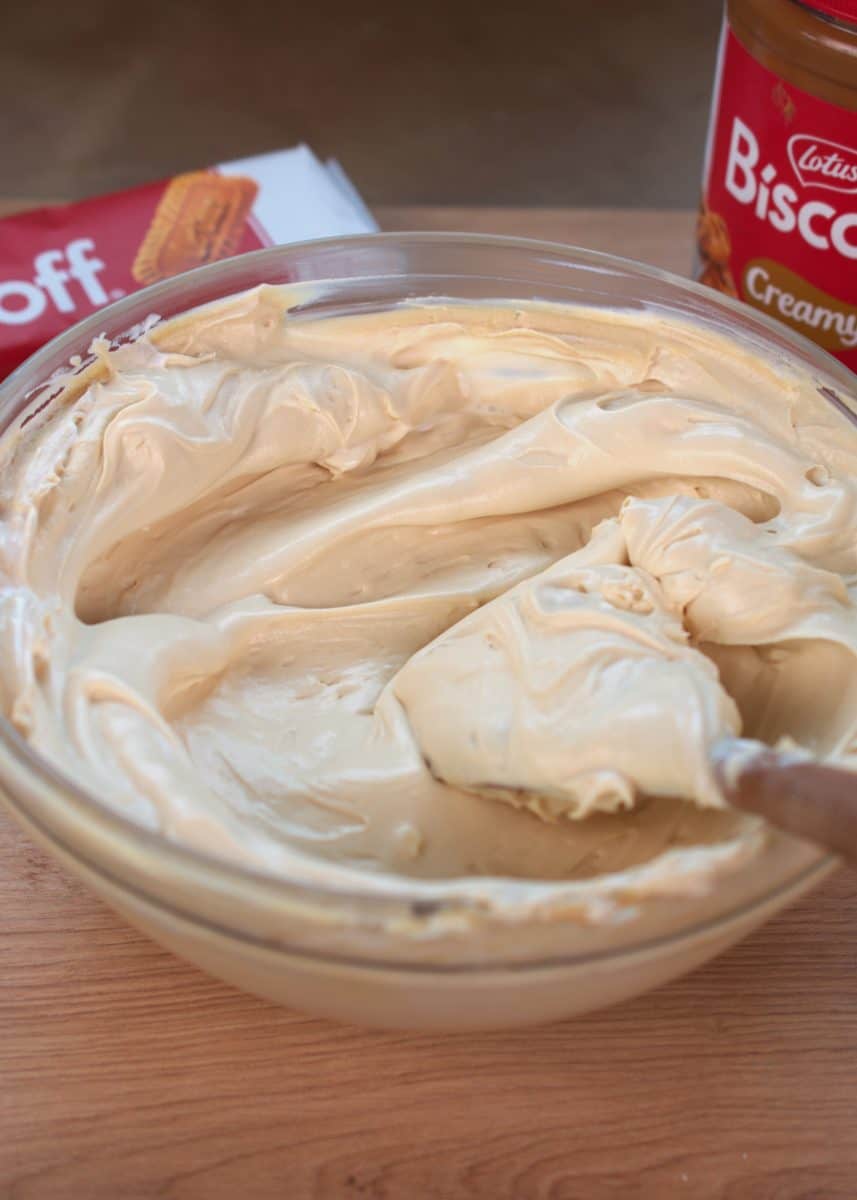
- In a mixing bowl, combine 2 cups (500g) room temperature mascarpone cheese, slightly over ¾ cup (200g) room temperature cream cheese, and ½ cup (170g) Biscoff spread. Work the mixture with a hard spatula.
- Sift ½ cup (60g) powdered sugar and add it to the cream mixture. Fold in the whipped cream with gentle movements. Don’t overmix.
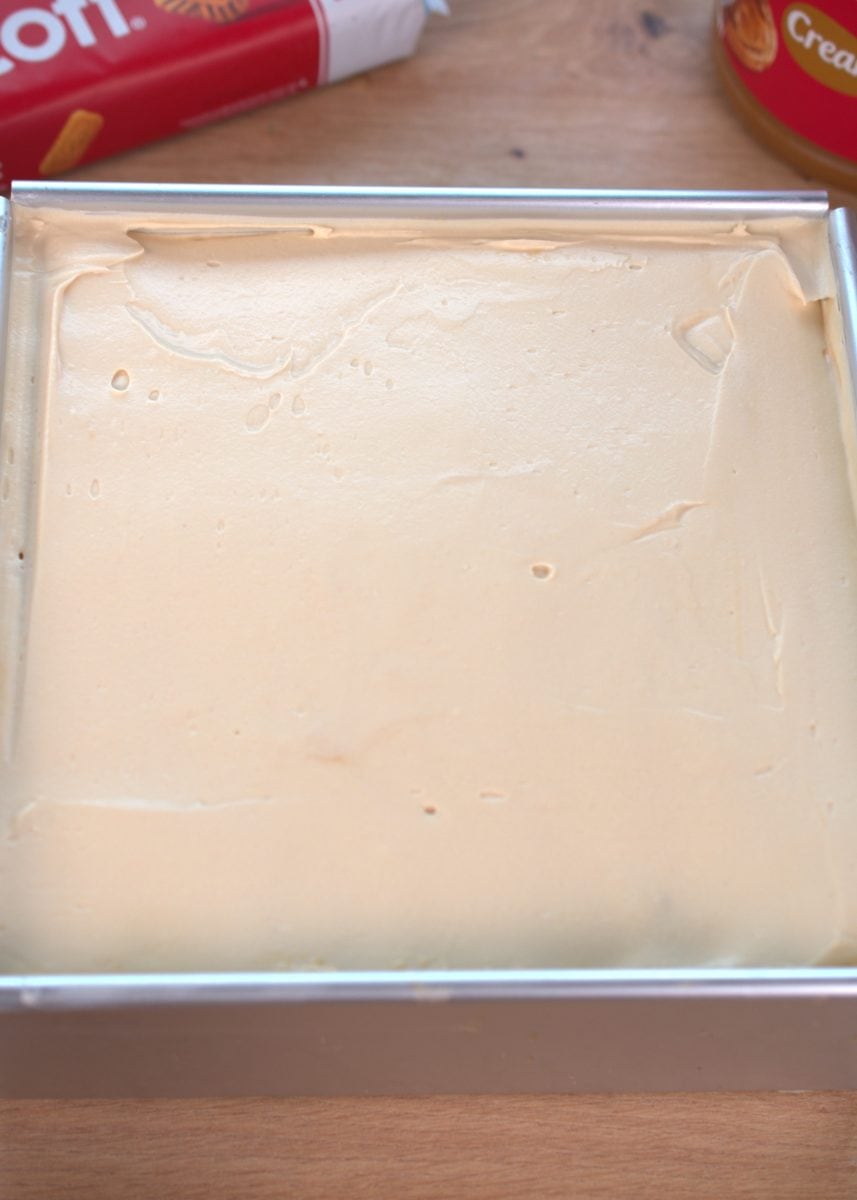
- Assemble the tiramisu. Soak 13 ladyfingers in the milk mixture, making sure to soak them long enough so they can absorb the liquid. Place them at the bottom of an 8-inch 20cm pan. Add 1/3 part of the filling and smooth it out.
- Soak 18 biscoff cookies in the milk mixture and place them on top of the mascarpone filling. Add ½ of the tiramisu filling and smooth it out.
- Soak 13 ladyfingers and place them over the cream filling. Cover with the remaining filling and smooth it out.
- Refrigerate for at least 8 hours to overnight.
- To decorate, melt 2/3 cup (200g) Biscoff spread and pour it over the tiramisu. Tilt the pan around so it covers the top. Add 9 biscuits and then crush two Biscoff cookies and sprinkle them around the edges.


Biscoff is so delicious, I am obsessed with this recipe