
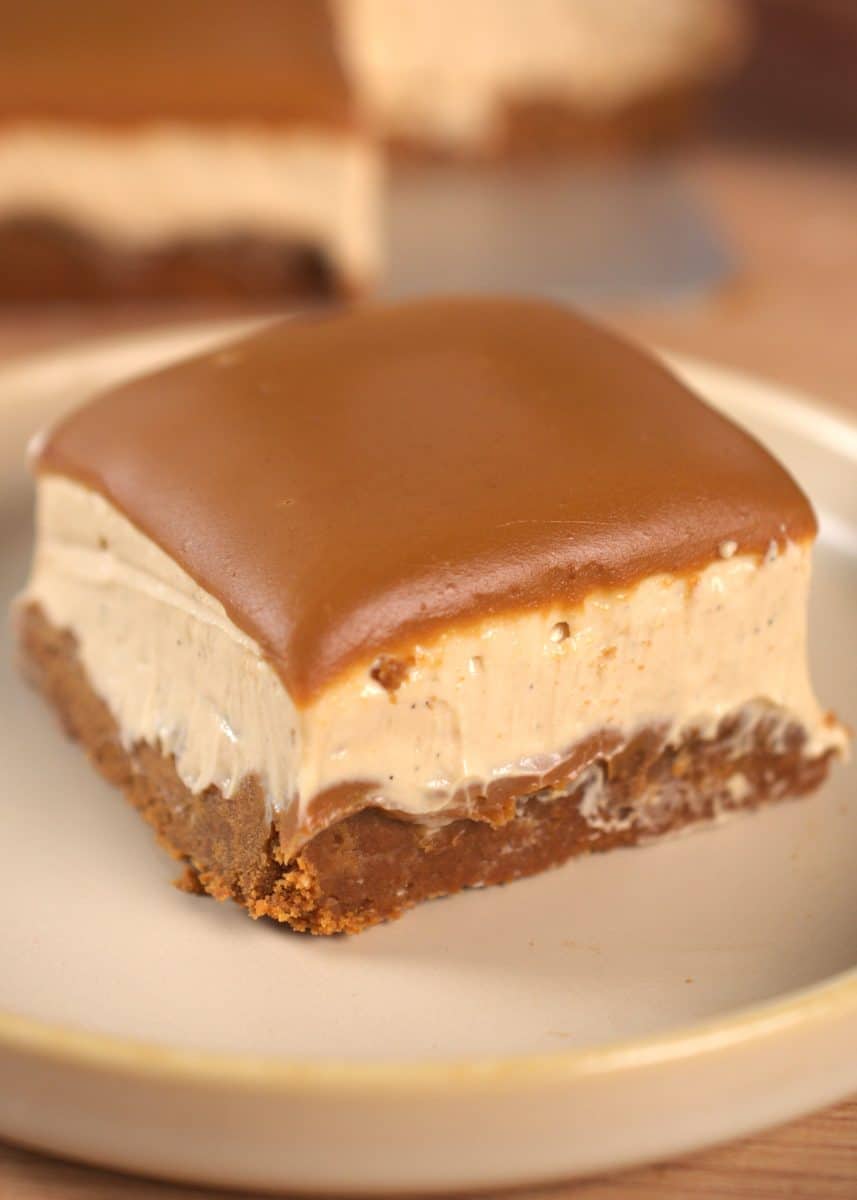
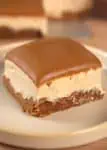
Vanilla Biscoff Cheesecake Bars
Today, we bring a dessert that is going to be everyone’s favorite. Vanilla Biscoff cheesecake bars. Who doesn’t love a creamy no-bake Biscoff dessert?

It’s made with a buttery Biscoff crust and a vanilla bean Biscoff filling. All topped with creamy and melted Biscoff spread. We have shared in the past a Biscoff cheesecake bar recipe and many other Biscoff cheesecakes you can find easily on our website.
This dessert is easy to prepare and, most importantly, doesn’t have gelatin at all; all you need are proper, good-quality ingredients and the right technique, so you can also do this without gelatin.

Add to your shopping list!
Most of the ingredients here you can easily find at any grocery store. If you can’t find the Biscoff or Biscoff spread in the stores or online, try to find any substitute with a speculoos cookie and cookie butter.
- Biscoff cookies: we will crush them into fine powder.
- Biscoff spread: we will use it in the filling and to decorate. You might need to melt it for the filling if it’s too hard.
- Butter: We need to melt it and cool it down slightly before adding it to the Biscoff cookies. If you use a food processor instead of a blender, you might need to add slightly more than it calls for in the recipe, as we use a blender and it gives us more powdery biscuits.
- Cream cheese: room temperature and full-fat. I mention full-fat because any lighter version might not hold the cheesecake shape, and you’d have to add gelatin.
- Heavy whipping cream: make sure you are using one with at least 35 % of fat content. We are going to whip it until soft peaks.
- Powdered sugar: fine sugar that comes from blended granulated sugar. You can make it at home with just a blender and sugar; it’s very powdery.
- Salt: Salt is very important to enhance the flavor of the cheesecake. I forget to add it many times, and the dessert turns out amazing anyway, but it’s so much better with salt in it.
- Vanilla bean: slice it in half with a knife and then, using kitchen tongs (the thin ones for delicate presentation), press them on the vanilla bean to remove all the beans from the pod. It’s way more effective than using a knife to scrape the vanilla.
buy the ingredients here
 Buy Now →
  Buy Now →
  Buy Now →
  Buy Now →
  Buy Now →
  Buy Now →
  Buy Now →
  Buy Now →
 Gelatin-free desserts
Making gelatin-free desserts is easier than you think, there’s different things you can do to make sure your no-bake dessert has a nice consistency and doesn’t collapse when chilling. It’s all about the ingredients, the technique, and the times.

- Don’t over-mix any of the ingredients. You don’t want to over-mix the cream cheese, as it will become liquid or the heavy whipping cream because it will curdle.
- For this recipe, we are using Biscoff spread. When it cools down, it solidifies a little, which helps a lot with the structure of the cheesecake.
- The heavy whipping cream is whipped to soft peaks, which will help with the texture and structure. The reason why we do it until soft peaks is because we are going to combine it with the cream cheese and Biscoff, which might take slightly longer than some other no-baked desserts.
- Use full-fat products, don’t use any ‘light’ products or reduced in fat. Reduced in fat products tend not to work well in desserts, especially one that are not baked and needs to hold their shape on their own without any gelatin products.
- Don’t use a whisk when mixing the cream cheese; use only a hard spatula and a silicone spatula.
How to fix overwhipped heavy cream
If by any chance you accidentally over-whip the heavy whipping cream, there’s a point where you can actually fix it, when it’s stiff peaks. If it has reached the curdle stage or you see chunks of fat and liquid, that’s too late to fix it.
It has happened to us so many times, and we used to not know what to do until you start experimenting with different options.
- Option 1. Separate ¼ of the whipped cream and microwave it until warm and liquid. Add it carefully using a spatula and folding only being very gentle.
- Option 2. Add liquid heavy whipping cream to the overwhipped cream. You should start by adding about ¼ of the total weight of the whipped cream.
- Option 3. Combine both methods. Microwave a part of the cream and also add liquid cold cream.
Key points in this recipe
- The whipped cream.
- Cream cheese.
- Chill time.
Recipe elaborations and order
- Biscoff crust.
- Whip the heavy cream.
- Prepare the cheesecake filling.
- Assemble.
- Chill.
- Decorate.


Best tips to make vanilla Biscoff cheesecake bars
We love making easy recipes that are very understandable for everyone, but here are some tips so you can make them, and the process will be easier.
- If the Biscoff spread is too cold and hard, I recommend you microwave it slightly in 10-15 second intervals and stirring after each time. This will help with any unnecessary lumps the Biscoff can have when mixing it with the room temperature cream cheese.
- Whip the heavy whipping cream in a clean, cold, and dry bowl. That’s very important, as if the bowl is dirty, it will prevent it from whipping. It’s recommended to keep the bowl in the freezer before you whip the cream.
- Don’t over-mix the heavy whipping cream; it will curdle. We shared how to fix overwhipped cream on top.
- Refrigerate this cheesecake for enough time so it has time to set and the flavors can just make the whole dessert taste better.
- I recommend you use a kitchen thin tong to scrape all the vanilla bean from the pod. Reserve the pods to make vanilla extract or infuse.
Tools you need!
- Mixing bowls, you will need different bowls to be able to do this recipe.
- Whisk, electric hand whisk, or stand mixer, you will need it to whip the cream to soft peaks.
- Spatulas, wooden and silicone. I like to use a hard spatula to first work the ingredients like cream cheese and Biscoff spread, and then a silicone smooth one to fold the ingredients and scrape the bowl.
- Square pan, I love using a pan with a detachable bottom; it makes it so much easier, but if you don’t have it, you can use a normal square pan lined with parchment paper. You can easily lift the cheesecake by pulling from the sides. Use parchment paper that doesn’t melt with wet ingredients.
- Offset spatula, to smooth out the cheesecake filling.
- I like to use a chocolate tempering spatula for making the whole surface very flat and smooth.
- Food processor or blender, you will need it to crush the biscuits very finely.
shop the tools
 Buy Now →
  Buy Now →
  Buy Now →
  Buy Now →
  Buy Now →
  Buy Now →
  Buy Now →
  Buy Now →
  Buy Now →
 How to serve a Vanilla bean Biscoff cheesecake bar
This dessert must be served cold. Once it gets warm, it can melt after a while and collapse. It’s also not safe to consume if it has been stored at room temperature, as it contains dairy products that are not safe to stay out of the fridge for longer than 2 hours.
If you want to add some freshness to this Biscoff dessert, you can add some cut fresh strawberries; they combine perfectly with the Biscoff.
How to store a Biscoff cheesecake
This dessert can be refrigerated, and it’s safe for up to 3-4 days. Keep it in the same square pan and cover it with aluminum foil. Make sure to add a tray or plate under the pan to avoid any spills in the fridge. You can also move it to another container instead.
Freeze a Biscoff dessert.
You can freeze this lotus dessert; it barely changes the texture of the cheesecake, It freezes beautifully.
You can freeze the cheesecake bars whole or in servings.
- Freeze the whole Biscoff cheesecake: in the same square pan or in a plate, cover it with aluminum foil, and place it inside a large enough freezer-safe container.
- Freeze in servings: I recommend you cut the cheesecake into 9 servings. Place them in a prepared tray with parchment paper for easy removal. Make sure to leave some distance between them so you don’t struggle to separate them. Freeze them for 2-4 hours until they are hard; they don’t need to be fully frozen. Add them to a freezer-safe bag and place the bag inside a freezer container.
*Make sure to add the name of the food and the date of the day you made it. (day/month/year or month/day/year, depending on what you prefer).This way, you can know if it’s safe to eat, and also you know what it is. Which is not easy if it doesn’t have a name tag.
*Use food-safe and freezer-safe containers and bags. Food containers are for food; other containers contain materials that are not safe for humans. Freezer-safe products are made to be used in the freezer and keep the product safe.
And that’s the whole recipe, I hope you love it and recreate it at home!
If you try this recipe, make sure to leave us a review! It helps so much. Select as many stars as you think this recipe deserves and add a little comment. We appreciate any review we can get!
Don’t forget to follow our Facebook page for new videos every day!
Vanilla Biscoff Cheesecake Bars
Delicious and creamy no-bake Vanilla Biscoff cheesecake bars. A gelatin-free dessert that everyone will love!
- Total Time45 minutes
- Yield9 servings
Ingredients
CRUST
- 2 ½ cups, finely crushed (300 g) Biscoff cookies
- 5 tbsp (70 g) unsalted butter, melted and cooled
CHEESECAKE FILLING
- 1 cup (250 ml) heavy whipping cream
- Slightly over 2 cups (500 g) cream cheese, room temperature, full-fat
- ¼ tsp salt
- Under ½ cup (50 g) powdered sugar
- 2 vanilla beans
- 2/3 cup (200 g) Biscoff spread
DECORATE
- 2/3 cup (200 g) Biscoff spread, melted
Instructions
- Start by preparing the Biscoff crust, blend about 30 Biscoff cookies until you have 2 ½ cups of finely crushed Biscoff (300 g) with 5 tbsp (70 g) unsalted melted and cooled butter. Mix well; the crumbs should resemble wet sand. Press at the bottom of a removable 8-inch 20 cm square pan. Refrigerate while you prepare the cheesecake filling.
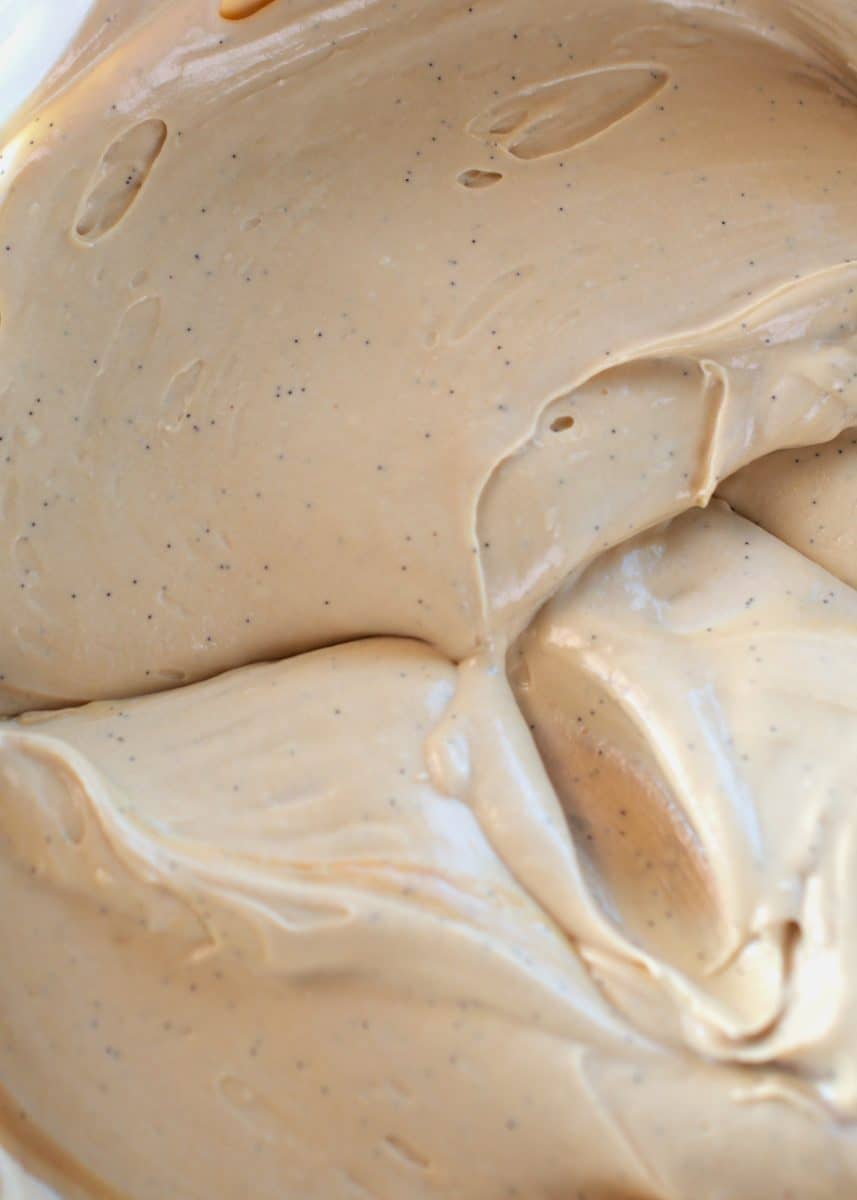
- Use a stand mixer or hand whisk to whip 1 cup (250 ml) heavy whipping cream until soft peaks. In a mixing bowl, work with a hard spatula slightly over 2 cups (500 g) room temperature full-fat cream cheese and ¼ tsp salt, sift about under ½ cup (50 g) powdered sugar over the cream cheese, and mix it. Add 2/3 cup (200 g) Biscoff spread (you can melt it slightly if it’s too hard) and mix it again. Split open 2 vanilla beans and scrape the beans from the pod.
- Add the previously whipped cream and fold it in until no streaks remain. Pour it over the chilled crust. Chill for 8 hours or overnight.
- Decorate the Biscoff cheesecake by melting 2/3 cup (200 g) Biscoff spread and pouring it over the cheesecake. Tilt the pan around so it covers the whole surface. The cold form of the cheesecake will set the layer in less than 2 minutes.
- Prep Time: 45 minutes
- Cook Time: 0 minutes
- Category: Dessert
- Method: No bake, no oven, No-Bake
Nutrition
- Serving Size: 1 slice/9
- Calories: 640 kcal
- Sugar: 38 g
- Sodium: 360 mg
- Fat: 47 g
- Saturated Fat: 28 g
- Unsaturated Fat: 15 g
- Trans Fat: 0.5 g
- Carbohydrates: 48 g
- Fiber: 1 g
- Protein: 7 g
- Cholesterol: 120 mg
ARCHER'S FOOD
Easy and delicious recipes


Lovely! My family loved it