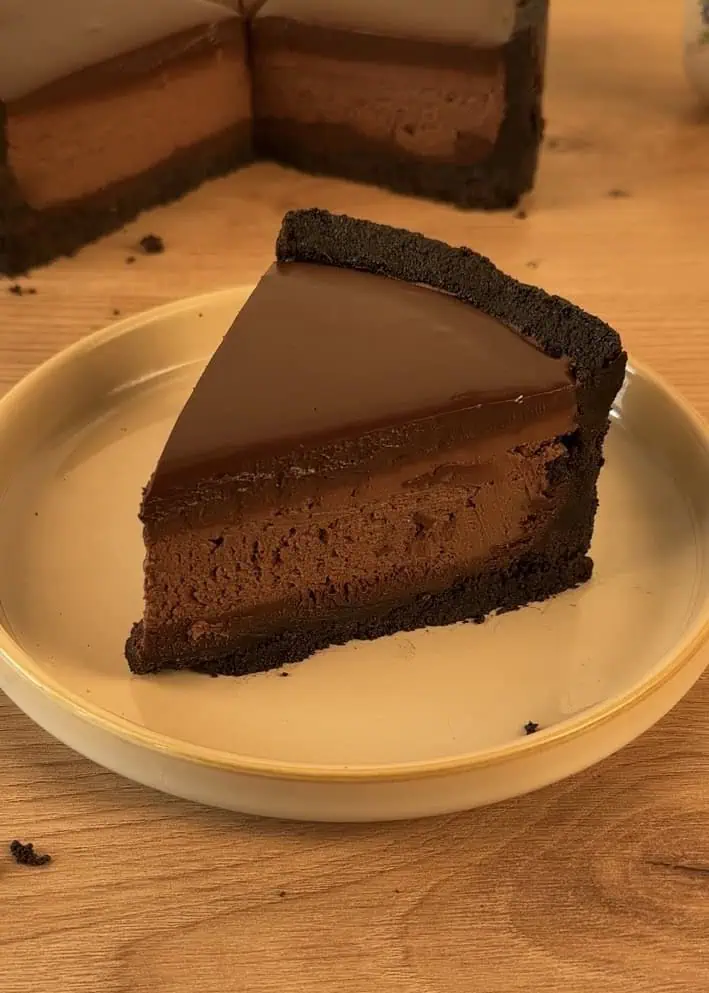
Rich Chocolate Cheesecake (No Bake)
We are making the most rich and delicious Chocolate Cheesecake. It has an incredibly deep chocolate flavor, the perfect creamy-yet-firm texture, and is topped with a luxurious chocolate ganache. The best part? It’s a no-bake cheesecake, which means absolutely no oven is needed!
I have been absolutely loving chocolate lately.
If you take a look around our website, you’ll see that at least 60 percent of our recipes feature it in some form!
For this particular cheesecake, I wanted to create a different experience from our Nutella cheesecake. My goal was a deeper, richer chocolate flavor, a firmer texture, and the addition of a crazy amount of chocolate without making it overly sweet.
We started with a base of crushed Oreos, then elevated it by adding a layer of delicious chocolate ganache right on top of the crust.
For the filling, we took our classic no-bake cheesecake base and adapted it, making it a hundred times more chocolatey and perfecting the consistency.
The result is pure perfection.
After it sets, you get to decorate it with even more silky chocolate ganache. Seriously, can it get any more perfect than that??
We were debating whether to add a center layer of chocolate ganache, and we ended up deciding against it—it probably would have been too much chocolate (is that even possible?). But I can’t promise I won’t try it in a future version!

The best way to enjoy a rich chocolate dessert like this is with a big, cold glass of milk or water. Then you’re all set for the perfect treat. Imagine it: a slice of this chocolate cheesecake, a good movie, and some pizza… that’s the dream!
I’m definitely making this cheesecake for my boyfriend soon, and I just know he’s going to be completely obsessed!!
Why This is the Best Chocolate Cheesecake Recipe
What makes this recipe so special? Well, I’ll have you know I’m a professional cheesecake and chocolate tester… in my own house! And I can tell you with authority that this recipe is the best of the best.
I have tried and tested countless variations to make this cheesecake stand out from the rest. You should definitely try it to see if it’s worth the hype—because for me, it absolutely is.
We just finished shooting photos of this delicious dessert, and I’m already thinking about having another slice. And maybe another after that!

Why you’ll Love This Recipe
Well, if my sheer love for chocolate and cheesecake isn’t enough, let me tell you why you won’t just love—but absolutely ADORE—this recipe.
- The Perfect Textures: Enjoy a symphony of textures with a crunchy Oreo base, an incredibly rich and smooth chocolate cheesecake filling, and a luxurious, creamy chocolate ganache on top.
- Intense Chocolate Flavor: We use an insane amount of chocolate, ensuring every single bite is packed with deep, decadent flavor.
- Not Overly Sweet: Unlike many chocolate desserts that rely too heavily on sugar, this one is perfectly balanced. We carefully selected the right chocolates to deliver richness without being cloying.
- Ridiculously Easy to Prepare: The secret? It’s a no-bake wonder. Everyone will think you spent hours in the kitchen, but it comes together with minimal effort and time.
- The Ultimate Crowd-Pleaser: This is the perfect dessert for any special occasion. It’s guaranteed to impress your family, friends, or party guests.
- Stable & No Gelatin: It sets beautifully without melting easily at room temperature, and we are NOT using any gelatin. The perfect texture comes from the recipe itself!
Ingredients and Why They Matter
Here you’ll find all the ingredients we’re using for this recipe, along with why they’re important and possible substitutions. For exact quantities, check the recipe card below!
- Chocolate: We are using dark chocolate for a deeper, richer flavor and a darker color. You can use milk chocolate instead for a sweeter taste. We use chocolate in all the layers for maximum impact!
- Butter (melted): We mix this with our crushed Oreos. The melted butter acts as a glue, binding the crust together so it holds its shape and isn’t a crumbly mess.
- Oreos: We will crush them whole—filling and all—into fine crumbs. I like using a food processor for this, as it saves me the trouble (and hand pain!) of using a ziplock bag and rolling pin.
- Cream Cheese: Make sure it’s at room temperature! We whip it first until smooth. If it’s cold, the chocolate we add later could solidify upon contact, creating lumps in our filling. You can use Mascarpone Cheese instead.
- Granulated Sugar: We’ll use this to sweeten and whip the heavy cream to soft, pillowy peaks.
- Heavy Whipping Cream: Check the label and make sure it has at least 35% milk fat. Anything less won’t whip up properly and won’t give you the stable, creamy texture we need for this no-bake recipe.
Chocolate Cheesecake Shop Ingredients
 Buy Now →
  Buy Now →
  Buy Now →
  Buy Now →
  Buy Now →
 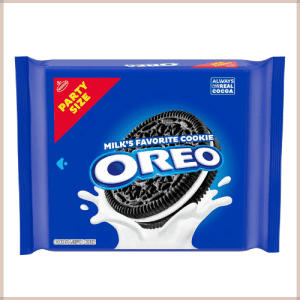 Buy Now →
 Affiliate Disclosure: This post may contain affiliate links to products on Amazon. This means that if you make a purchase through one of these links, we may receive a small commission at no extra cost to you. This helps support our blog and allows us to continue creating delicious recipes for you.
Special Tools and Why we Use Them
Here is the short list of tools you’ll need to make this chocolate cheesecake a success. We’ve also included alternatives wherever possible!
- Mixing Bowls: You’ll need these for combining ingredients and whipping the cream.
- Electric Mixer (Stand or Handheld): This is essential for whipping the heavy cream to soft peaks. A manual whisk will take significantly more time and effort but can be used too.
- Food Processor or Blender: This is the easiest way to crush the whole Oreos into fine, even crumbs. Alternatively, you can use a ziplock bag and a rolling pin.
- Two Saucepans:
- One for the Bain-Marie: A small saucepan that fits snugly over a larger pot of water. This is for gently melting the chocolate without burning it.
- One for the Cream: A separate saucepan to warm the heavy cream before combining it with the chocolate.
- Spatulas:
- Rubber or Silicone Spatula: Essential for gently folding the whipped cream into the cheesecake filling without deflating it.
- Wooden Spatula/Spoon: Perfect for working the melted chocolate into the cream cheese, as it’s sturdy and helps smooth out any lumps.
- Springform Pan: A springform pan is essential for this recipe. The 17 x 6 cm size or 6.5 x 2.4 inch pan. The removable sides make it easy to release the beautiful cheesecake without damaging it.
Best tools!
 Buy Now →
 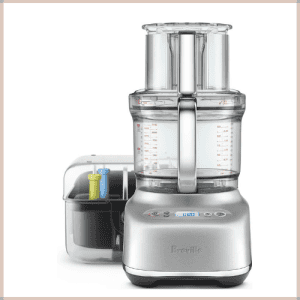 Buy Now →
 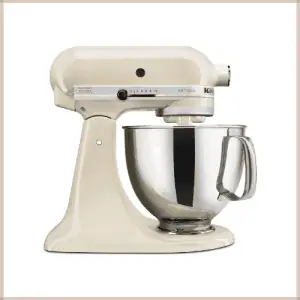 Buy Now →
 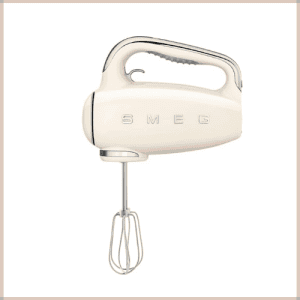 Buy Now →
  Buy Now →
  Buy Now →
  Buy Now →
  Buy Now →
  Buy Now →
Chocolate Cheesecake Step by Step Overview
We are going to start by preparing the cheesecake base. We use Oreos, but you can use any chocolate cookie you like.
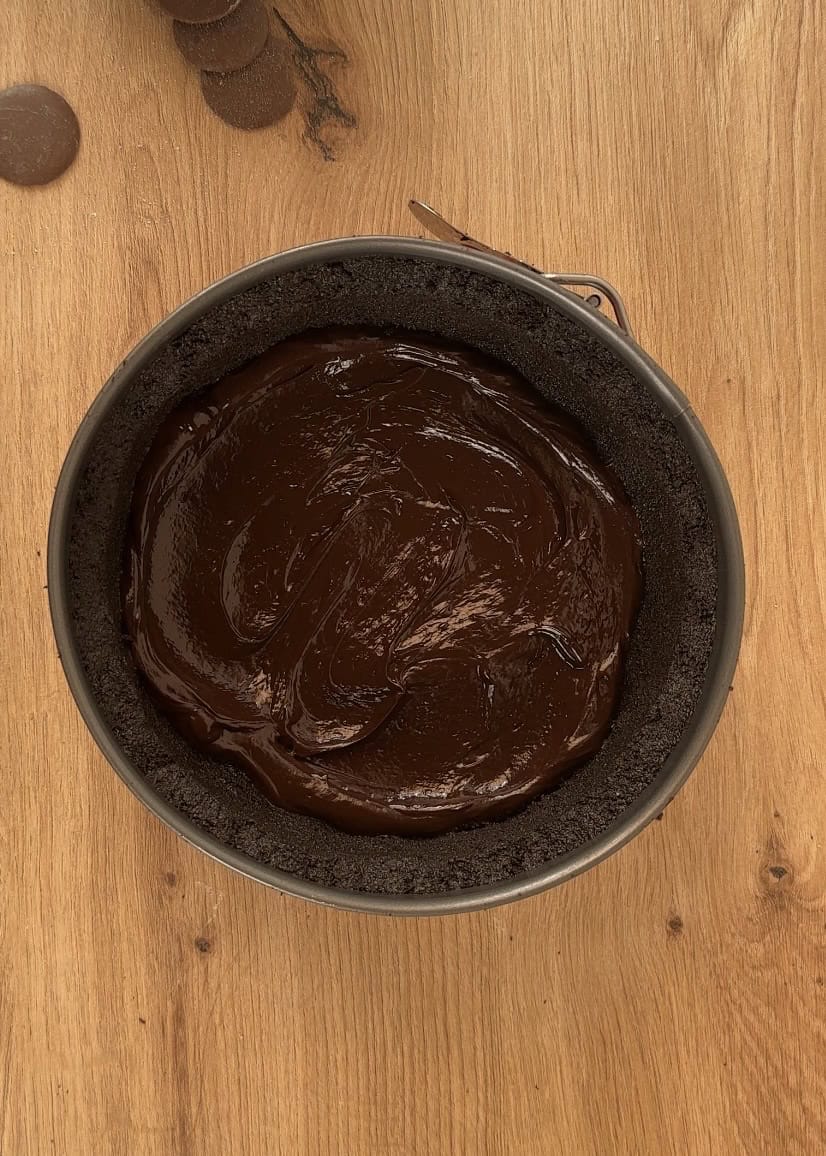
Then, we are going to add melted chocolate and melted butter, combine it all together, and press it into a springform pan. We will refrigerate it and prepare the ganache.
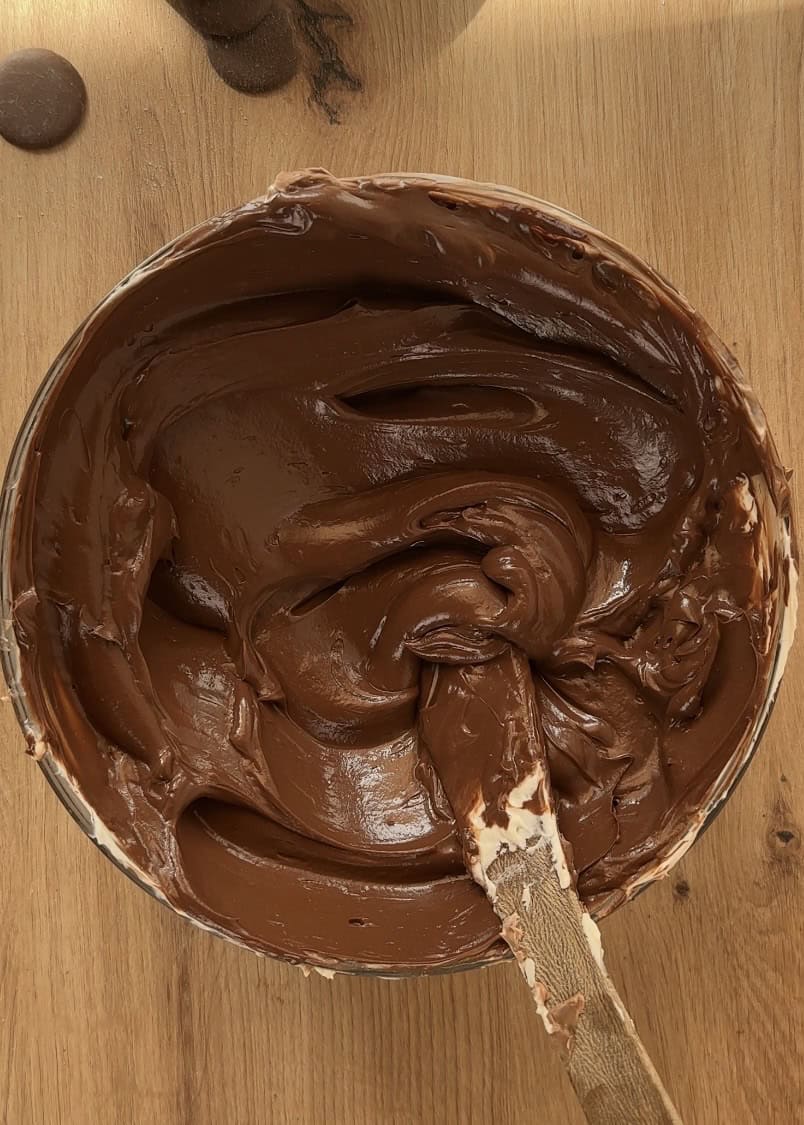
Prepare a chocolate ganache by simmering the heavy cream and then pouring it over the chopped chocolate. Mix until it’s completely melted and smooth, being careful not to incorporate too many bubbles.
Spread half of the ganache over the cookie crust and reserve the rest in the fridge, with plastic wrap touching the surface. We will use this later for decoration.
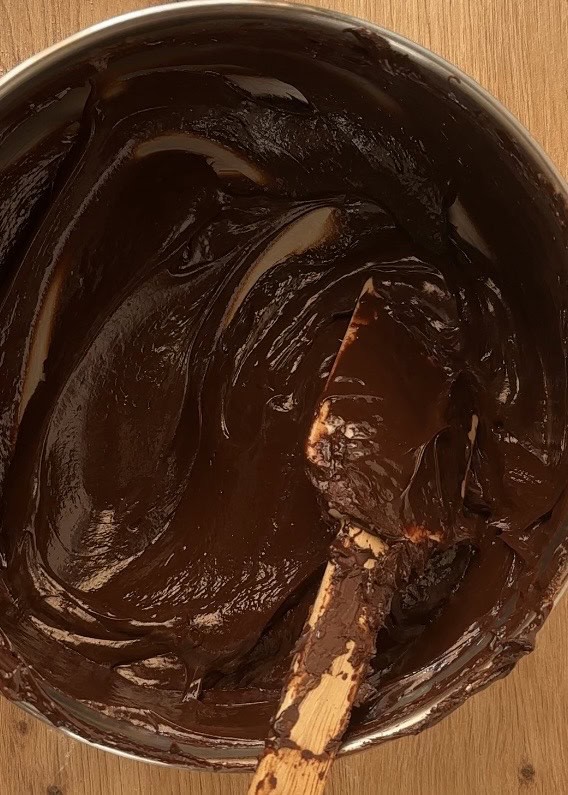
Now, prepare the chocolate cheesecake filling. Work the cream cheese with a wooden spatula until it’s soft and creamy. Then, add the melted chocolate and combine again. Read the detailed guide on how to properly melt chocolate using a bain-marie for success below!
In a separate bowl, whip the cream with the sugar until it holds soft peaks. Gently fold this into the chocolate and cream cheese mixture. This is your cheesecake filling. Pour it on top of the set base, smooth out the top, and refrigerate until fully set.


To decorate, gently warm the reserved chocolate ganache until it is slightly fluid. Pour it over the fully set cheesecake, spread it into an even layer, and refrigerate for about 10 minutes to allow the top layer to set slightly.
Variations and Flavor Ideas
- Customize Your Chocolate: You can use any type of chocolate you like! Feel free to swap the dark chocolate for milk or white chocolate to create a different flavor profile.
- Choose Your Own Crust: You can use any chocolate cookie you want for the base; you don’t have to use Oreos or other cream-filled cookies. Just make sure you increase the amount of butter, as you’ll probably need more without the cream filling to bind the crust.
- Get Creative with Design: Have fun with the presentation! You could add a middle layer of ganache for extra decadence or create a beautiful swirl pattern on top with the reserved ganache.
How to Store Chocolate Cheesecake
To keep your chocolate cheesecake fresh and delicious, follow these simple storage guidelines:
- Refrigeration: This is the best method for short-term storage. Keep the cheesecake in an airtight container or securely wrapped with plastic wrap in the refrigerator. It will maintain its perfect texture and flavor for up to 3 days.
- Freezing for Long-Term Storage: Yes, you can freeze this cheesecake! For the best results, place it in a freezer-safe, airtight container to prevent freezer burn. It can be frozen for up to 2 months. When you’re ready to enjoy it, thaw it overnight in the refrigerator before serving. This method is perfect for making dessert ahead of time for a special occasion!
The Bain-Marie Method: Your Secret Weapon
If you’ve ever ended up with grainy chocolate or a lumpy chocolate cheesecake filling, the bain-marie is about to become your favorite kitchen tool.
This gentle water bath is the secret to melting chocolate perfectly for our no-bake cheesecake. It gives you smooth, silky chocolate every time, with absolutely no risk of burning.
Here’s how it works: place a small pot or heat proof bowl over a pot of gently simmering water, making sure the bottom of the bowl doesn’t actually touch the water.
Keep the heat low, and stir your chocolate occasionally as it melts. That’s all there is to it! You’ll get beautifully melted chocolate that incorporates perfectly into your cream cheese filling.
Pro Tips for the Perfect No-Bake Chocolate Cheesecake
- Use High-Fat Cream: For the whipped cream, ensure your heavy whipping cream has at least 35% milk fat. Anything less won’t whip up properly and can lead to a runny filling.
- Whip to Soft Peaks: When whipping the cream, stop once you reach soft peaks. This means the peaks should gently curl over when you lift the whisk. Over-whipping can make the texture grainy and affect the smooth, creamy mouthfeel of your cheesecake.
- Chill Thoroughly: Refrigerate the cheesecake for the full recommended time (8h), ideally overnight. This is not a suggestion—it’s essential! This allows the structure to set completely so it doesn’t fall apart when you slice it.
- Room Temperature is Key: Ensure your cream cheese is at room temperature before you start. Cold cream cheese can cause the melted chocolate to solidify on contact, creating lumps in your filling.
- Melt Chocolate Gently: Always melt your chocolate using a bain-marie (double boiler). This gentle, indirect heat prevents the chocolate from burning or seizing. Remember to keep all water away from the chocolate bowl.
- Adjust the Crust: If you use plain chocolate cookies without a cream filling (instead of Oreos), you will need to increase the amount of melted butter to help the crust bind together properly.
- Fold, Don’t Mix: When combining the whipped cream with the chocolate and cream cheese mixture, use a spatula and fold gently. This preserves the air you whipped into the cream, keeping the filling light and airy.
- Prevent Ganache Splitting: When warming the reserved ganache for decoration, do it gently. If it gets too hot, it can split and become oily.

Rich Chocolate Cheesecake (No Bake)
No-Bake Chocolate Cheesecake! Featuring a rich Oreo crust, a silky-smooth chocolate filling, and a decadent chocolate ganache topping. Incredibly easy to make and perfect for any occasion.
- Total Time8 hours 45 minutes
- Yield10 servings
- DietVegetarian
Ingredients
Cheesecake Crust
- 270g whole Oreo cookies
- 50g melted dark chocolate (1/4 cup)
- 60g melted butter (1/4 cup)
Ganache
- 200g dark chocolate (1 1/4 cup)
- 200g heavy whipping cream (3/4 cup)
Cheesecake Filling
- 400g dark chocolate (2 1/2 cups)
- 400g cream cheese (14 oz)
- 185g heavy whipping cream (3/4 cups)
- 50g granulated sugar (1/4 cup)
Instructions
Prepare the oreo crust
- Begin by processing the whole Oreo cookies, including their cream filling, into fine crumbs using a food processor. Alternatively, place the cookies in a sturdy plastic bag and crush them with a rolling pin until no large pieces remain.
- In a mixing bowl, combine the fine Oreo crumbs with the melted butter and melted chocolate. Stir thoroughly until the mixture has a uniform, wet sand-like consistency and all the crumbs are coated.
- Transfer this mixture to a springform pan and press it down firmly and evenly across the sides and then press into the bottom to create a compact base.
- Place the pan in the refrigerator to chill and set while you proceed to the next step.
Prepare Chocolate ganache
- Chop the dark chocolate for the ganache into small, even pieces and place them in a heatproof bowl.
- In a small saucepan, heat the heavy cream over medium heat until it begins to simmer gently—do not let it boil.
- Immediately pour the hot cream over the chopped chocolate and let it sit undisturbed for a minute or two to allow the chocolate to soften. Then, stir the mixture slowly and gently with a spatula until it becomes completely smooth, glossy, and unified.
- Be careful not to incorporate too many air bubbles. Pour half of this ganache over the chilled crust, spreading it into an even layer. Reserve the remaining ganache for later use. Return the pan to the refrigerator to allow this layer to set.
Make the Chocolate Cheesecake Filling
- Melt the remaining dark chocolate for the filling using a bain-marie: place a heatproof bowl or pot over a pot of hot water on medium low heat, ensuring the water doesn’t boil and the chocolate doesn’t get too hot.
- Stir the chocolate occasionally until it is fully melted and smooth.
- Remove the bowl from the heat, clean the bottom of the bowl or pot and let the chocolate cool slightly.
- In a separate large bowl, use a wooden spatula to work the room-temperature cream cheese until it is soft, smooth, and free of lumps. Add the slightly cooled melted chocolate to the cream cheese and mix thoroughly until the two are fully combined and the mixture is uniformly chocolate-colored.
- In another clean, dry bowl, whip the heavy whipping cream and granulated sugar together until it forms soft peaks—this means the peaks should gently curl over when the whisk is lifted.
- Gently fold the whipped cream into the chocolate and cream cheese mixture using a spatula, using slow, sweeping motions until the filling is evenly combined and no white streaks remain.
Assemble and Set the Cheesecake
- Remove the springform pan from the refrigerator/freezer.
- Pour the prepared chocolate cheesecake filling over the set ganache layer. Use a spatula to spread the filling evenly and smooth the top. Cover the pan with plastic wrap, ensuring it does not touch the surface of the cheesecake. Place the cheesecake in the refrigerator to set for at least 8 hours, though for best results, leave it to chill overnight.
- This extended time allows the flavors to meld and the texture to become firm enough for slicing.
Decorate and Serve
- Once the cheesecake is fully set, gently warm the reserved ganache until it is soft and spreadable but not hot.
- If it becomes too warm, it may split, so heat it in short intervals if necessary.
- Pour the softened ganache over the chilled cheesecake and use an offset spatula to spread it into a smooth, even layer on top. Return the cheesecake to the refrigerator for an additional 10-15 minutes to allow the ganache to set slightly. When ready to serve, carefully release the springform pan.
- For clean slices, dip a sharp knife in hot water and wipe it dry between each cut.

Notes
- For best results, use high-quality dark chocolate with at least 60% cocoa content
- Make sure cream cheese is at room temperature before mixing to prevent lumps
- When whipping cream, ensure your bowl and beaters are completely clean and cold
- For clean slices, dip your knife in hot water and wipe dry between each cut
- The ganache can be made 2-3 days in advance and stored refrigerated
- Cheesecake can be frozen for up to 2 months – wrap tightly in plastic wrap before freezing
- Let cheesecake sit at room temperature for 15-20 minutes before serving for best texture
- For decorative touches, try topping with chocolate shavings, fresh berries, or a dusting of cocoa powder
- Prep Time: 45 minutes
- Cook Time: 0 hours
- Category: Dessert
- Method: No-Bake
- Cuisine: American
Nutrition
- Serving Size: 1 slice
- Calories: 544
- Sugar: 38g
- Sodium: 256mg
- Fat: 42g
- Saturated Fat: 26g
- Unsaturated Fat: 12g
- Trans Fat: 0g
- Carbohydrates: 46g
- Fiber: 3g
- Protein: 7g
- Cholesterol: 76mg