
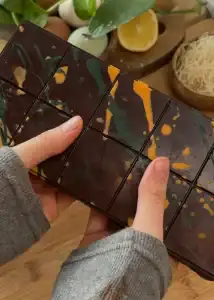
How to make the viral Dubai chocolate
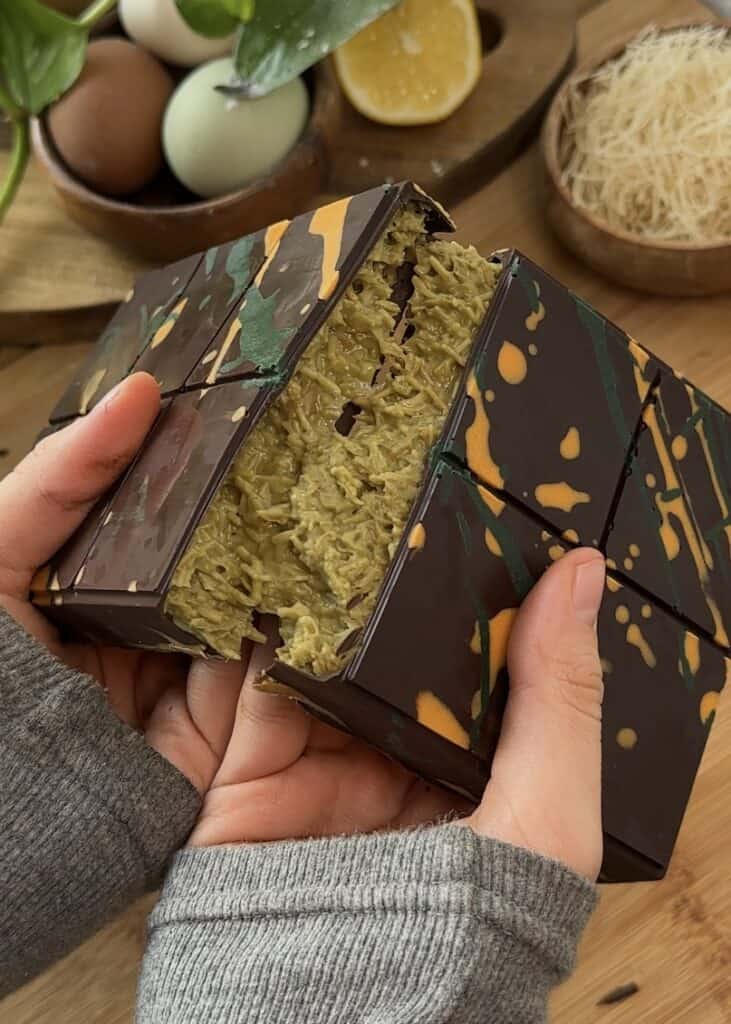
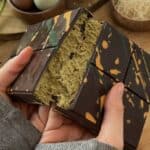
You have probably seen the viral Dubai chocolate bars everywhere. They’re the ultimate treat—crunchy kataifi pastry, creamy pistachio and tahini filling, and a rich chocolate coating that makes every bite pure perfection. The best part? You don’t need to fly to Dubai or spend a fortune to enjoy them. With this easy homemade recipe, you can recreate this luxurious dessert in your own kitchen! Find the recipe to make kataifi for Dubai Chocolate for 0,67$.
Recipes you’ll like
- How to make kataifi for Dubai chocolate
- The best fudgy brownies
- No bake creamy and easy Nutella cheesecake
- No bake creamy pistachio cheesecake
- Luxurious Dubai chocolate strawberries
- White chocolate Dubai strawberries
- Dubai chocolate croissants
I’ve been dreaming about Dubai chocolate bars ever since they started blowing up on social media. But since I don’t live in Dubai (and my bank account isn’t ready for a trip there anytime soon), I decided to make my own version at home. The first time I tried this recipe, I was hooked. The combination of crunchy kataifi, creamy pistachio, and smooth chocolate is chef’s kiss. Now, I add this homemade chocolate bar to my desserts, snacks, and even breakfast (no shame!).
Ingredients for Homemade Dubai Chocolate Bars
Here’s what you’ll need to make this viral dessert:
- Tahini: A hint of Middle Eastern flavor to balance the sweetness.
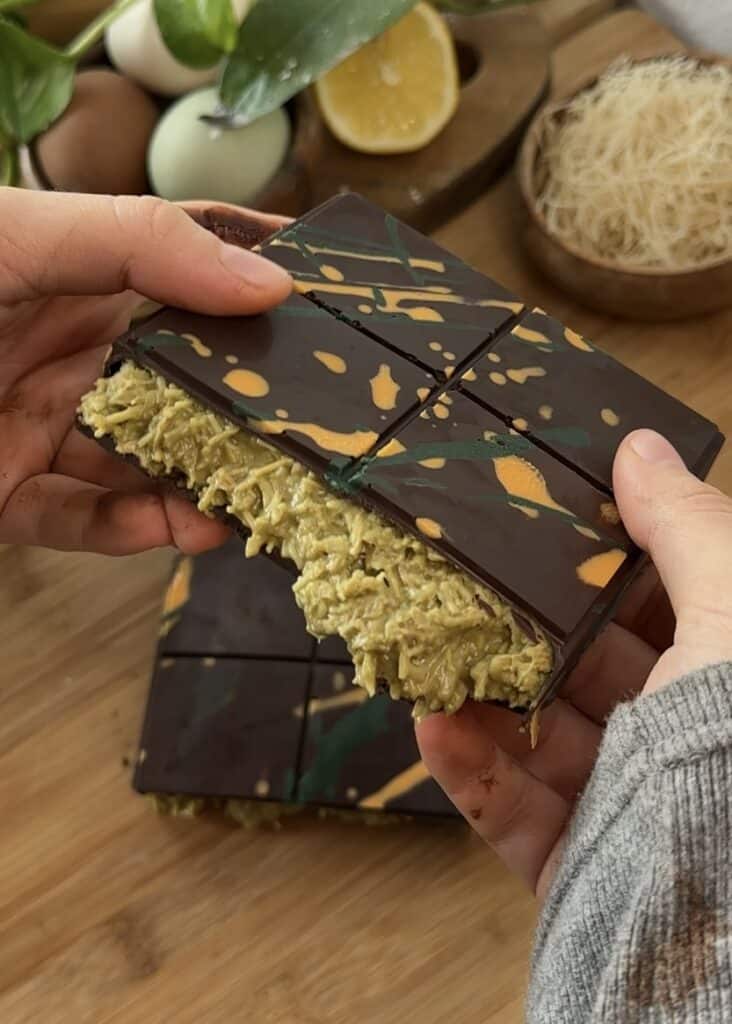
- White chocolate: For the colorful splash lines in the mold.
- Orange and green food coloring: To give it that vibrant Dubai chocolate bar look.
- Dark or milk chocolate: The rich coating that holds everything together.
- Butter: To toast the kataifi pastry for that perfect crunch.
- Kataifi pastry: The star of the show—crunchy, shredded, and oh-so-delicious.
- Pistachio spread: Adds a creamy, nutty flavor that pairs perfectly with chocolate.
Essential Equipment
- Kitchen scale: To measure ingredients accurately for the perfect texture.
- Chocolate bar mold: To shape your bars like a pro.
- Pan and spatula: For toasting the kataifi pastry to golden perfection.
Tips for Perfect Dubai Chocolate Bars
- When melting chocolate using the bain-marie method, make sure no water touches the chocolate, or it will seize.
- After adding the filling and topping it with chocolate, freeze it just until the chocolate hardens (about 8 minutes). This keeps the filling melty and delicious.
- If you’re not confident about layering the pistachio mixture and chocolate, freeze the filling slightly first—but remember, it won’t be as gooey!
- Make sure you toast the kataifi, you want it golden brown
Common Mistakes and How to Fix Them
- Curdled or burnt chocolate: If melting in the microwave, stir every 10-15 seconds. For the bain-marie method, keep the water simmering (not boiling) and stir constantly.
- Messy layers: Use a spoon to carefully spread the chocolate over the pistachio mixture, or freeze the filling slightly before adding the top layer.

FAQs About Homemade Dubai Chocolate Bars
Absolutely! It saves time and works just as well.
You can make your own by blending roasted pistachios with a bit of honey and oil until creamy.
Store them in the fridge for up to a week, or freeze for up to a month.
This recipe cost us $8.50 to make for a xxl size chocolate bar.
Dubai chocolate bars are known for their unique combination of textures and flavors—crunchy kataifi pastry, creamy pistachio spread, and rich chocolate. They’re luxurious, Instagram-worthy, and totally addictive!
Absolutely! Milk chocolate works just as well and adds a sweeter, creamier flavor. Use whichever you prefer or even mix both for a balanced taste.
Not at all! You can find kataifi pastry in most Middle Eastern grocery stores or online. But you can make it for a friction of the price at home with only oil, cornstarch, flour and water.
Yes! Use vegan chocolate, dairy-free butter, and a plant-based pistachio spread. Tahini is already vegan, so you’re good to go!
Yes! You can use a silicone baking tray or even a lined loaf pan. Just cut the bars into squares once they’re set.
The bain-marie method (double boiler) is the best way to melt chocolate without burning it. If using a microwave, heat in short intervals and stir frequently.
Hi everyone⋆˙⟡♡
If you try this homemade Dubai chocolate bar recipe, let me know how it turns out! Leave a review in the comments and tell me what you loved (or if you added your own twist). Your feedback helps a ton, and I’d love to hear about your chocolate bar adventures!
Recipe for homemade Dubai chocolate bars
Recipe in cups and grams. You can find the cup measurements in the printable recipe scrolling down at the end.

Ingredients:
- 10 grams white chocolate
- orange and green food coloring
- 200 grams chocolate
- 40 grams butter or ghee
- 150 grams kataifi pastry (recipe linked on how to make kataifi)
- 1 tablespoon tahini
- 300 grams pistachio spread
Step by step
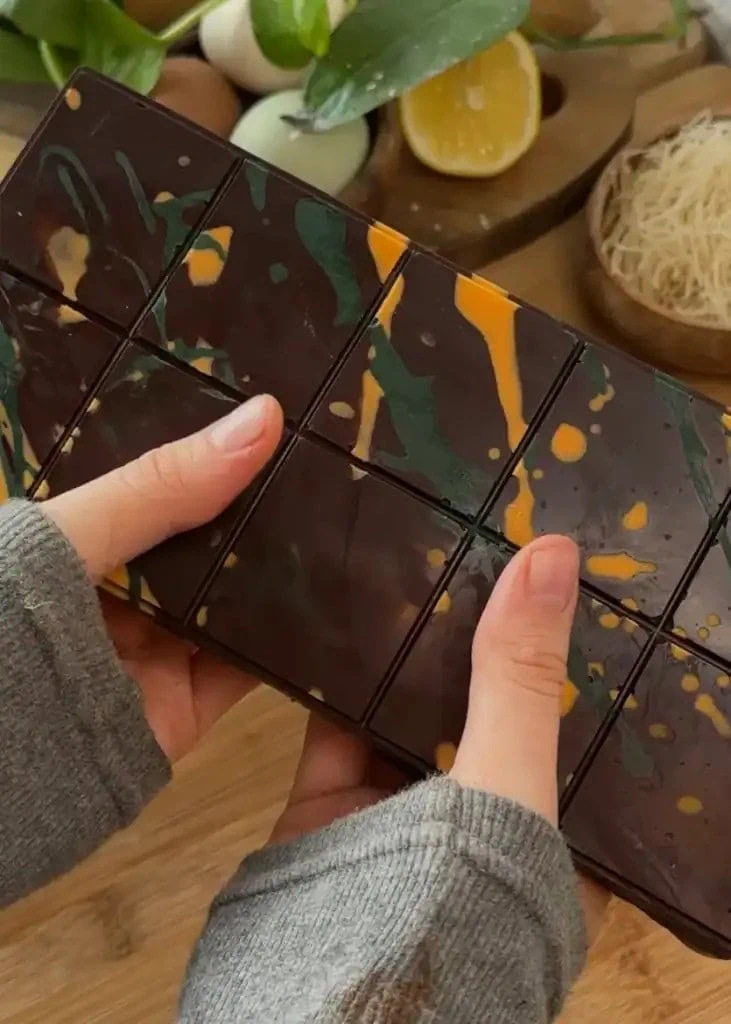
1) step one, Prepare the Colorful Splash Lines:
Melt the white chocolate using a microwave safe bowl, stir every 10-15 seconds, once melted divide it into two portions. Add orange food coloring to one and green to the other. Use a spoon to create splash lines in your chocolate bar mold. Freeze for 5 minutes to set. If the chocolate doesn’t melt properly feel free to add some coconut oil to melt.
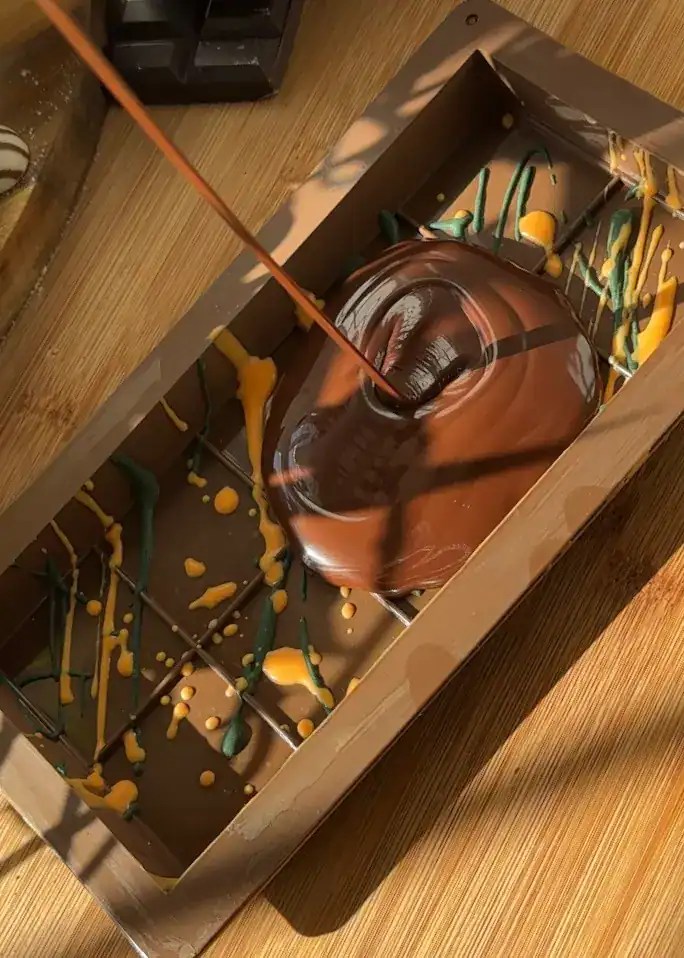
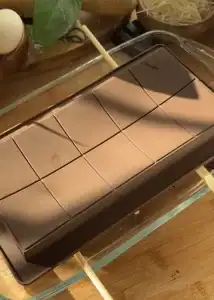
2) step two, Coat the Mold with Chocolate:
Melt the dark (or milk) chocolate using the Bain Marie method or the microwave, stir every 10-15 seconds. Pour it into the mold, tilting to cover the base and sides completely. Flip the mold over a plate to remove excess chocolate. Use chopsticks to hold the mold and let it set for 2-3 minutes. Freeze for another 5 minutes.

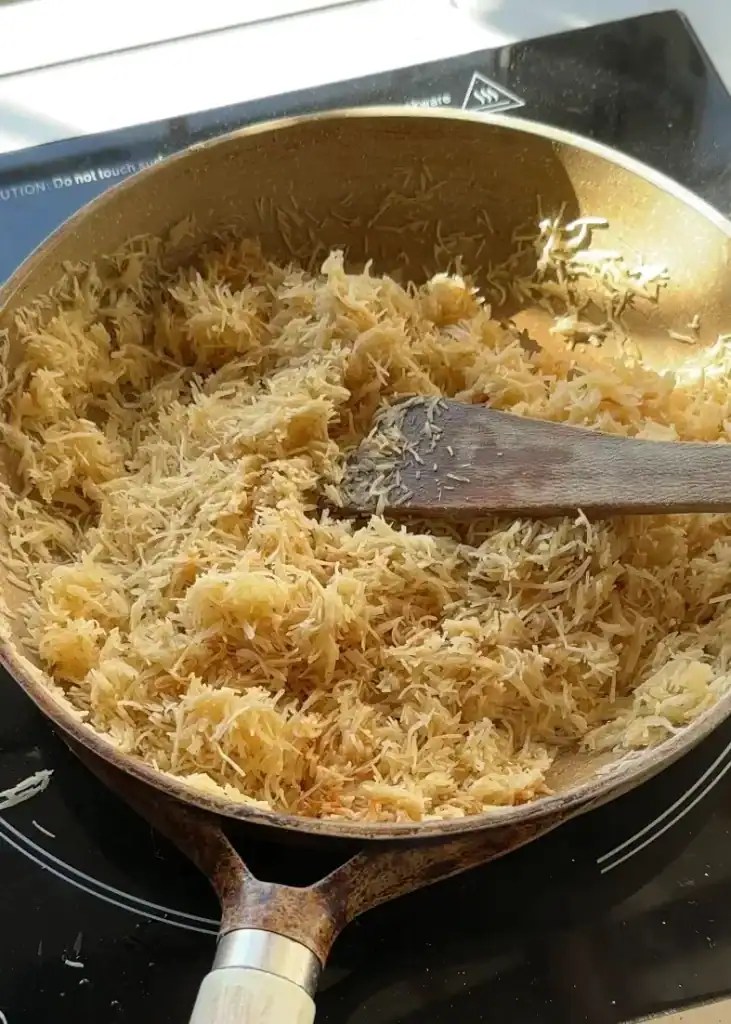
3) step three, Toast the Kataifi Pastry:
Break the kataifi pastry into small pieces using your hands or a knife. Heat butter in a pan, then add the kataifi and toast until golden and crispy.
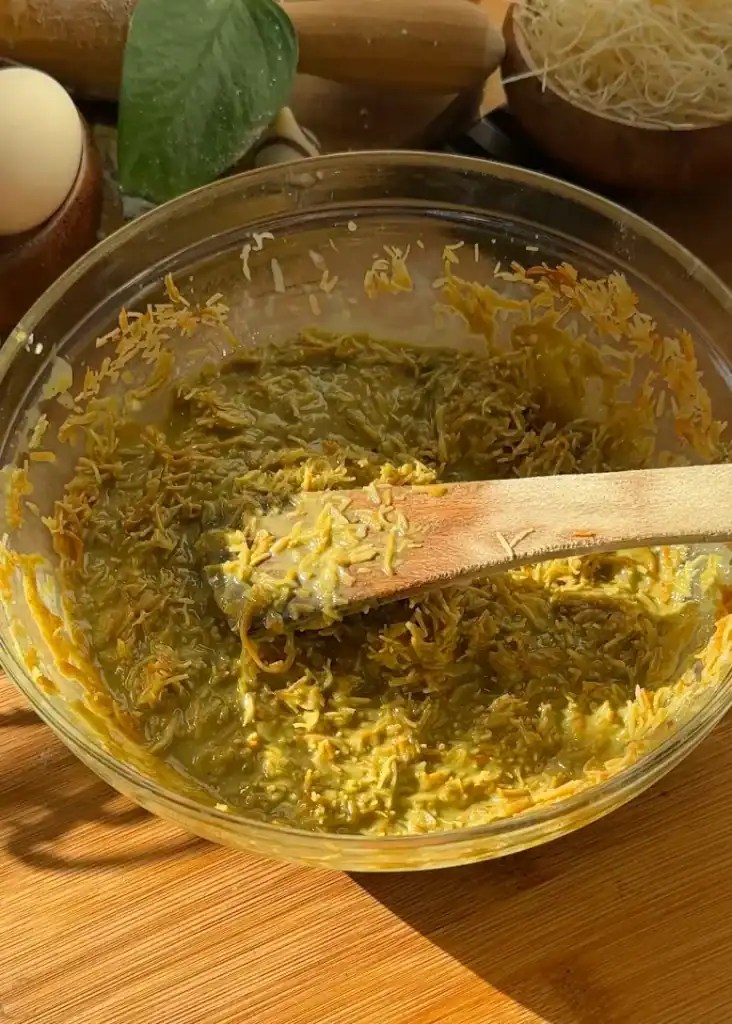
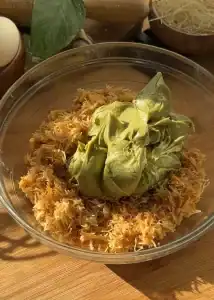
4) step four, Mix the Filling:
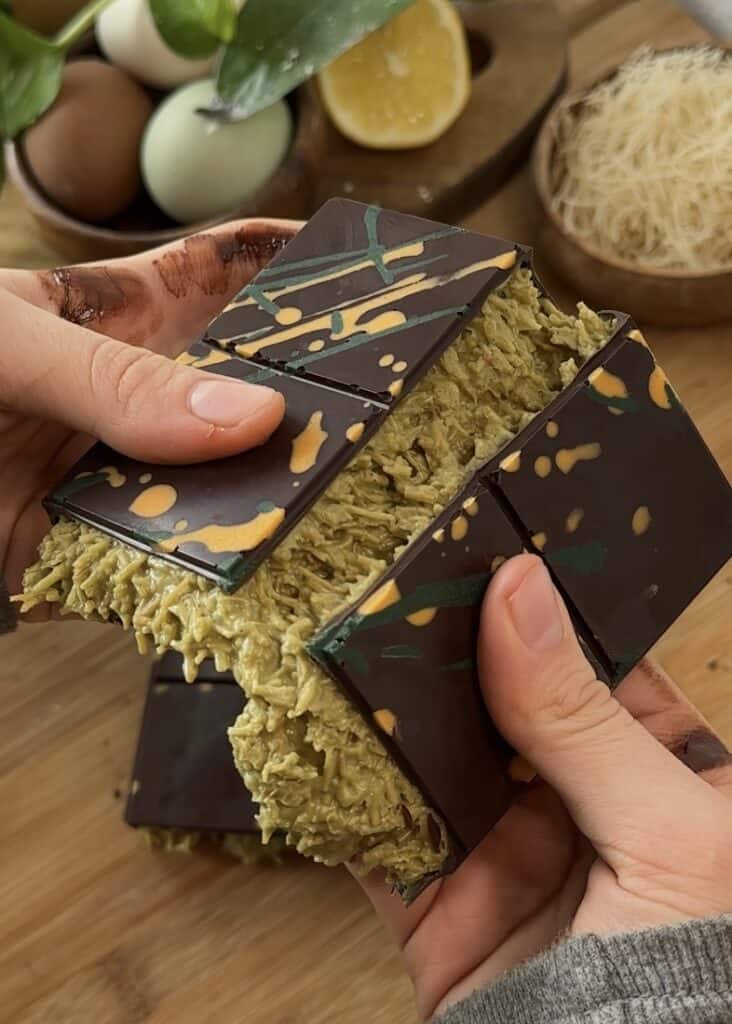
In a bowl, combine the toasted kataifi, pistachio spread, and tahini. Mix until evenly combined.
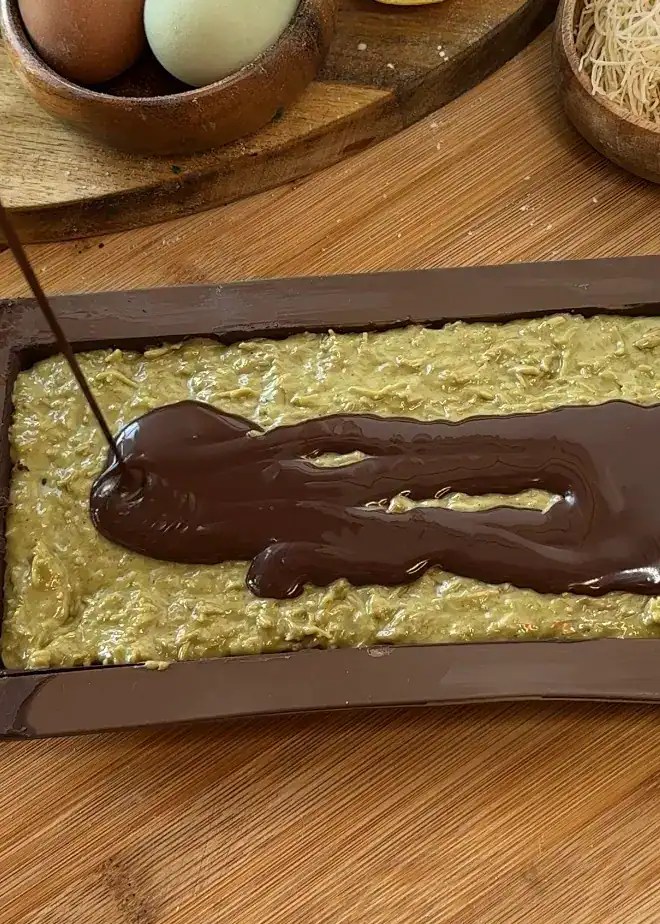
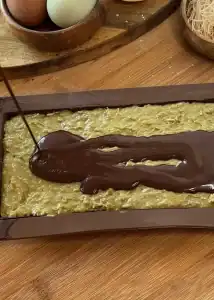
5) step five, Layer the Filling and Chocolate:
Spread the pistachio mixture evenly over the frozen chocolate in the mold. Carefully pour melted chocolate on top, ensuring it covers the filling completely. Use a spatula to smooth it out.
6) step six, Freeze and Enjoy:
Freeze the bars for 8-10 minutes, or until the chocolate is set. Pop them out of the mold and enjoy your homemade Dubai chocolate bars!
Viral Dubai chocolate recipe
- Prep Time: 15 minutes
- Total Time: 30 minutes
- Yield: 1 chocolate Bar
- Category: from scratch, Snack
- Cuisine: Emirati cuisine
Description
They’re the ultimate treat—crunchy kataifi pastry, creamy pistachio and tahini filling, and a rich chocolate coating that makes every bite pure perfection. The best part? You don’t need to fly to Dubai or spend a fortune to enjoy them. With this easy homemade recipe, you can recreate this luxurious dessert in your own kitchen!
Ingredients
- 10 Grams white chocolate
- Orange and green food coloring
- 200 grams chocolate
- 40 grams butter or ghee
- 150 grams kataifi pastry
- 1 tablespoon tahini
- 300 grams pistachio spread
Instructions
step one, Prepare the Colorful Splash Lines:
- colorful splash lines Melt the white chocolate in the microwave using a safe bowl, stir every 10-15 seconds and divide it into two portions. Add orange food coloring to one and green to the other. Use a spoon to create splash lines in your chocolate bar mold. Freeze for 5 minutes to set. If the chocolate doesn’t melt properly feel free to add some coconut oil to melt.
step two, Coat the Mold with Chocolate:
- Chocolate mold Melt the dark (or milk) chocolate using the Bain Marie method or a microwave, if microwave stir every 10-15 seconds to avoid the chocolate to burn. Pour it into the mold, tilting to cover the base and sides completely. Flip the mold over a plate to remove excess chocolate. Use chopsticks to hold the mold and let it set for 2-3 minutes. Freeze for another 5 minutes.

step three, Toast the Kataifi Pastry:
- toast kataifi Break the kataifi pastry into small pieces using your hands or a knife. Heat butter in a pan, then add the kataifi and toast until golden and crispy.

step four, Mix the Filling:
- pistachio filling In a bowl, combine the toasted kataifi, pistachio spread, and tahini. Mix until evenly combined.
step five, Layer the Filling and Chocolate:
- layer Spread the pistachio mixture evenly over the frozen chocolate in the mold. Carefully pour melted chocolate on top, ensuring it covers the filling completely. Use a spatula to smooth it out.
step six, Freeze and Enjoy:
- freeze Freeze the bars for 8-10 minutes, or until the chocolate is set. Pop them out of the mold and enjoy your homemade Dubai chocolate bars!
Notes
Best tips for Dubai chocolate recipe
– When melting chocolate using the bain-marie method, make sure no water touches the chocolate, or it will seize.
– After adding the filling and topping it with chocolate, freeze it just until the chocolate hardens (about 8 minutes). This keeps the filling melty and delicious.
– If you’re not confident about layering the pistachio mixture and chocolate, freeze the filling slightly first—but remember, it won’t be as gooey!
– Make sure you toast the kataifi, you want it golden brown
ARCHER'S FOOD
Easy and delicious recipes


Size of the mold please
The combination of crunchy kataifi pastry, creamy pistachio spread, and rich chocolate coating creates a perfect harmony of textures and flavors.The addition of tahini adds a delightful depth, making each bite truly indulgent.The step-by-step instructions were clear and easy to follow, making the process enjoyable and rewarding. Thank you for sharing this incredible recipe—it’s a new favorite in my dessert repertoire.