
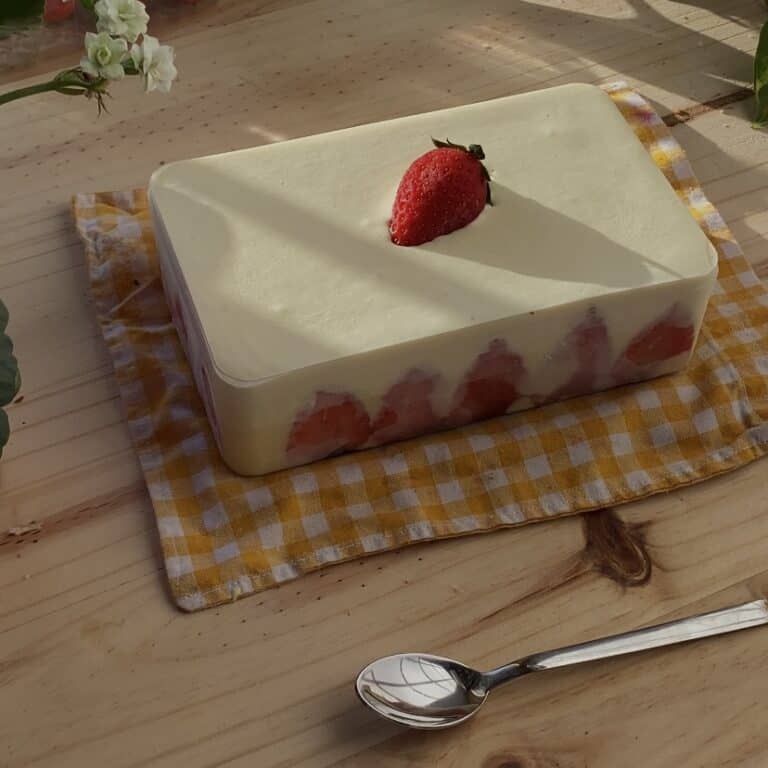
This no bake Strawberry Tiramisu Cake is silky smooth, light, and bursting with flavor. It has the perfect layers of a buttery cookie crust, sweet strawberry jam, creamy tiramisu filling, and soft ladyfingers soaked in a strawberry milk mixture.
Topped with a luscious layer of Biscoff spread, it brings together fruity, creamy, and spiced cookie flavors in every bite. With no alcohol, no baking, and simple steps, this dessert is easy to prepare yet elegant enough for any occasion.
For this Strawberry Tiramisu Cake, we are using a strawberry jam that Prozis kindly gifted us, and it truly makes all the difference.
The jam is vibrant, fruity, and just the right amount of sweet, pairing perfectly with the creamy tiramisu filling and the soft ladyfingers.
We love making cheesecakes, cakes, tiramisus, and anything that is no bake. It’s something we truly enjoy, and it always feels fun and creative to experiment with new flavor combinations.
Why you’ll love this Strawberry Tiramisu Cake
- It’s a no bake dessert, quick and effortless to prepare.
- The texture is incredibly creamy and smooth.
- No alcohol, no coffee, just the pure sweetness of strawberry jam.
- Perfect for any occasion, always guaranteed to be delicious.
This recipe is very simple to make, but it does need time to rest in the fridge. Let it set for at least 8 hours, though overnight is always best. The beauty of it is that once you put it together, the fridge does all the work for you, completely stress free.
For this recipe we are using a springform pan, the same type we use in most of our cheesecake recipes. The detachable bottom makes it very easy to handle and remove the cake cleanly.
Our pan is 17 cm x 6 cm (about 7 x 2.5 inches), but you can use a similar size or even slightly larger or smaller. Just keep in mind that the thickness of the layers may vary depending on the pan you choose.
tools
 Buy Now →
  Buy Now →
  Buy Now →
  Buy Now →
  Buy Now →
  Buy Now →
  Buy Now →
 - Layers: This strawberry tiramisu cake is made with layers that are easy but full of flavor. It starts with a cookie crust that covers the bottom and sides. Then comes a layer of strawberry jam, followed by a creamy tiramisu filling. Next, you add soaked ladyfingers for that classic texture, another layer of the tiramisu cream, and finally finish with a smooth topping of Biscoff spread. Let’s get to baking!
How to Make a Strawberry Tiramisu Cake Step by Step Photos:
You can find the full strawberry tiramisu cake recipe with exact measurements at the bottom of this post.
But before we get there, let me walk you through a simple step-by-step overview with photos, so you can see exactly how this beautiful dessert comes together.
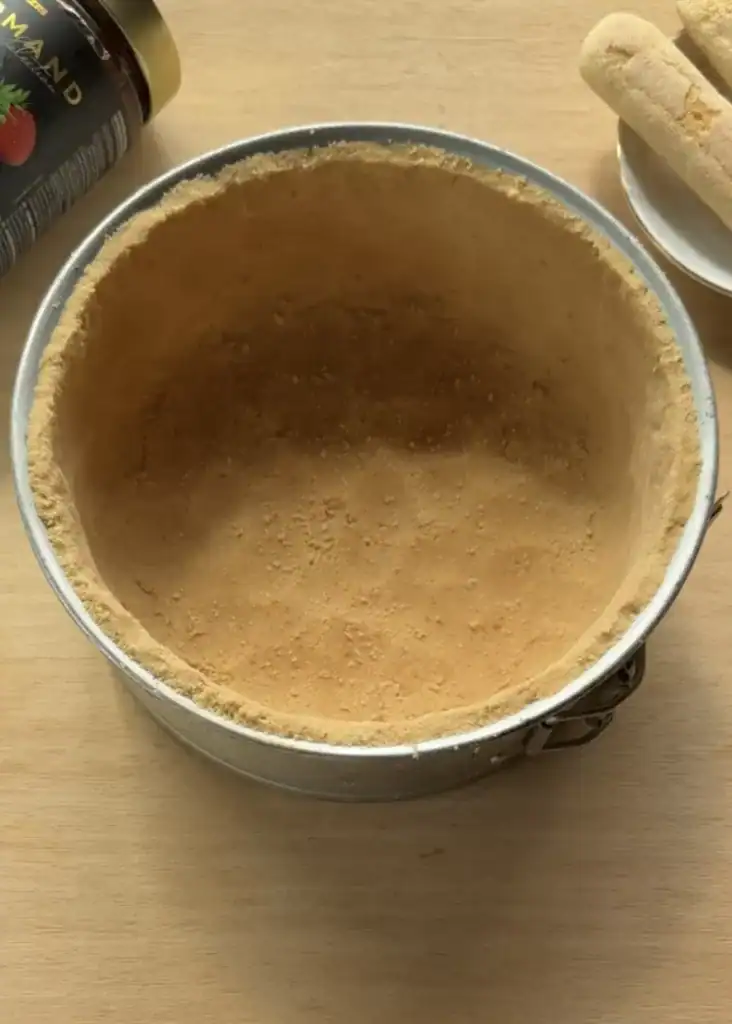
1. cookie crust
Start by preparing the cookie crust. Blend the cookies in a food processor until they turn into fine crumbs. Mix the crumbs with melted butter, then press the mixture into your springform pan. Begin with the sides to create a sturdy edge, then press into the bottom for an even base.
Place the pan in the freezer to firm up while you prepare the next layers.
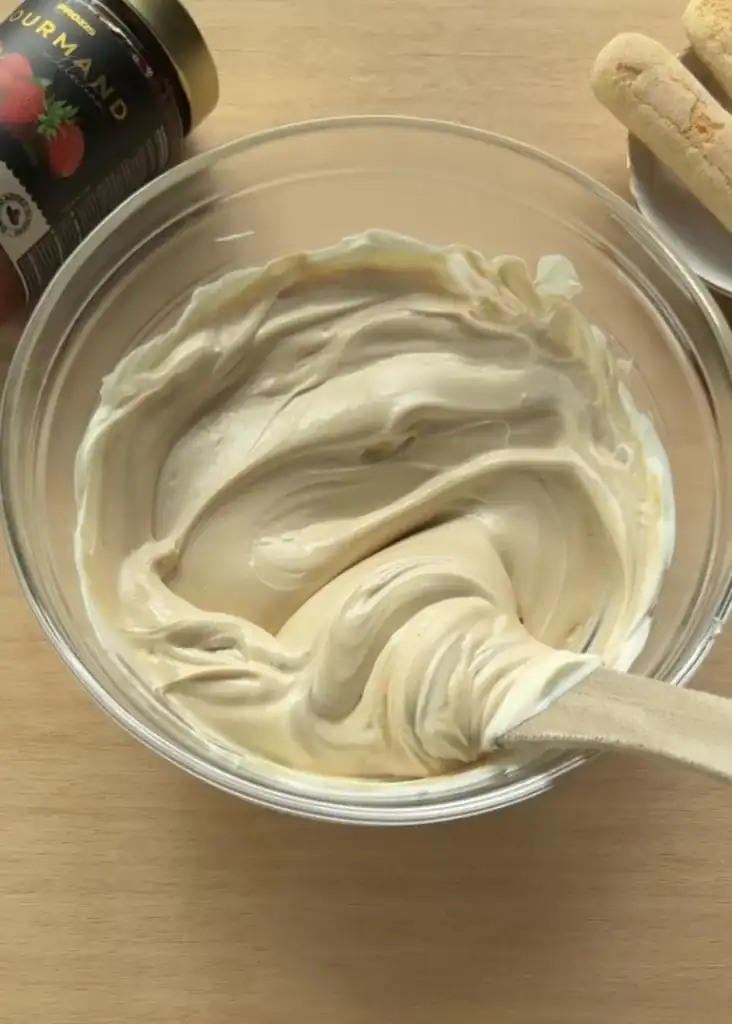
2. Strawberry tiramisu filling
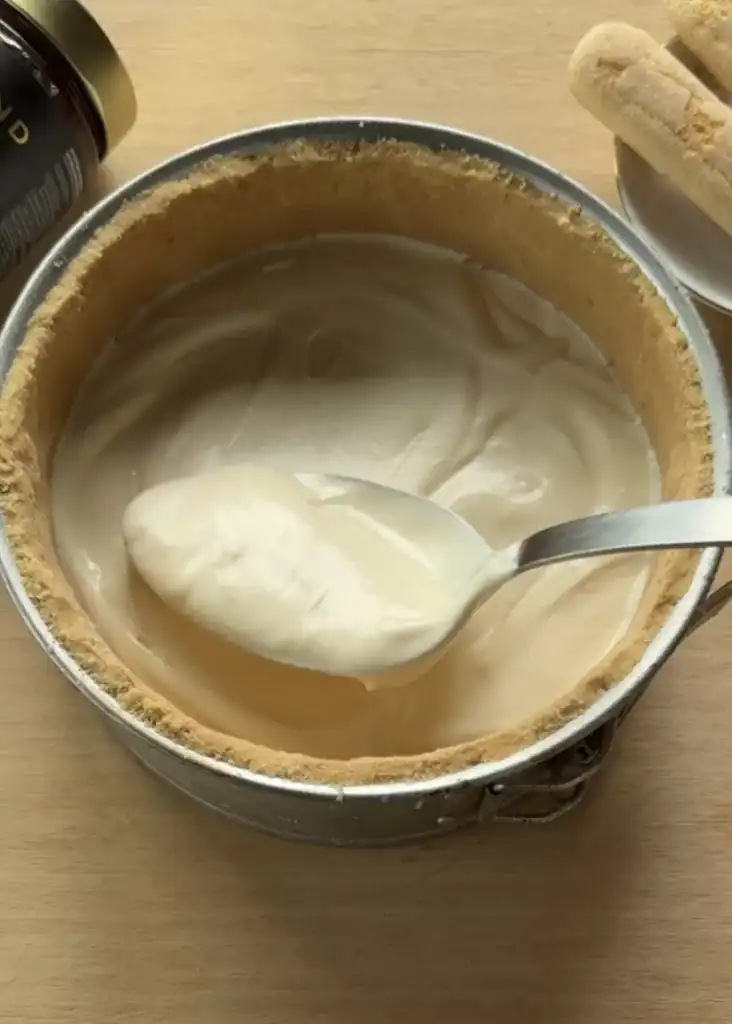
Next, prepare the filling. In one bowl, gently work the room temperature mascarpone cheese together with the Biscoff spread using a spatula. Do not overmix, as the texture can turn grainy.
In a separate bowl, whip the heavy cream with sugar until soft peaks form. Add the whipped cream to the mascarpone mixture and carefully fold it in with a spatula. Work slowly and stop as soon as it comes together—this will keep the filling light and smooth.

3. prepare the strawberry milk
Now, prepare the strawberry milk for soaking the ladyfingers. In a small bowl, combine hot milk with strawberry jam and stir until the jam fully dissolves into the milk.
This sweet mixture will be used to soak the ladyfingers
4. Assemble the cake
- Assemble the cake by spreading a generous layer of strawberry jam over the cookie crust.
- Add half of the tiramisu filling and smooth it evenly.
- Dip the ladyfingers into the strawberry milk and arrange them on top.
- Spread another layer of strawberry jam.
- Finish with the remaining tiramisu filling, smoothing out the surface
- Decorate with Biscoff spread
You have to make sure you refrigerate the cake for at least 8 hours to be able to decorate it with the warm, melted Biscoff spread.
Best Tips for Making This Strawberry Dessert
Before you start, here are some important and useful tips to help you create the perfect Strawberry Tiramisu Cake. Following these will ensure your dessert is creamy, smooth, and beautifully structured every time.
- Use room temperature mascarpone cheese for a smooth, creamy filling. It’s easier to work with.
- Choose heavy whipping cream with at least 35% fat; lower-fat cream won’t whip properly.
- Whip the cream only to soft peaks—overwhipping can make the texture too stiff.
- Be careful not to overmix any part of the filling, or it may turn grainy.
- Always refrigerate the cake for the recommended time. Without chilling, it won’t hold its structure.

Strawberry Tiramisu Cake
- Prep Time: 20 minutes
- Refrigerate: 8 hours
- Cook Time: 0 minutes
- Total Time: 8h and 20 minutes
- Yield: 10 portions
- Category: no bake dessert
- Method: no bake
- Cuisine: american
Description
This no bake Strawberry Tiramisu Cake is silky, creamy, and bursting with fresh strawberry flavor. Layers of cookie crust, strawberry jam, creamy tiramisu filling, and soaked ladyfingers are topped with luscious Biscoff spread for a dessert that’s both easy to make and impressively elegant.
Ingredients
Cookie crust:
- 270 grams cookies
- 65 grams melted butter
Tiramisu Filling:
- 400 grams mascarpone cheese
- 130 grams granulated sugar
- 55 grams Biscoff Spread
- 170 grams Heavy Whipping Cream
Jam Layers:
- 350 grams Strawberry jam
Ladyfingers:
- 9 ladyfingers
Strawberry Milk
- 5 tablespoons Strawberry Jam
- 55 grams Milk
Decorate:
- 140 grams Biscoff Spread
Instructions
-
Blend the cookies in a food processor until they turn into fine crumbs.
-
Mix the cookie crumbs with melted butter until fully combined.
-
Press the mixture into a springform pan, starting with the sides, then the bottom. Freeze while preparing the filling.
-
Gently mix room temperature mascarpone cheese with Biscoff spread using a spatula until smooth.
-
In a separate bowl, whip the heavy cream with sugar until soft peaks form.
-
Fold the whipped cream into the mascarpone mixture slowly, keeping it light and smooth.
-
Heat milk and stir in strawberry jam until fully combined to make the soaking mixture.
-
Spread a layer of strawberry jam over the cookie crust.
-
Spread half of the tiramisu filling over the jam layer.
-
Dip the ladyfingers into the strawberry milk mixture and arrange them on top of the filling.
-
Spread another layer of strawberry jam over the soaked ladyfingers.
-
Spread the remaining tiramisu filling on top and smooth it out.
-
Refrigerate the cake for at least 8 hours, or overnight, to let the layers set.
-
Melt the Biscoff spread and pour it evenly over the top before serving.
Notes
-
This is a no bake dessert, so it’s easy and stress-free.
-
Refrigeration is essential; the cake needs at least 8 hours to set, overnight is best.
-
Use room temperature mascarpone cheese for a smooth, creamy filling.
-
Heavy cream should have at least 35% fat to whip properly.
-
Be careful not to overmix the filling to prevent a grainy texture.
-
Any similar-sized springform pan can be used, just adjust layers if needed.
-
Strawberry jam can be swapped for your favorite fruit jam if desired.
-
The cake is best served chilled and fresh from the fridge, but leftovers can be stored and lightly warmed if desired.
ARCHER'S FOOD
Easy and delicious recipes


One Comment