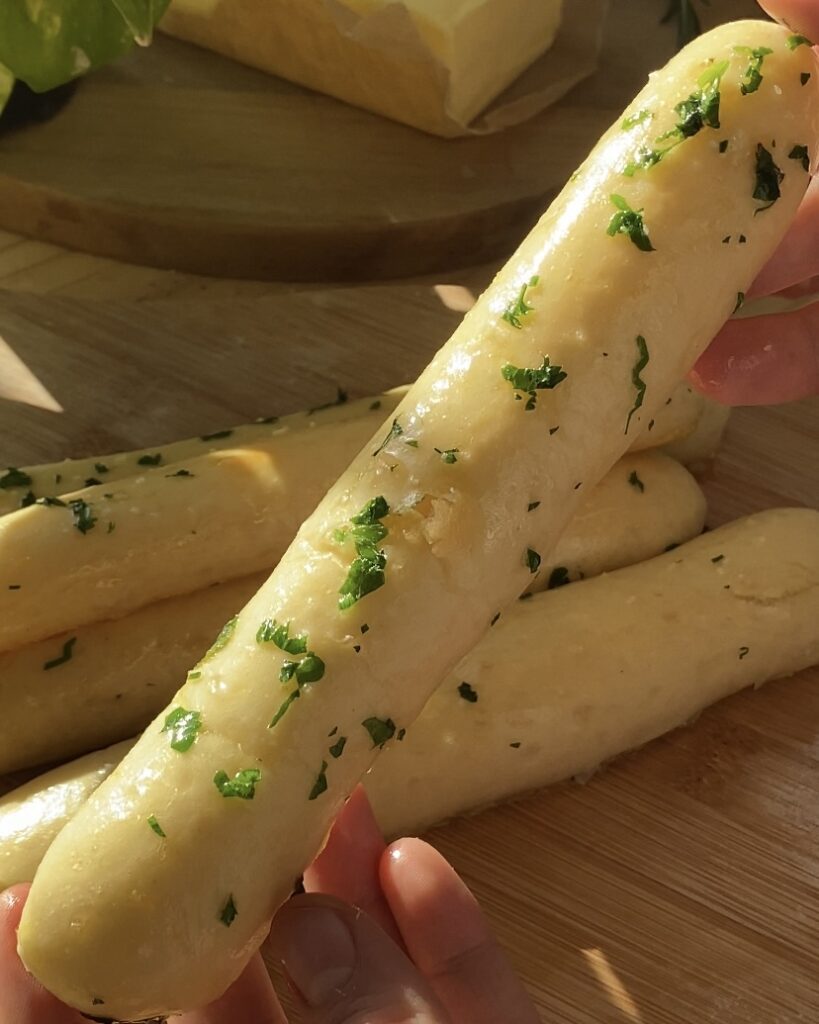
Craving the irresistible, melt-in-your-mouth breadsticks from Olive Garden? Now you can enjoy the same soft, fluffy, and perfectly buttery breadsticks right at home! This easy-to-follow copycat recipe brings the warmth and comfort of restaurant-style breadsticks straight to your kitchen. With just a few simple ingredients, you’ll have homemade breadsticks that are golden on the outside, pillowy on the inside, and topped with a delicious garlic butter that’ll make your taste buds dance. Perfect for any meal or as a snack, these breadsticks are sure to become a family favorite!
This is an updated recipe posted on 24 December 2024
What are the sauces that go with the Olive Garden breadsticks?
- Marinara Sauce – A classic tomato based sauce that pairs perfectly with the warm, soft breadsticks.
- Alfredo Sauce – A creamy and rich sauce made with butter, cream, and Parmesan cheese, offering a smooth and indulgent dip.
- Garlic Butter – The same buttery, garlicky goodness that’s brushed on the breadsticks themselves, often served as a dip for extra flavor.
- Pesto Sauce – A basil based sauce with olive oil, Parmesan, and pine nuts, providing a fresh, herbaceous dip for those who love a more savory option.
equipment you need to make Olive Garden breadsticks
- Mixing Bowls – Essential for combining your ingredients and kneading the dough.
- Measuring Cups and Spoons or kitchen scale – Ensure you have accurate measurements for all your ingredients.
- Stand Mixer – A stand mixer with a dough hook makes kneading the dough easier, creating soft and fluffy breadsticks.
- Rolling Pin – Helps roll the dough to the ideal thickness for perfectly shaped breadsticks.
- Baking Sheet or Tray – A baking sheet for placing your breadsticks while they bake to golden perfection.
- Parchment Paper or Silicone Baking Mat – Prevents sticking and ensures an even bake for those soft and fluffy breadsticks.
- Pastry Brush – Ideal for brushing the butter sauce on the breadsticks, adding that delicious flavor.
- Cooling Rack – A cooling rack allows your breadsticks to cool evenly, keeping them soft and fluffy.
Different variations of this recipe and possible substitutions:
Making Olive Garden breadsticks at home allows you to get creative with flavors and adapt the recipe to suit your preferences or dietary needs. Here are some popular variations and substitutions:
- Garlic Parmesan breadsticks: Enhance the classic recipe by sprinkling freshly grated Parmesan cheese and a pinch of Italian seasoning over the breadsticks after brushing them with garlic butter. This adds a cheesy, savory twist perfect for dipping in marinara or Alfredo sauce.
- Whole Wheat Breadsticks: For a healthier alternative, replace half or all of the all-purpose flour with whole wheat flour. The breadsticks will have a heartier texture and a slightly nutty flavor while still remaining soft and fluffy.
- Make the recipe vegan-friendly by substituting butter with vegan butter and using plant-based milk instead of dairy milk. Skip the egg wash and brush the breadsticks with olive oil or a garlic-infused vegan butter for a golden finish.
- Herb-Infused Breadsticks: Add dried or fresh herbs like rosemary, oregano, or thyme directly into the dough for a flavorful twist. You can also sprinkle the herbs on top after brushing the breadsticks with garlic butter for extra aroma and taste.
- Spicy Breadsticks: For a little heat, add a pinch of red pepper flakes or cayenne pepper to the melted garlic butter used for brushing. Pair these spicy breadsticks with a creamy dipping sauce to balance the flavors.
The best tips on how to make Olive Garden breadsticks
These are the ultimate tips to ensure your homemade Olive Garden breadsticks turn out soft, fluffy, and absolutely delicious every time!
- Use Fresh active dry Yeast – Always check the expiration date on your yeast. Expired yeast won’t activate properly, which can ruin the rise and texture of your breadsticks.
- Measure Ingredients Precisely – A kitchen scale is crucial for perfect results. Weighing the dough ensures evenly sized breadsticks, just like the restaurant’s signature look.
- Allow the Dough to Rest in a Warm Place – Let the dough rise until it doubles in size. Resting in a warm, draft-free spot ensures soft and fluffy breadsticks.
- Shape Evenly Sized Breadsticks – Divide and weigh the dough before rolling to create perfectly uniform breadsticks that bake evenly.
- Brush with Egg Wash Before Baking – An egg wash gives the breadsticks their golden brown color, making them as visually appealing as they are tasty.
- Bake Until Just Golden Brown – Avoid overbaking to keep the breadsticks soft and fluffy. Overbaking can make them dry and less enjoyable.
- Brush Generously with Butter – Once baked, coat the breadsticks in a rich. butter glaze for that iconic Olive Garden flavor and a shiny, irresistible finish.
- Serve Fresh and Warm – These breadsticks are best enjoyed straight out of the oven, soft and buttery, just like at Olive Garden.
Common questions on how to make soft and fluffy breadsticks
Why didn’t my Olive Garden breadsticks rise properly?
This usually happens if the yeast is expired or the water used to activate it was too hot or too cold. Make sure to use fresh yeast and warm water between 100–110°F (37–43°C) to properly activate the yeast, which is essential for soft and fluffy breadsticks.
How do I make my breadsticks soft like Olive Garden’s?
To achieve soft breadsticks, ensure the dough is well-kneaded and allow it to proof in a warm place until it doubles in size. Brushing the baked breadsticks with melted garlic butter also keeps them soft and flavorful, just like the restaurant-style breadsticks.
Can I make Olive Garden breadsticks without milk powder?
Yes, you can skip the milk powder if you don’t have it. However, milk powder adds a richer flavor and helps create a softer texture in the breadsticks.
What’s the secret to getting golden brown breadsticks?
Using an egg wash made with one beaten egg and a tablespoon of cream is the key. Brush the egg wash generously over the breadsticks before baking to give them a golden brown finish that mimics the breadsticks perfectly.
Can I prepare the dough for Olive Garden breadsticks ahead of time?
Yes! After shaping the breadsticks, cover them and refrigerate for up to 24 hours. Allow them to come to room temperature and rise for about 30 minutes before baking.
How do I make the garlic butter for Olive Garden breadsticks?
Melt butter and mix with garlic powder and a pinch of salt. Brush generously over the baked breadsticks for that authentic Olive Garden garlic butter breadstick flavor.


How to make Olive Garden breadsticks without active dry yeast
If you don’t have active dry yeast, you can still make delicious Olive Garden breadsticks using fresh yeast or instant yeast. Here’s how to adjust the recipe while keeping the same soft, fluffy texture and irresistible flavor.
fresh yeast
To replace active dry yeast, use 17.5 grams of fresh yeast for this Olive Garden breadsticks copycat recipe. For the best results, crumble the fresh yeast and add it to the dough after kneading for about 10 minutes. Adding it midway through kneading prevents the proofing process from starting too early, ensuring a perfectly soft and fluffy texture.
Alternatively, you can dissolve the crumbled fresh yeast in a small amount of warm water (100–110°F) and add it to the dough at the beginning. If using this method, avoid kneading the dough for too long to prevent over-activating the yeast.
These tips ensure your homemade Olive Garden breadsticks are light, airy, and just as irresistible as the ones served in the restaurant!
active yeast
If you’re using instant yeast to make your Olive Garden breadsticks copycat recipe, you’ll need 7 grams (a 1:1 ratio with active dry yeast). Simply mix the instant yeast directly with the dry ingredients, such as flour and salt. Then, add warm water (100–110°F) to the mixture—there’s no need to activate the yeast beforehand. From there, proceed with the recipe as usual, and you’ll have soft, buttery, restaurant-style breadsticks that are just as delicious as the originals!
Recipe to make Olive Garden breadsticks
Recipe in cups and grams. You can find the cup measurements in the printable recipe scrolling down at the end.
ingredients
dough
- 90 grams warm water
- 7 grams active dry yeast
- 1 teaspoon sugar
- 300 grams all purpose flour
- 90 grams milk
- 70 grams soft butter
- 1 teaspoon milk powder (optional)
- 1 teaspoon salt
egg wash
- 1 egg
- 1 tablespoon heavy cream
step by step: Olive Garden breadsticks
1) step one, prepare the sponge mixture
Start by preparing the yeast mixture in a Pyrex glass or mixing bowl. Combine warm water (100–110°F) with active dry yeast and a teaspoon of sugar. Stir gently and let it sit for 5–10 minutes until the mixture becomes foamy. This step ensures the yeast is activated and ready to create soft, fluffy breadsticks.

2) step two, add the rest of dough ingredients
In a large mixing bowl, combine milk, softened butter, salt, flour, and milk powder (optional). Mix these ingredients to start forming the dough base. Once the yeast mixture (sponge) is ready and foamy, pour it into the bowl with the other ingredients.

3) step three, knead the dough
Transfer the dough to a stand mixer fitted with a dough hook. Knead the mixture on medium speed for 10 minutes until it becomes smooth and elastic. Proper kneading develops the gluten, which is essential for the soft and fluffy texture of Olive Garden breadsticks. If kneading by hand, work the dough on a lightly floured surface for about 10-15 minutes. Ensure the dough is soft but not sticky for the best results.

4) step four, proof dough
Place the kneaded dough into a greased mixing bowl. Cover it with a damp cloth or plastic wrap to keep it from drying out. Let the dough proof in a warm, draft-free place for about 1 hour and 30 minutes, or until it doubles in size. This step is crucial for achieving the soft, fluffy texture that makes Olive Garden breadsticks so irresistible.
5) step five, shape the breadsticks
Roll out the dough on a lightly floured surface into an even rectangle. Use a sharp knife or dough cutter to divide the dough into 12 equal pieces. For precision, weigh each piece using a kitchen scale. Roll each portion into a smooth breadstick shape. Place the shaped breadsticks onto a parchment-lined baking sheet, leaving enough space between them for rising and cover with plastic wrap.


6) step six, second proof
Allow them to rest for 30 minutes in a warm spot. This resting period lets the dough rise again, ensuring the breadsticks bake up soft, fluffy, and just like Olive Garden’s signature breadsticks.
7) step seven, bake the olvie garden breadsticks
Preheat the oven to 180°C (350°F). While the oven heats up, prepare an egg wash by beating one egg with a tablespoon of whipped cream. Use a pastry brush to generously apply the egg wash on all the Olive Garden breadsticks. This step gives the breadsticks a beautiful golden brown color, just like the restaurant-style breadsticks you love.
Bake the Olive Garden breadsticks for 15–18 minutes, or until they are golden and fully cooked. Once out of the oven, brush them with melted butter for a shiny, flavorful finish. This final touch enhances the flavor and gives them the iconic look of buttery breadsticks from Olive Garden.


The best breadsticks Olive Garden copycat
- Prep Time: 20 minutes
- Cook Time: 15 minutes
- Total Time: 2 hours 5 minutes
- Yield: 12 1x
Description
Olive Garden Breadsticks Copycat Recipe: Soft, Fluffy, and Absolutely Delicious!
Ingredients
dough
- 90 grams warm water
- 7 grams active dry yeast
- 1 teaspoon sugar
- 300 grams all purpose flour
- 90 grams milk
- 70 grams soft butter
- 1 teaspoon milk powder (optional)
- 1 teaspoon salt
egg wash
- 1 egg
- 1 tablespoon heavy cream
Instructions
step one, prepare the sponge mixture
- Start by preparing the yeast mixture in a Pyrex glass or mixing bowl. Combine warm water (100–110°F) with active dry yeast and a teaspoon of sugar. Stir gently and let it sit for 5–10 minutes until the mixture becomes foamy. This step ensures the yeast is activated and ready to create soft, fluffy breadsticks.
step two, add the rest of dough ingredients
- In a large mixing bowl, combine milk, softened butter, salt, flour, and milk powder (optional). Mix these ingredients to start forming the dough base. Once the yeast mixture (sponge) is ready and foamy, pour it into the bowl with the other ingredients.
step three, knead the dough
- Transfer the dough to a stand mixer fitted with a dough hook. Knead the mixture on medium speed for 10 minutes until it becomes smooth and elastic. Proper kneading develops the gluten, which is essential for the soft and fluffy texture of Olive Garden breadsticks. If kneading by hand, work the dough on a lightly floured surface for about 10-15 minutes. Ensure the dough is soft but not sticky for the best results.
step four, proof dough
- Place the kneaded dough into a greased mixing bowl. Cover it with a damp cloth or plastic wrap to keep it from drying out. Let the dough proof in a warm, draft-free place for about 1 hour and 30 minutes, or until it doubles in size. This step is crucial for achieving the soft, fluffy texture that makes Olive Garden breadsticks so irresistible.
step five, shape the breadsticks
- Roll out the dough on a lightly floured surface into an even rectangle. Use a sharp knife or dough cutter to divide the dough into 12 equal pieces. For precision, weigh each piece using a kitchen scale. Roll each portion into a smooth breadstick shape. Place the shaped breadsticks onto a parchment-lined baking sheet, leaving enough space between them for rising and cover with plastic wrap.
step six, second proof
- Allow them to rest for 30 minutes in a warm spot. This resting period lets the dough rise again, ensuring the breadsticks bake up soft, fluffy, and just like Olive Garden’s signature breadsticks.
step seven, bake the olvie garden breadsticks
- Preheat the oven to 180°C (350°F). While the oven heats up, prepare an egg wash by beating one egg with a tablespoon of whipped cream. Use a pastry brush to generously apply the egg wash on all the Olive Garden breadsticks. This step gives the breadsticks a beautiful golden brown color, just like the restaurant-style breadsticks you love.
- Bake the Olive Garden breadsticks for 15–18 minutes, or until they are golden and fully cooked. Once out of the oven, brush them with melted butter for a shiny, flavorful finish. This final touch enhances the flavor and gives them the iconic look of buttery breadsticks from Olive Garden.
Nutrition
- Calories: 152
- Sugar: 1
- Sodium: 242
- Fat: 6
- Saturated Fat: 4
- Carbohydrates: 20
- Fiber: 1
- Protein: 4
- Cholesterol: 29
Archersfood
Recipes from my family to yours
