
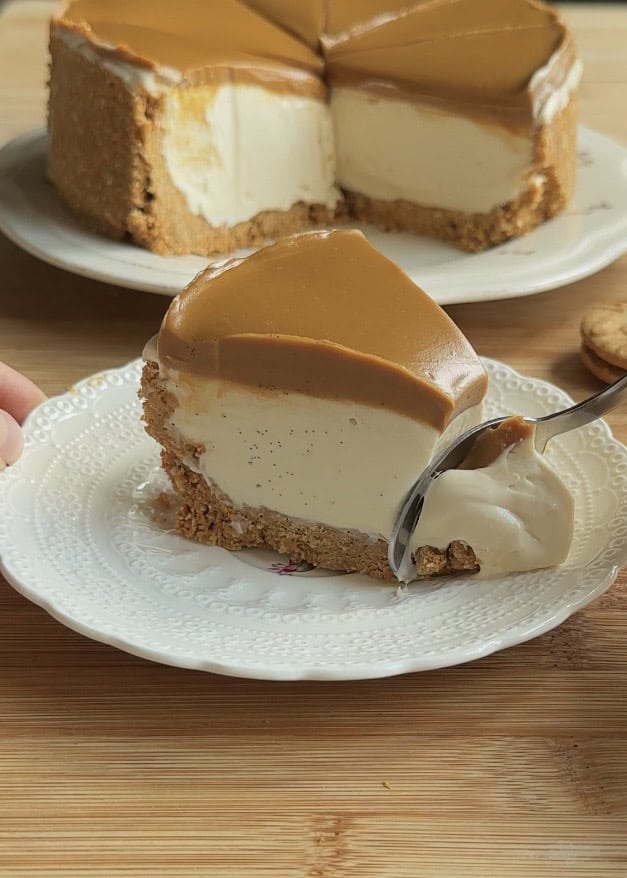
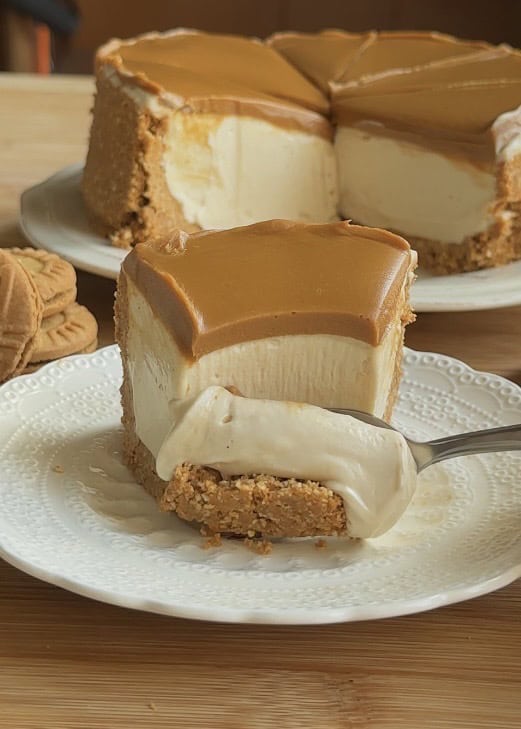
Calling all Biscoff lovers! Dive into this No-Bake Vanilla Bean Biscoff Cheesecake, where simple ingredients come together in minutes—no oven needed.
The creamy, smooth texture melts on your tongue, thanks to real vanilla bean and airy whipped cream folded into the tangy cheesecake base.
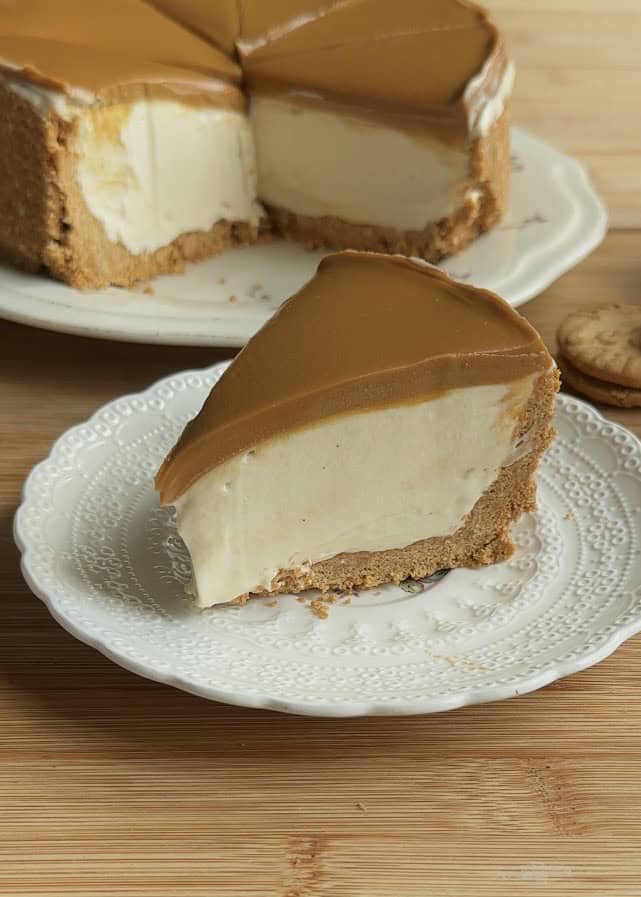
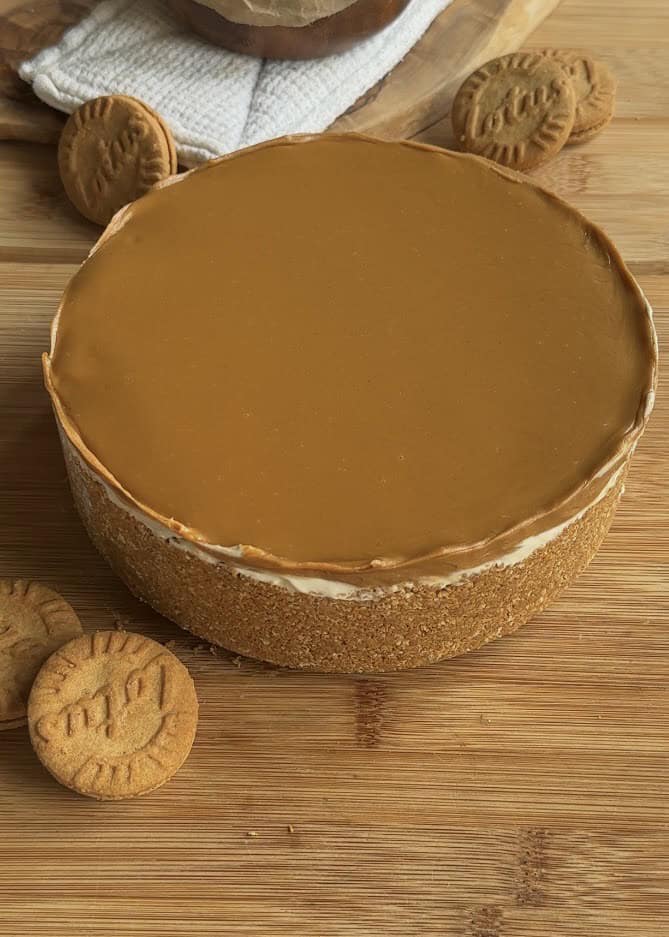
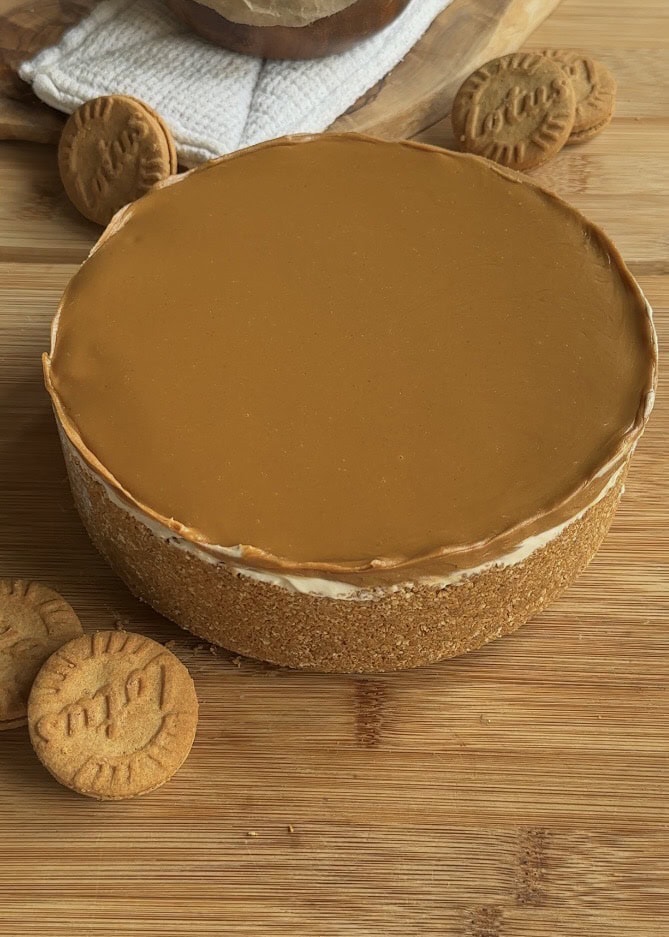
A buttery Biscoff cookie crust wraps up the flavorful, decadent experience, finished with a glossy drizzle of melted Biscoff spread on top.
Easy to make and utterly delicious, this cheesecake is pure cookie-butter bliss in every bite!
Everyone can’t get enough of our Biscoff cheesecakes, so we decided to give you a lighter option that’s just as irresistible. On our website you’ll also find Biscoff rolls, a classic no-bake Biscoff cheesecake, Biscoff cheesecake bars, and so much more.
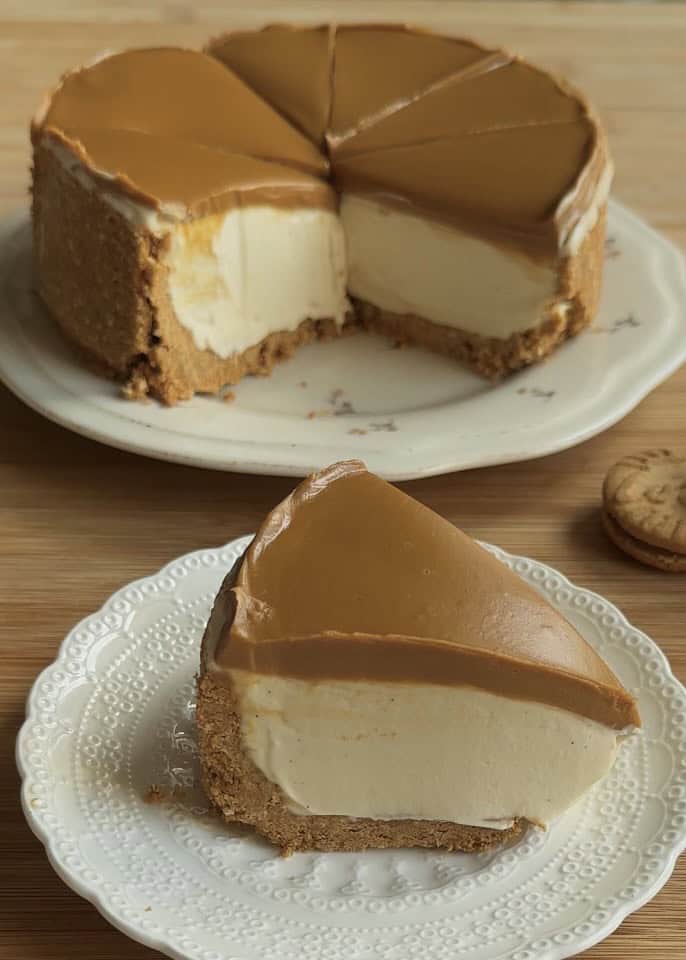
This new version is beautifully simple—just a buttery Biscoff cookie crust, a pillowy vanilla-bean filling swirled with Biscoff spread, and a glossy Biscoff drizzle—no oven required.
It’s incredibly easy to make, yet delivers all the flavor and fan-favorite crunch you’ve come to love. Give it a whirl and see why Biscoff fans keep coming back for more!
No-Bake Vanilla Bean Biscoff Cheesecake

Why You’ll love this Recipe
❀ No-Oven Needed – Prep, chill, and enjoy without heating up your kitchen.
❀ Silky Vanilla-Bean Filling – Real vanilla seeds create a smooth, mousse-like texture.
⭑ Quadruple Biscoff Flavor – Crust, filling, drizzle, and optional crumbs deliver pure cookie-butter bliss.
⭑ Super Simple Ingredients – Pantry staples only, yet impressively decadent.
Grab These Ingredients
- Biscoff Cookies: Crushed to create a flavorful, spiced cookie crust that complements the creamy filling.
- Unsalted Butter: Melted and combined with the cookie crumbs to bind the crust and add richness.
- Full-Fat Cream Cheese: Provides a smooth and creamy base for the cheesecake; using full-fat ensures the best texture.
- Vanilla Bean: Adds natural vanilla flavor and aromatic specks throughout the filling.
- Biscoff Spread: Incorporated into the filling and drizzled on top, it intensifies the Biscoff flavor.
- Heavy Whipping Cream (35% fat): Whipped to soft peaks and folded into the filling for a light, mousse-like texture.
- Powdered Sugar: Sweetens the whipped cream without adding graininess, ensuring a smooth consistency.
Special Tools to Make a No-Bake Vanilla Bean Biscoff Cheesecake
- Springform Pan: A springform pan is perfect for cheesecakes, making it easy to remove the dessert without harming the crust or filling.
- Mixing Bowls: You’ll want a couple of large mixing bowls—one for the crust and two more for the filling.
- Spatula: A silicone spatula helps mix ingredients smoothly and scrape the bowl for even blending.
- Electric Mixer or Whisk: An electric hand mixer or stand mixer saves time when whipping cream or mixing the filling. If you don’t have one, a whisk will do, though it takes a bit more effort.

How To Make No-Bake Vanilla Bean Biscoff Cheesecake
crust
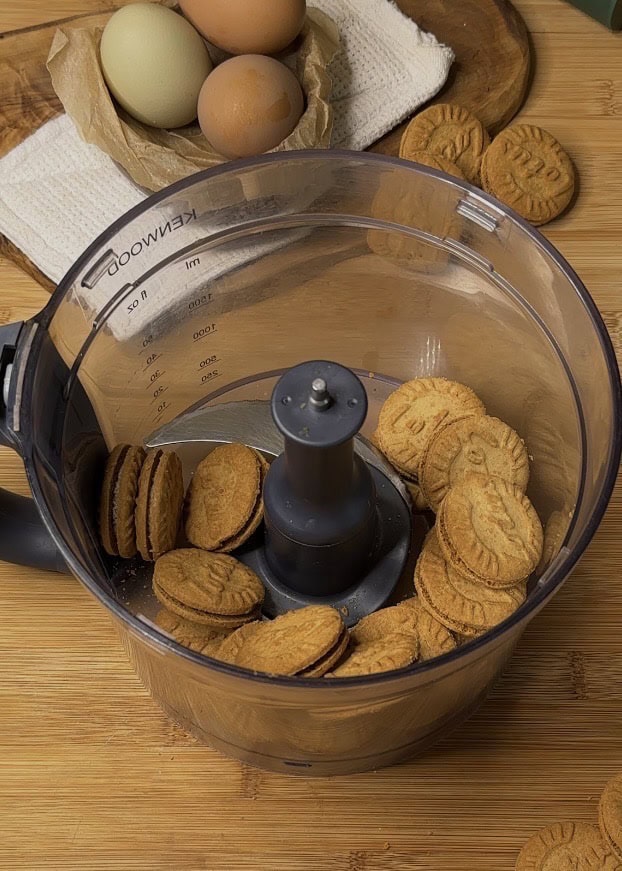
We’ll begin by using any Biscoff cookies you have on hand. If you don’t have speculoos, you can substitute with any spiced cookies or even graham crackers.
Place them in a food processor and blend until they form fine crumbs

Place the crushed Biscoff cookies into a mixing bowl. Add the melted butter and Biscoff spread, stirring until the mixture resembles wet sand.
The exact amount of butter needed can vary due to factors like humidity and the type of cookies used, so feel free to adjust the quantity to achieve the desired consistency.
Transfer the crumb mixture into a springform pan. Begin by pressing the mixture firmly against the sides to form a sturdy edge, then press the remainder evenly across the bottom to create the base.
Ensuring the crust is well-compacted helps maintain its shape and prevents crumbling when slicing.
Once the crust is shaped, place the pan in the freezer to set while you prepare the filling.
Cheesecake Filling
Prepare the Filling for Your No-Bake Vanilla Bean Biscoff Cheesecake
In a mixing bowl, soften the room-temperature cream cheese by stirring it with a spatula until it’s smooth and creamy.
Next, split two vanilla beans lengthwise and scrape out the seeds. Add these fragrant vanilla seeds to the cream cheese mixture, ensuring they’re well incorporated.
Then, add the Biscoff spread and mix until the filling is thoroughly combined and smooth. Remember to reserve the empty vanilla pods—you can repurpose them to infuse flavor into sugar or other desserts later on.

In a separate mixing bowl, pour in the heavy cream, ensuring it has a minimum fat content of 35%. This fat percentage is crucial for achieving the desired whipped texture.
Add the powdered sugar to the cream. Using a whisk or electric mixer, whip the mixture until it forms soft peaks—when you lift the whisk, the peaks should gently fold over themselves.
Be cautious not to overwhip; exceeding the soft peak stage can cause the cream to curdle or turn grainy when incorporated into the dessert.


Carefully fold the whipped cream into the cream cheese mixture in two stages, using a spatula. Begin by adding half of the whipped cream, gently folding it in until just combined.
Repeat with the remaining whipped cream. Be cautious not to overmix, as excessive stirring can cause the mixture to become grainy or curdled.

build the cheesecake
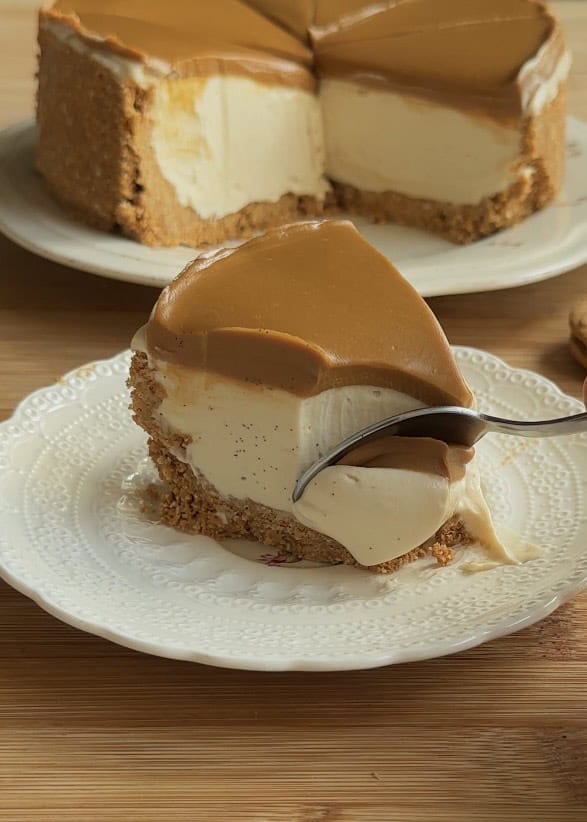
Carefully pour the prepared cheesecake filling into the chilled crust that has been resting in the freezer.
Use a spatula to gently spread the filling evenly, ensuring it reaches all edges and corners. Smooth the top to create a level surface, which will help in achieving a professional-looking finish once the cheesecake is set.


To ensure your No-Bake Vanilla Bean Biscoff Cheesecake achieves the perfect creamy texture and allows the flavors to meld beautifully, refrigerate it for at least 8 hours.
For optimal results, leaving it overnight is recommended.
If you’re short on time, you can place it in the freezer for 4-5 hours, but be aware that the texture may be slightly firmer.
decorate
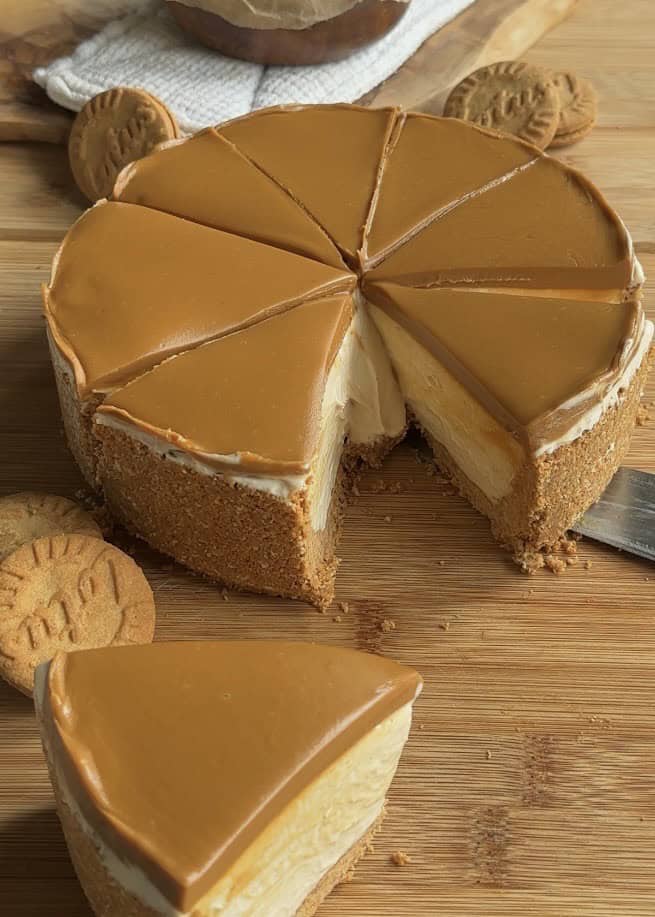
To decorate, melt some Biscoff spread in the microwave and pour it over the cheesecake. Gently tilt the pan to spread it evenly, then let it set for a few minutes. Once set, slice into portions and serve.

Best Tips to make a Vanilla Dessert with Biscoff
- Room Temperature Cream Cheese – Ensure your cream cheese is fully softened to avoid lumps in the filling. Cold cream cheese won’t blend smoothly.
- Use High-Fat Heavy Cream (35% or more) – Lower-fat cream won’t whip properly and may result in a runny cheesecake.
- Whip Cream to Soft Peaks Only – Overwhipping can make the filling grainy or too stiff. Stop when the cream holds gentle peaks that slightly droop.
- Chill the Crust Before Adding Filling – Press the Biscoff crust into the pan and refrigerate for at least 15-20 minutes to prevent crumbling when sliced.
No-Bake Vanilla Bean Biscoff Cheesecake
- Prep Time: 40 min
- Refrigerate: 8h
- Total Time: 8h 40 min
- Yield: 8-10
- Category: no bake dessert
Description
Indulge in this creamy No-Bake Vanilla Bean Biscoff Cheesecake—easy, oven-free, and bursting with cookie butter bliss! A buttery Biscoff crust, velvety vanilla filling, and luscious Biscoff drizzle make this dessert irresistible.
Ingredients
Crust
- 315 grams Biscoff cookies
- 65 grams melted butter
- 1 tablespoon Biscoff spread
cheesecake filling
- 2 vanilla beans
- 400 grams cream cheese
- 100 grams powdered sugar
- 50 grams Biscoff spread
- 200 grams heavy whipping cream
decorate
- 100 grams Biscoff spread
Instructions
Crust
-
Blend Biscoff cookies (or spiced cookies/graham crackers) in a food processor until fine crumbs form.
-
In a bowl, combine crumbs with melted butter and a spoonful of Biscoff spread until the texture resembles wet sand. Adjust butter as needed.
-
Firmly press the mixture into a springform pan, building up the sides first, then the base. Freeze for at least 15-20 minutes to set.
cheesecake filling
-
Work the room-temperature cream cheese until smooth. Split the vanilla bean, scrape seeds into the cream cheese, and mix well.
-
Fold in Biscoff spread until fully combined.
-
In another bowl, beat heavy cream (35% fat or higher) with powdered sugar to soft peaks (peaks should gently droop). Avoid overwhipping!
-
Fold whipped cream into the cream cheese mixture in two batches, using a spatula. Stop once just combined to prevent graininess.
Build the cheesecake
-
Spread the filling evenly over the chilled crust. Smooth the top with a spatula.
-
Chill for at least 8 hours (or overnight) for the best texture. For a quicker set, freeze for 4-5 hours
decorate
- Microwave Biscoff spread until runny, then drizzle over the cheesecake. Tilt the pan to spread it. Let set for 5 minutes.
- Release the springform and cut into slices. Serve cold.
Notes
- Room Temperature Cream Cheese – Ensure your cream cheese is fully softened to avoid lumps in the filling. Cold cream cheese won’t blend smoothly.
- Use High-Fat Heavy Cream (35% or more) – Lower-fat cream won’t whip properly and may result in a runny cheesecake.
- Whip Cream to Soft Peaks Only – Overwhipping can make the filling grainy or too stiff. Stop when the cream holds gentle peaks that slightly droop.
- Chill the Crust Before Adding Filling – Press the Biscoff crust into the pan and refrigerate for at least 15-20 minutes to prevent crumbling when sliced.
ARCHER'S FOOD
Easy and delicious recipes


What size spring form pan is used for this?
17 cm x 6 cm
The filling was nice and light. I love the tang of the cream cheese mixed with the spicy sweetness of the biscoff. Just threw it in the fridge so we will try tomorrow.
I hope you love it!