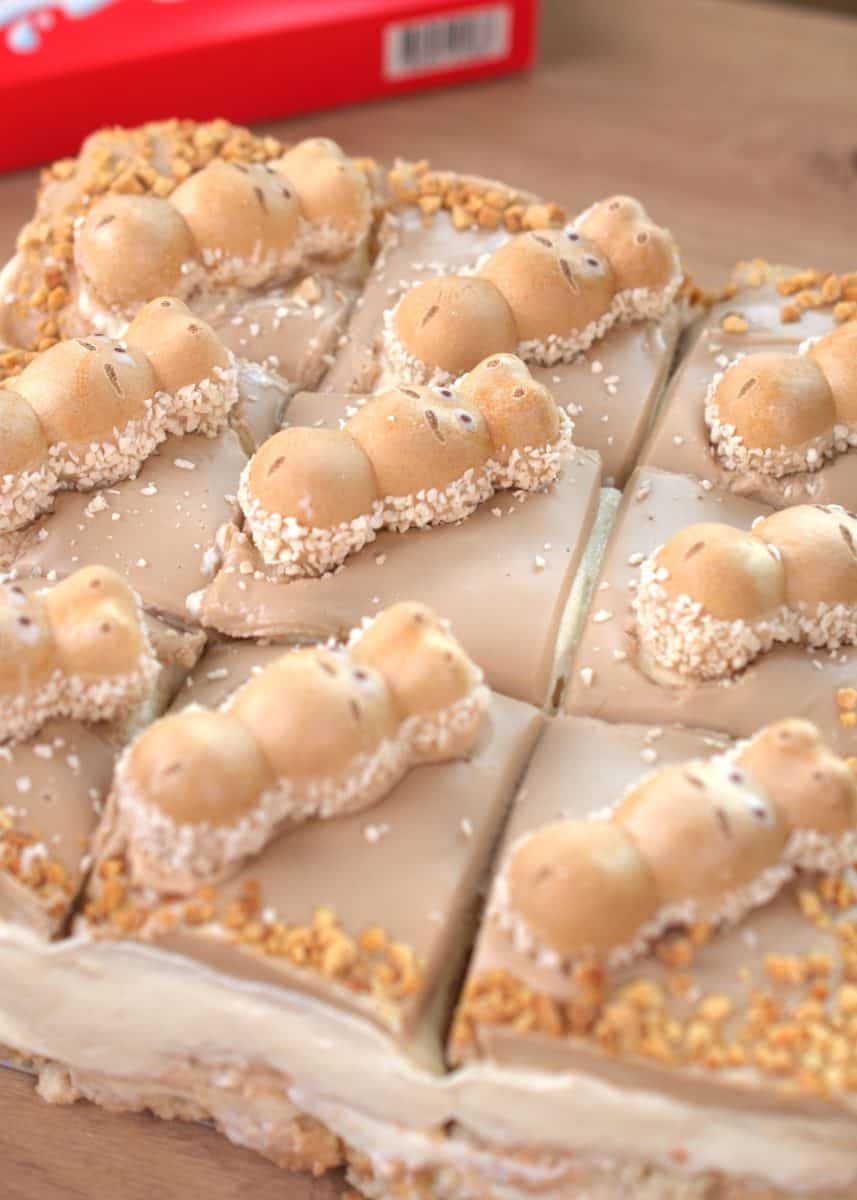
Delicious happy hippo tiramisu. This dessert is going to be the favorite of sooo many. It has a delicious creamy texture and our favorite childhood chocolates, happy hippos. They’re sweet, crunchy, and taste DELICIOUS.
I was so excited to make this as I love happy hippo chocolates so much, and I wanted to make a dessert including them. We have different desserts with this chocolate, like baked and unbaked cheesecakes on our website, another version of this tiramisu, and we plan on posting so many more recipes just so I can eat them more often.
Most of the time, we make recipes that some of you ask for or love, but this one was something I had been craving.
Happy hippo
If you never heard of a happy hippo is like a kinder bueno, but it just tastes so much better, it has a better crunch, and I personally enjoy it more than any other kinder chocolate.
You can easily find it at most grocery stores or online. They sell different types of happy hippo; this one is with hazelnut.

Add to your shopping list
For this recipe, we are using an ingredient that you could have trouble trying to find at stores, which is Kinder Bueno spread. It’s not sold by them (even though they should), you will find it in stores or online by the name of hazelnut spread, or white chocolate hazelnut butter.
I know Prozis carries them because we have ordered this exact product so many times from them, and I also have a discount if you’d like to use it (archersfood). It’s also available online at different stores.
- Happy hippos: adding them to the list first because they are the main ingredient. They are sweet, creamy, and delicious.
- Mascarpone cheese: it’s an Italian type of cheese with a similar texture to normal cream cheese. It changes the flavor slightly. It’s used to prepare many desserts.
- Cream cheese: we need it to mix with the mascarpone so we can have the perfect texture.
- Kinder spread: it’s a hazelnut spread that tastes just like kinder buenos. If you can’t find it anywhere, you can also make it yourself by mixing white chocolate-hazelnut butter and oil. We will share a recipe soon.
- Heavy whipping cream: make sure it has at least 35% fat content. You need to whip it to medium peaks.
- Powdered sugar: also known as icing sugar, it’s a very fine type of sugar that you can make yourself by blending granulated sugar until fine powder. They normally overprice it at stores, so making it yourself is much easier.
- Chopped hazelnuts: needed to decorate the happy hippo tiramisu
- Milk: to soak the ladyfingers until soft.
- Ladyfingers: they’re sponge-like biscuits that we use in many desserts.
 Buy Now →
  Buy Now →
  Buy Now →
  Buy Now →
  Buy Now →
  Buy Now →
  Buy Now →
  Buy Now →
  Buy Now →
 Tips to make the best tiramisu
- Don’t over-mix the mascarpone cheese; it’s very delicate, and if you over-mix it, it will curdle.
- When you whip the heavy whipping cream, use a clean, dry, and cold bowl and whisk. You can put the bowl in the freezer for 10 minutes so it’s very cold (dry it after to remove any humidity left).
- Chill the tiramisu long enough, or it might collapse. Any no-bake dessert requires a period of resting in the fridge, so it has time to set, and get the flavors to kind of know each other. If you rush the process, it won’t taste the same and will also be a melted mess.

Ingredients you need at room temperature: cream cheese, mascarpone cheese.
Ingredients you need melted: Kinder Bueno spread
Cold ingredients for this recipe: heavy whipping cream.
- Having the ingredients you need at the right temperature is very important. This way, the process can be smooth and more enjoyable. To have room temperature ingredients, make sure to leave them on the counter at least 1 hour before you start preparing this recipe. Try to find them a nice warm area that is not too cold.
- Melt the ingredients right before you use them; this way, they don’t have time to cool down again and harden, especially now that it is so cold.
- Cold ingredients need to stay in the refrigerator until you use them.
Recipe elaborations and order
- Mascarpone cheese and cream cheese in the counter 1 hour before you start.
- Whip heavy whipping cream until medium peaks.
- Prepare the filling (cream cheese plus mascarpone cheese)
- Finish preparing the tiramisu.
- Chill.
- Refrigerate.


How to fix overmixed heavy cream
Over-whipped cream can be fixed only at the medium peaks or stiff peaks point; after that, there’s no point of return. It has happened to everyone: you get distracted for a second, and the cream goes from medium peaks to stiff.
- Option 1. Remove about ¼ part of the cream and warm it up until it turns liquid. Slowly fold it into the whipped cream.
- Option 2. Add heavy whipping cream that has not been whipped. I’d recommend starting from ¼ part of the total weight of the cream you have whipped and going from there.
- Option 3. Combine both options.
You mustn’t whisk the cream anymore, and you only use a spatula to slowly and carefully fold the cream.

You will need the following tools
- Mixing bowls: have different-sized bowls. Make sure you have a microwave-safe bowl.
- Whisk, stand mixer, or hand electric mixer: I prefer using a stand mixer to whip the heavy whipping cream as it’s so much faster, and I can have it ready while I prepare the rest of the recipe.
- Spatulas: I love having a hard spatula for working the cream cheese or mascarpone and then a softer one for folding ingredients and scraping the sides of the bowl. (wooden spatula and silicone spatula!)
- A square pan: Use one with a removable bottom if you can find it; it will make the job much easier. We are using an 8-inch 20cm square pan. If you don’t have one with a removable bottom, use a normal square pan, line it with parchment paper, make sure you use a strong one, not one that melts easily; the parchment paper will be useful to pull the tiramisu out of the pan without breaking it.
- Offset spatula: we will smooth out the tiramisu for neat, even layers.
- A knife: to chop the happy hippos to add inside for layering.
 Buy Now →
  Buy Now →
  Buy Now →
  Buy Now →
  Buy Now →
  Buy Now →
  Buy Now →
 If you want to make this happy hippo tiramisu but in a different shape, just use a different-sized pan, oval, round, or any shape you like.
How to store a happy hippos Tiramisu
This tiramisu dessert must be refrigerated at all times. It can last up to 4 days in the fridge. Keep in mind that the happy hippo’s texture will change. Instead of a crunchy exterior, it will be softer.
The right storing temperature for a dairy dessert is 4 °C or under (39F). If the temperature on your fridge is higher than that it’s at a higher risk of growing bacteria and is unsafe to eat.
Freeze this dessert:
You can definitely freeze this Buenos dessert. There are some things you should keep in mind if you do so.
This dessert freezes really well, but not all parts of it. The happy hippos have a crunchy exterior that, when freezing and defrosting, will turn softer.
If you plan on freezing this dessert, don’t add the top decoration and save it for when you are going to eat it, so you can enjoy the crunchy topping.
Freeze the whole happy hippo Tiramisu Dessert: Place the tiramisu in a plate and cover it with aluminum foil. Place it inside a freezer-safe container.
Freeze in slices: for this recipe, I recommend cutting it into 9 portions. This method is perfect when you know you’ll want just one slice one day, not the whole cake. (what I always do!).
Place the sliced tiramisu servings in a tray lined with parchment paper. Make sure you leave space between each of the slices, and freeze for 2 to 4 hours just to make sure it’s hardened enough. Put them inside a freezer-safe bag; they won’t stick together now.
Make sure you add the name of the product and the day you made it so you can easily identify the food. For example: Happy hippo Tiramisu, 2/23/26 or day/month/year depending on what you normally do.
It’s safe to keep in the freezer for up to 3 months, but better to consume at the first month to avoid losing quality or freezer burn.

And that’s the whole recipe! If you tried this recipe, I would highly appreciate any review you want to give us. Select the stars and then add a little comment. Any review can help us so much.
Print
Happy hippo’s tiramisu
Ingredients
MILK
- 1 ¼ cups (300 ml) milk
- 2 tbsp Kinder Bueno spread
FILLING
- Slightly over 1 cup (245 ml) heavy whipping cream
- 2 cups (500 g) mascarpone cheese, room temperature
- Slightly over ½ cup (130 g) cream cheese, full-fat, room temperature
- 1 cup (245 g) Kinder Bueno spread or hazelnut spread
- 1/3 cup (45 g) powdered sugar
ASSEMBLE
- 14 ladyfingers, bottom layer
- 2 happy hippos, chopped
- 14 ladyfingers, middle layer
DECORATE
- Slightly over 2/3 cups (200 g) kinder spread
- 2 tbsp chopped hazelnuts
- 9 happy hippos
Instructions
- Start by preparing the milk mixture to soak the ladyfingers in. Warm up 1 ¼ cups (300 ml) of milk and add 2 tbsp Kinder Bueno spread. Mix until all incorporated.
- Prepare the filling. Start by whipping slightly over 1 cup (245 ml) heavy whipping cream until it reaches medium peaks. Use a whisk or stand mixer.
- In a mixing bowl, combine 2 cups (500 g) room temp mascarpone cheese, slightly over ½ cup (130 g) full-fat room temperature cream cheese. Use a hard spatula to work both ingredients. Add 1 cup (245 g) of Kinder Bueno spread and combine 1/3 cup (45 g) powdered sugar, and sift it over the rest of the ingredients.
- Fold in the heavy whipping cream until just incorporated.
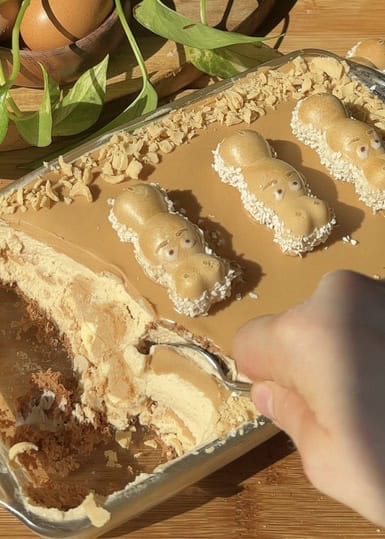
- Assemble the happy hippo tiramisu. We are using an 8-inch 20 cm square pan with a removable bottom. Start by soaking 14 ladyfingers in the milk mixture, and place them all at the bottom of the pan. Add half of the tiramisu filling and smooth it out. Chop 2 happy hippos (or more!) and sprinkle them.
- Soak 14 ladyfingers for the middle layer. Top it with the rest of the filling and smooth it out. Refrigerate for at least 8 hours, best overnight.
- Melt slightly over 2/3 cups (200 g) of Kinder Bueno spread in the microwave, in 10-15 second intervals, stirring each time to avoid burning. Pour the spread over the chilled tiramisu and tilt the pan around so it spreads all over the top. Place 2 tbsp of chopped hazelnuts on the edges and 9 happy hippos.