
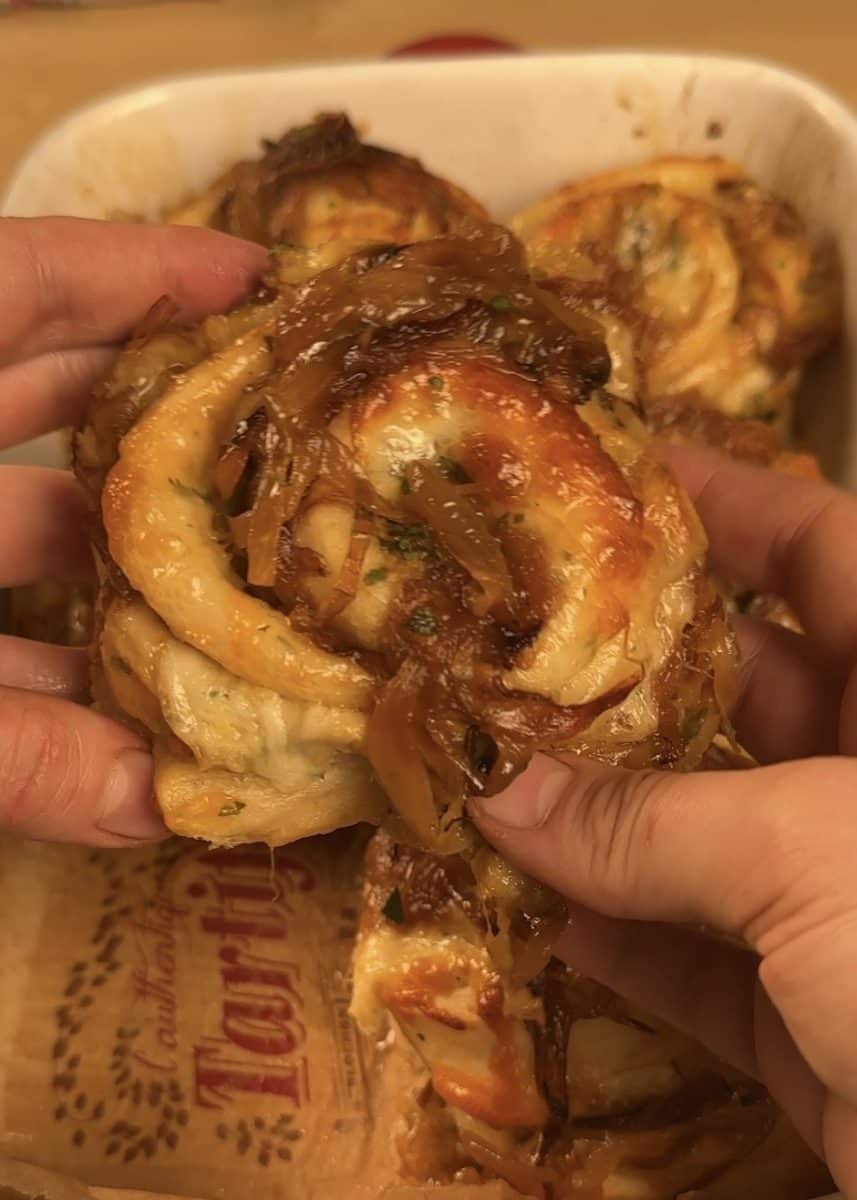
Did you know that not all rolls have to be sweet? Today, we’re making irresistibly savory Caramelized Onion Cheesy Rolls.
Since everyone loved our Cheesy Garlic Rolls and Pizza Rolls, we decided to create a different version, inspired by the deep flavor of ‘French onion soup’.

These rolls are packed with sweet, slow-cooked caramelized onions, and yes—lots and lots of cheese. The result is a rich, aromatic recipe that’s sure to impress every guest, making it perfect for holiday gatherings or a special weekend treat.
We’ve shared many roll recipes in the past, from sweet to savory, but this flavorful, cheesy version might just be our best one yet.
Savory rolls
This recipe is a new take on one of the most popular posts on our website. We start by slowly roasting garlic until it’s sweet and mellow, then caramelizing onions until they’re deeply golden and rich. We combine them with a generous amount of freshly grated cheese—lots and lots of it. All of this gets wrapped up in our soft, homemade dough and baked until the rolls are golden, bubbly, and utterly perfect.

How to caramelize onions
To make this recipe, you’ll need to master one of its foundational steps: perfectly caramelized onions.
The Process:
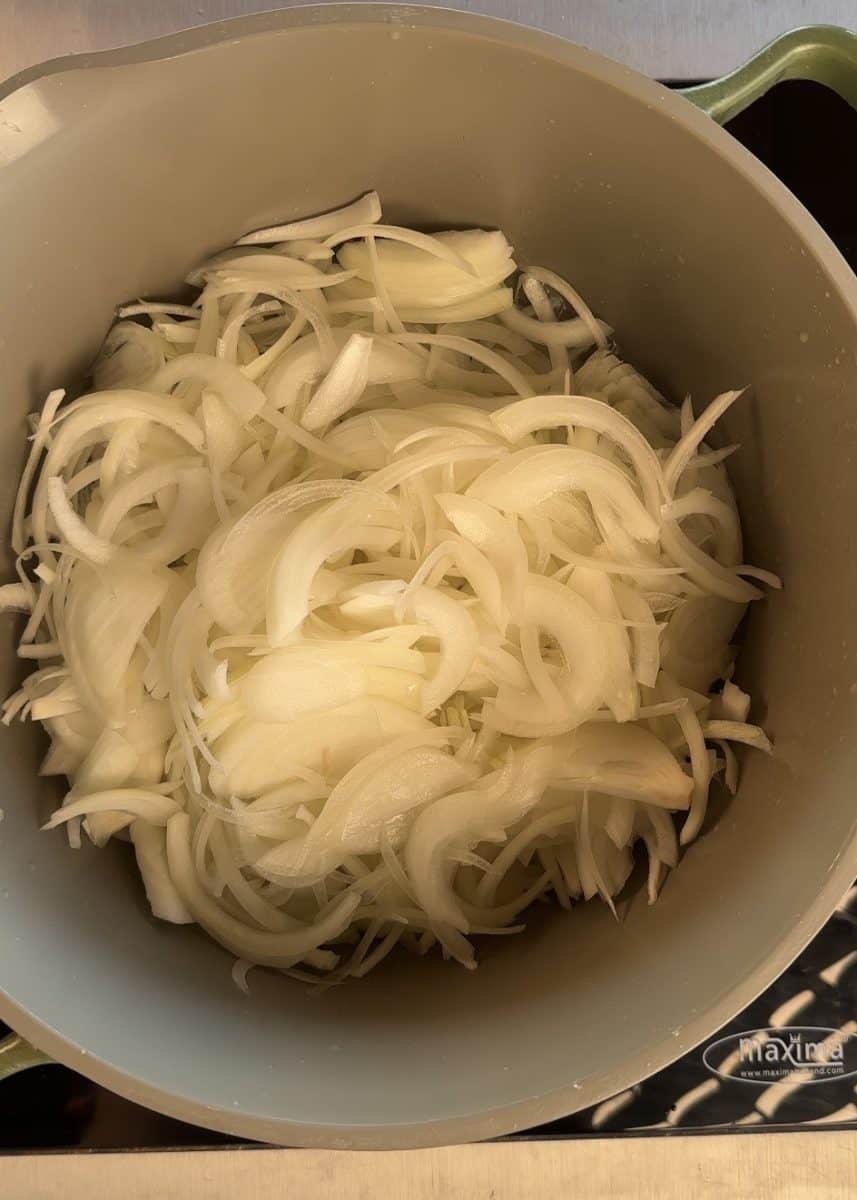
- Prep: Peel and slice your onions.
- Cook: In a large pot or deep skillet, melt a combination of butter and oil over medium-low heat. Add the onions and stir to coat.
- Caramelize: Cook the onions slowly, stirring frequently. They will first soften, then sweat, and finally begin to turn a deep golden brown. This process requires patience—do not rush it over high heat.
- Season & Finish: Once the onions start to develop some color, add a pinch of salt to help draw out moisture and deepen the flavor. Continue cooking, stirring often, until they are richly caramelized. This can take about 1 h 30 minutes.
Pro Tip: This is the perfect task to do while your dough is rising. The slow, hands-off cooking time aligns perfectly with the recipe’s other steps.

Ingredients you need and why
- All-Purpose Flour: The essential base for our soft, pliable dough, giving the rolls their perfect structure and tender crumb.
- Active Dry Yeast: The crucial leavening agent that makes the dough rise, creating light and airy rolls with a beautiful texture.
- Granulated Sugar: Feeds the yeast to ensure a strong rise, promotes a deeper golden-brown color during baking, and contributes to a subtly sweet flavor that balances the savory filling.
- Eggs
- Salt: A vital ingredient that regulates yeast activity, strengthens the gluten structure, and, most importantly, enhances and balances all the other flavors in both the dough and the rich caramelized onion and garlic filling.
- Milk: Gently warmed to activate the yeast, it enriches the dough for a softer texture, a more tender crumb, and a richer flavor than water alone.
- Onions: We will slowly caramelize these to develop their natural sugars, creating a deep, sweet, and rich flavor base that defines the “French onion soup” taste of the rolls.
- Butter: Used in two ways: enriched into the dough for tenderness and richness, and blended with roasted garlic to create the flavorful garlic butter spread.
- Olive Oil: Used to coat the garlic cloves before roasting. It prevents them from drying out, promotes even caramelization, and infuses the oil with flavor, which then gets incorporated into the garlic butter.
- Garlic: We will roast whole cloves until soft and caramelized, transforming their sharp bite into a sweet, mellow paste that forms the key flavor in our garlic butter.
- Parsley
 Buy Now →
  Buy Now →
  Buy Now →
  Buy Now →
  Buy Now →
  Buy Now →
  Buy Now →
  Buy Now →
  Buy Now →
  Buy Now →
  Buy Now →
 How to roast garlic cloves
Preparation
To begin roasting the garlic for these rolls, you’ll start by peeling two full heads of garlic. Place all the separated cloves into a small oven-safe dish, such as a ramekin. Generously drizzle the cloves with olive oil and sprinkle them with a pinch of salt, ensuring each clove is well-coated. The oil will help conduct heat and prevent the garlic from drying out, while the salt draws out moisture to aid in the caramelization process.

Roasting
Next, cover the dish tightly with aluminum foil—this creates a sealed, steamy environment that gently braises the garlic, transforming its sharp, raw bite into a soft, sweet, and mellow paste.
Roast the covered dish in a preheated oven at 140°C (285°F) for approximately one and a half to two hours. This low, slow roasting is essential; it allows the garlic’s natural sugars to caramelize fully without burning.
You’ll know the garlic is perfectly done when the cloves have turned a deep, golden brown and are so tender that they mash effortlessly with the back of a fork. Once roasted, you can combine this fragrant, softened garlic with butter to create a richly flavored roasted garlic butter that will be spread onto the dough, forming the deeply savory base of your cheesy onion rolls.

Caramelized onion rolls filling
The rich, savory filling is built in flavorful layers.
We start by making the perfect roasted garlic butter: mash the soft, roasted garlic cloves and mix them thoroughly with room-temperature butter, parsley, salt, and a bit of the fragrant oil from the roasting dish. This creates a deeply savory, spreadable paste.
To assemble:
- Roll out your dough into a rectangle.
- Spread the roasted garlic butter evenly over the entire surface.
- Add a generous, even layer of grated cheese. We used mozzarella for its perfect melt, but any good melting cheese works wonderfully—try cheddar, havarti, gouda, or smoked gouda for different flavor profiles.
- Finish with a uniform layer of your sweet, golden caramelized onions.
This careful layering ensures every bite is packed with the perfect balance of creamy cheese, sweet onion, and rich garlic butter.

How to cut the rolls: the best method
We’ve tested many cutting and shaping techniques over the years. Without fail, we always return to the same reliable method. This step-by-step approach gives you the most control, ensuring perfect and uniform rolls every time.
Follow this process for the best results:
- Start with your filled dough. First, roll out your dough into a large rectangle. Then, add the garlic butter, cheese, and caramelized onions in even layers.
- Measure for precision (optional but helpful). For perfectly even rolls, measure the entire filled rectangle. Next, divide that total measure by your desired number of rolls—for example, 6. This calculation gives you the exact size for each piece.
- Cut long, even strips. Use a sharp knife or dough scraper to cut the rectangle lengthwise into long strips. Importantly, the number of strips should match the number of rolls you want.
- Roll each strip individually. Finally, take one strip and roll it tightly from one end to the other. Place each spiral seam-side down in your baking dish. Repeat this with every strip.
Why this method works best:
By cutting long strips and rolling them individually, you maintain excellent control. Consequently, every roll will be the same size, and the filling will stay neatly sealed inside.

Special tools you need
- Mixing Bowls & Stand Mixer: Essential for preparing and kneading the dough.
- Spatula: Useful for mixing ingredients and scraping bowls.
- Large Pot or Deep Skillet: Necessary for properly caramelizing the onions.
- Ramekin or Small Oven-Safe Dish: The ideal vessel for roasting the garlic cloves.
- Rolling Pin: To roll the dough into a smooth, even rectangle.
- Offset Spatula: Perfect for spreading the garlic butter in a thin, consistent layer.
- Knife & Cutting Board: For finely chopping fresh herbs, like parsley.
- Fork or Potato Masher: To mash the roasted garlic into a smooth paste.
- Cheese Grater: Use a manual box grater or an electric grater to shred the cheese quickly and easily.
- Parchment Paper: To line the baking pan, which prevents sticking and makes cleanup effortless.
- Porcelain Baking Dish: To bake the rolls.
 Buy Now →
  Buy Now →
  Buy Now →
  Buy Now →
  Buy Now →
  Buy Now →
  Buy Now →
  Buy Now →
  Buy Now →
  Buy Now →
  Buy Now →
  Buy Now →
 How to freeze caramelized garlic rolls
These savory caramelized onion garlic rolls are perfect for stress-free entertaining, whether it’s a holiday gathering or a cozy weekend meal. You can prepare them ahead of time and freeze them easily, allowing you to serve warm, cheesy rolls straight from the oven with no last-minute work.
Freezing Before Baking (Best for Freshness):
After shaping your rolls and placing them in the baking dish, skip the final proofing. Cover the dish tightly with plastic wrap or foil and place it directly in the freezer. When you’re ready to bake, transfer the dish to the refrigerator the night before to thaw slowly. On the day of baking, let the rolls complete their final proof in a warm spot until puffy, then bake as directed. This method delivers the absolute freshest taste and texture.
Freezing After Baking:
Let your baked rolls cool completely first. Then, wrap the entire dish tightly with plastic wrap, followed by a layer of aluminum foil. You can also wrap individual rolls. Store in the freezer until needed.
Reheating Tips for That Fresh-Baked Taste:
- For Rolls Frozen Before Baking: Follow the thawing and proofing instructions above, then bake as usual.
- For Already Baked Rolls: You can thaw them in the refrigerator overnight or reheat directly from frozen. To reheat, preheat your oven to 175°C (350°F). Cover the rolls with foil to prevent over-browning and warm for 10–15 minutes, or until heated through. Let them cool for a few minutes before serving to ensure the cheese is perfectly melted and the centers are soft.
Best Tips for Perfect Caramelized Onion Rolls
- Be Patient with Proofing: Proofing is essential for light, fluffy rolls. Let your dough double in size during both rises. A warm, draft-free spot (like a turned-off oven with the light on) ensures the yeast activates fully, creating a soft and airy texture.
- Keep Ingredients at the Right Temperature: Use warm (not hot) milk to properly activate the yeast without killing it. Ensure your butter is fully softened at room temperature for the dough. This ensures smooth mixing and a tender, flavorful roll.
- Caramelize the Onions Slowly: Do not rush this step. Cook your onions low and slow until they are a deep, golden brown. This slow caramelization develops a rich, sweet flavor that is the soul of the recipe.
- Measure for Even Rolls: For perfectly uniform rolls, roll your dough into an even rectangle. Use a ruler to measure and mark the dough, then divide it into equal strips based on the number of rolls you want. This method gives you precise control over the size and ensures every roll bakes evenly.
- Don’t Over-Bake: Remove the rolls from the oven once they are golden brown on top and the cheese is bubbling. Over-baking dries them out and can make the cheese tough instead of gooey.
- Use Freshly Grated Cheese: Pre-shredded cheese contains anti-caking agents that can make your filling grainy and prevent smooth melting. Always grate your cheese from a block for the creamiest results.
- Let Them Rest Before Serving: Allow the baked rolls to cool in the pan for 5-10 minutes before serving. This lets the cheese set slightly, making them easier to handle and allowing the flavors to settle.

Caramelized Onion cheesy rolls
- Yield: 6 large rolls
- Category: Bread, Side Dish
- Method: Baked
- Cuisine: Fusion
Description
Indulge in the ultimate savory pull-apart bread with these Caramelized Onion Cheesy Rolls. Inspired by French onion soup, they feature sweet, slow-cooked caramelized onions, rich roasted garlic butter, and a gooey layer of melted cheese, all wrapped in a soft, homemade dough.
Ingredients
For the Dough:
- 130 g (½ cup) warm milk
- 1 tbsp (10 g) active dry yeast
- 1 tsp granulated sugar
- 300 g (2 ½ cups) all-purpose flour
- 20 g ( 1 ½ tbsp) granulated sugar
- 1 tsp salt
- 50 g (¼ cup) butter
- 1 large egg
For the Roasted Garlic:
- 2 whole heads of garlic
- 30 ml (2 tbsp) olive oil
- A generous pinch of salt
For the Caramelized Onions:
- 4–5 large onions
- 3 tbsp olive oil
- 1 tbsp butter
- ½ tsp salt
For the Garlic Butter Spread:
- 50 g (¼ cup) butter
- All of the roasted garlic
- 1 tsp infused oil
- 2 tbsp freshly chopped parsley
- ½ tsp salt
For Assembly & Baking:
- 300 g (about 3 cups) mozzarella cheese
- 1 egg (for egg wash)
Instructions
Roast the Garlic
- Place peeled garlic cloves in a small dish. Drizzle generously with olive oil, add a pinch of salt, and cover tightly with foil.
- Roast in a preheated oven at 140°C (285°F) for 1.5 to 2 hours, until deeply golden and completely soft when pierced.
- Mash the cooled cloves into a paste. Set aside.
Caramelize the Onions
- Thinly slice the onions.
- Cook them slowly in a combination of butter and oil over medium-low heat. Once they begin to develop a golden color, add salt.
- Continue cooking, stirring frequently, for over 1 hour and 30 minutes, until they are deeply caramelized and sweet. Set aside to cool completely.
Prepare the Dough
- Mix warm milk with a pinch of sugar and the yeast. Let it activate for 5-10 minutes, until frothy.
- To the same bowl, add flour, sugar, salt, softened butter, and one egg. Knead the dough for 15 to 20 minutes, by hand or mixer, until smooth and elastic.
- Place in a greased bowl, cover, and let rise in a warm proofing environment at 28°C (82°F) for 1 hour and 30 minutes, or until doubled in size.
Make the Garlic Butter & Assemble
- Combine the softened butter with the roasted garlic paste, salt, oil, and chopped parsley. Mix until smooth.
- Punch down the risen dough and roll it out into a rectangle. Spread the garlic butter evenly over the surface, then sprinkle generously with grated cheese. Top evenly with the cooled caramelized onions.
- Cut the filled rectangle into 6 strips, roll each one individually into perfect rolls.
- Place the rolls in a prepared baking dish, cover, and let them proof again at 28°C (82°F) for 30 to 45 minutes, or until puffy. While they proof, preheat your oven to 180°C (350°F).
Bake
- Brush the proofed rolls with a beaten egg wash.
- Bake for 25 to 30 minutes, until the tops are a deep golden brown and the cheese is melted and bubbly. Let the rolls cool in the pan for about 10 minutes before serving.

Nutrition
- Serving Size: 1 roll
- Calories: 580 kcal
- Sugar: 10 g
- Sodium: 680 mg
- Fat: 34 g
- Saturated Fat: 16 g
- Unsaturated Fat: 15 g
- Trans Fat: 0.5 g
- Carbohydrates: 52 g
- Fiber: 3 g
- Protein: 18 g
- Cholesterol: 105 mg


Great recipe that turned out amazing!! Only reason I docked a star was because the rolls took a lot longer than 25-30 minutes to bake. Took closer to 45 minutes personally
Omg, 45 minutes? I have tried the recipe in four different ovens and the most it took me was about 32 minutes I’m shocked it took so long!
Do you have a thermometer inside of the oven to check the temperature?
Thank you for your review!!
How big should the “prepared pan” be? I would expect 12 rolls in a normal 9×13″ pan, so is this a smaller pan?
Such a delicious recipe! Only reason for the 4 stars is it took almost an hour for them to bake. I took them out at 40 minutes originally and it was still raw in the middle. Will absolutely be making again though.
I made this for my family and they all loved it.
I’m so glad your family loved it!