
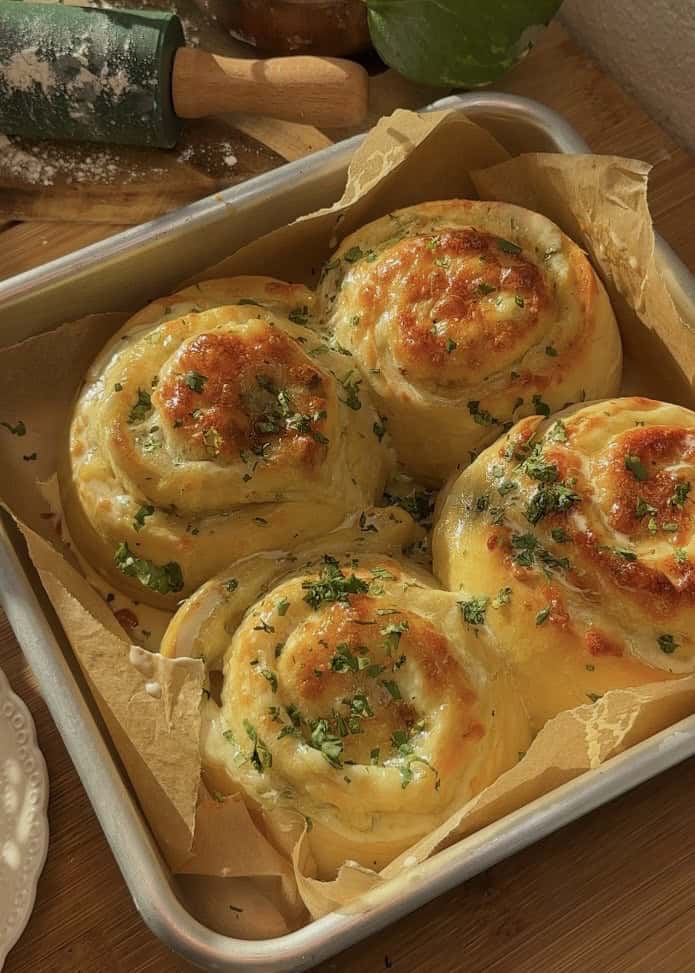
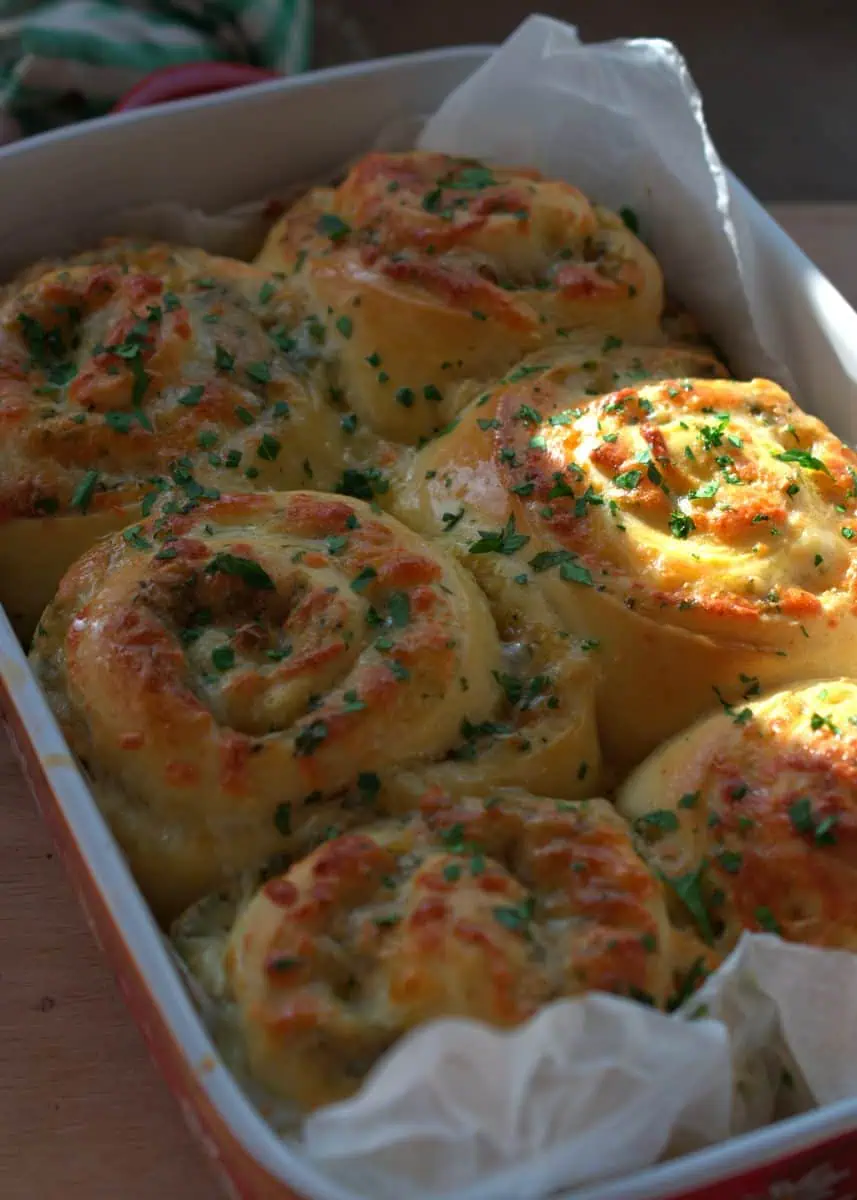
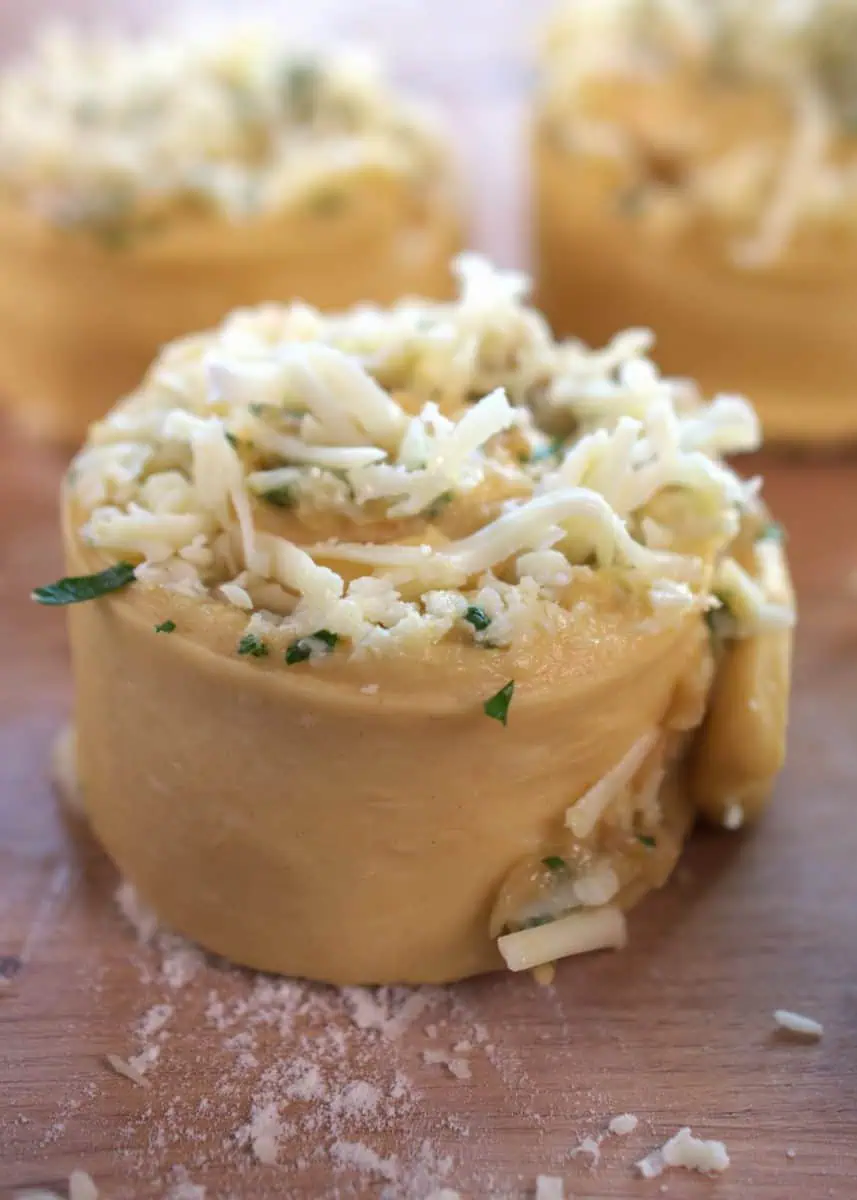
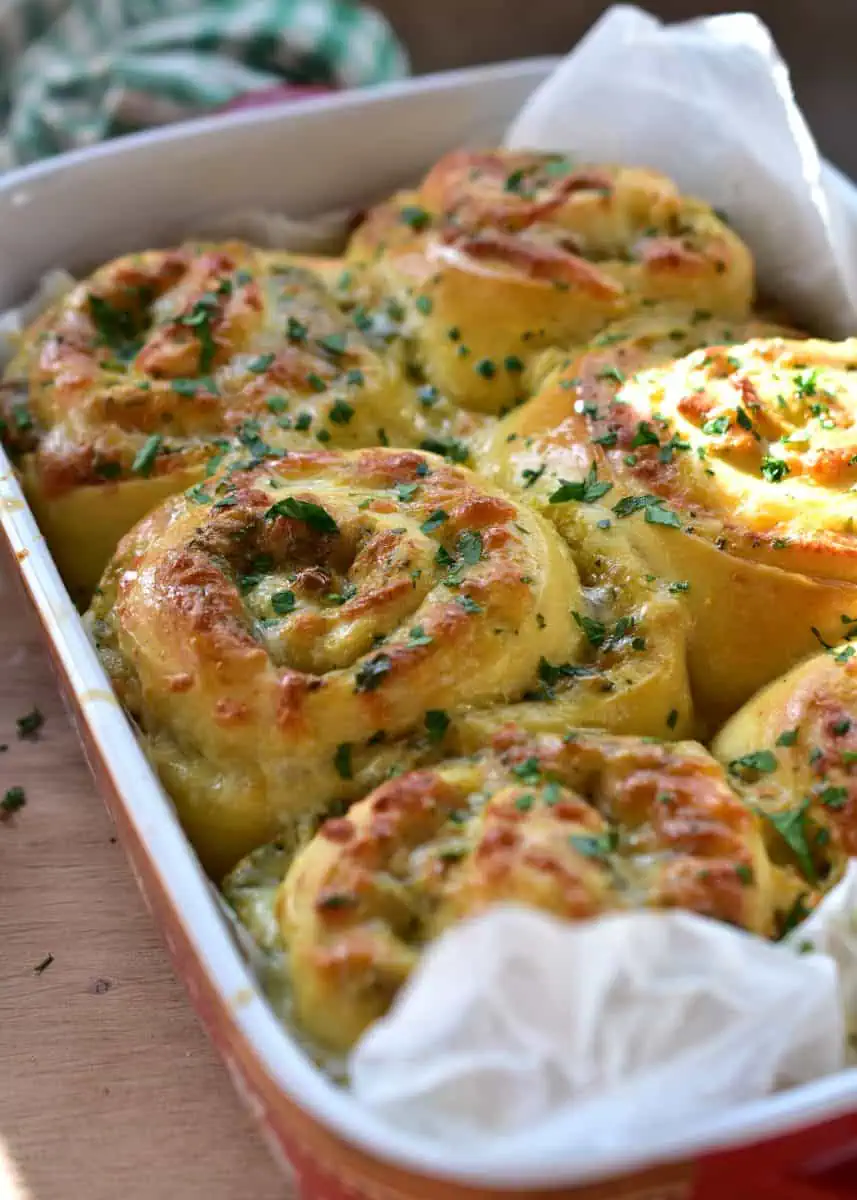
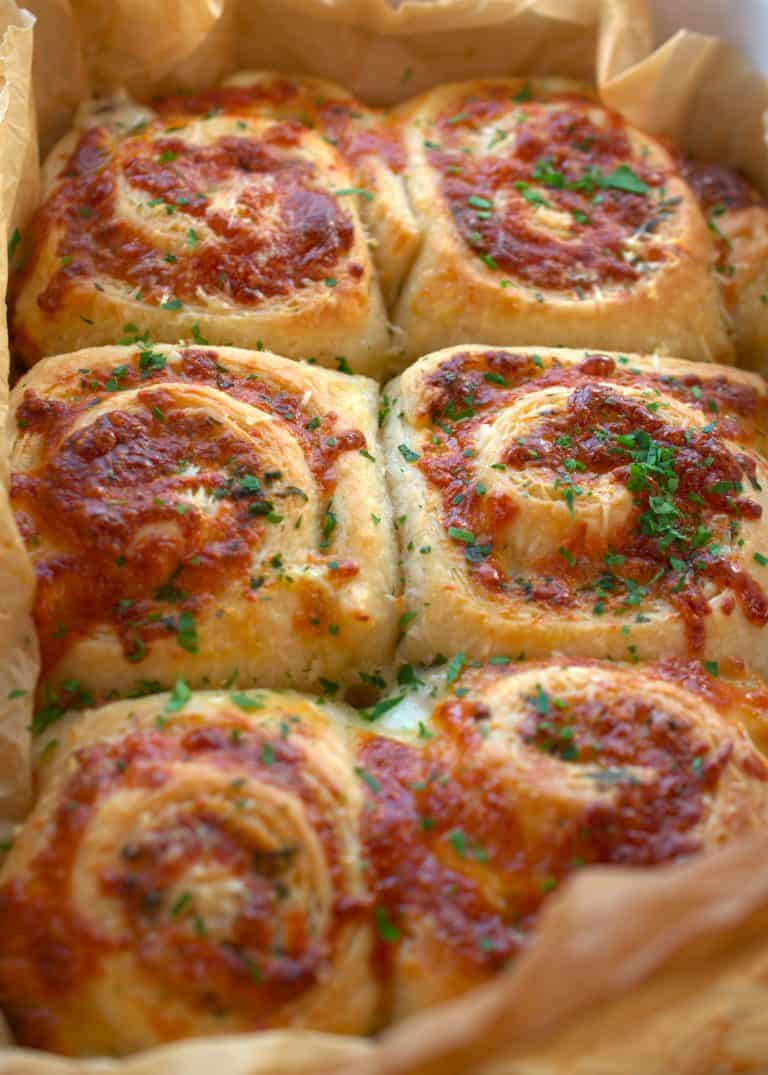
Buttery cheese Garlic Rolls
This recipe for buttery cheese garlic rolls is one of my favorites. They’re pillowy soft, delicious, and perfect for any garlic bread lover.

This recipe has been modified on 23/February/26 as we’ve seen some people struggle with the dough.
This is a recipe we always come back to. Probably every couple of weeks, you will find cheese garlic rolls in my house, and I’m not going to complain about it.
It has pillowy-soft dough, delicious garlic butter, and lots and lots of cheese.
Add to your shopping list!
Most of the ingredients you probably already have at home, or can easily find at your local grocery store.
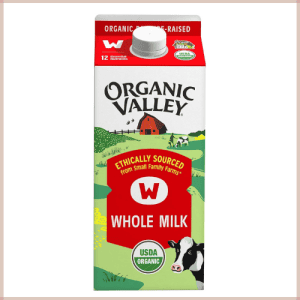
- Milk: make sure it is warm to be able to activate the active dry yeast.
- Active dry yeast: it needs to be fresh, not expired, not old.
- Honey: We will use it to feed the yeast. You can substitute by using sugar instead.
- Flours: We are using a mixture of all-purpose flour and bread flour for this recipe.
- Butter: added in the last 10 minutes of kneading, it will help the dough grow and keep its shape.
- Eggs: room temperature, remove them from the fridge at least one hour before starting with this recipe.
- Salt: needed to enhance the flavors and just make a very delicious cheese garlic roll.
- Granulated sugar: helps the dough grow, get a nice color, and flavor.
- Garlic: We are using so much fresh garlic for this recipe, but you can reduce it to whatever you like most.
- Extra virgin olive oil: we will use it to cook the garlic.
- Parmesan cheese: I like using it as it adds a nice saltiness to the dish and more flavor than mozzarella cheese.
- Mozzarella cheese: It melts beautifully. You can substitute any other cheese that you like.
- Parsley: fresh parsley, preferably.
 Buy Now →
  Buy Now →
 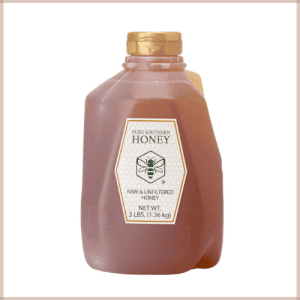 Buy Now →
 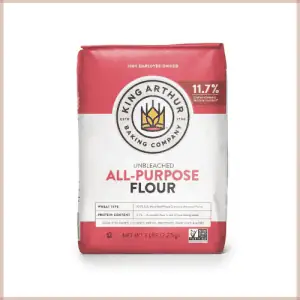 Buy Now →
  Buy Now →
  Buy Now →
  Buy Now →
  Buy Now →
  Buy Now →
  Buy Now →
  Buy Now →
  Buy Now →
  Buy Now →
  Buy Now →
 How to make the garlic butter
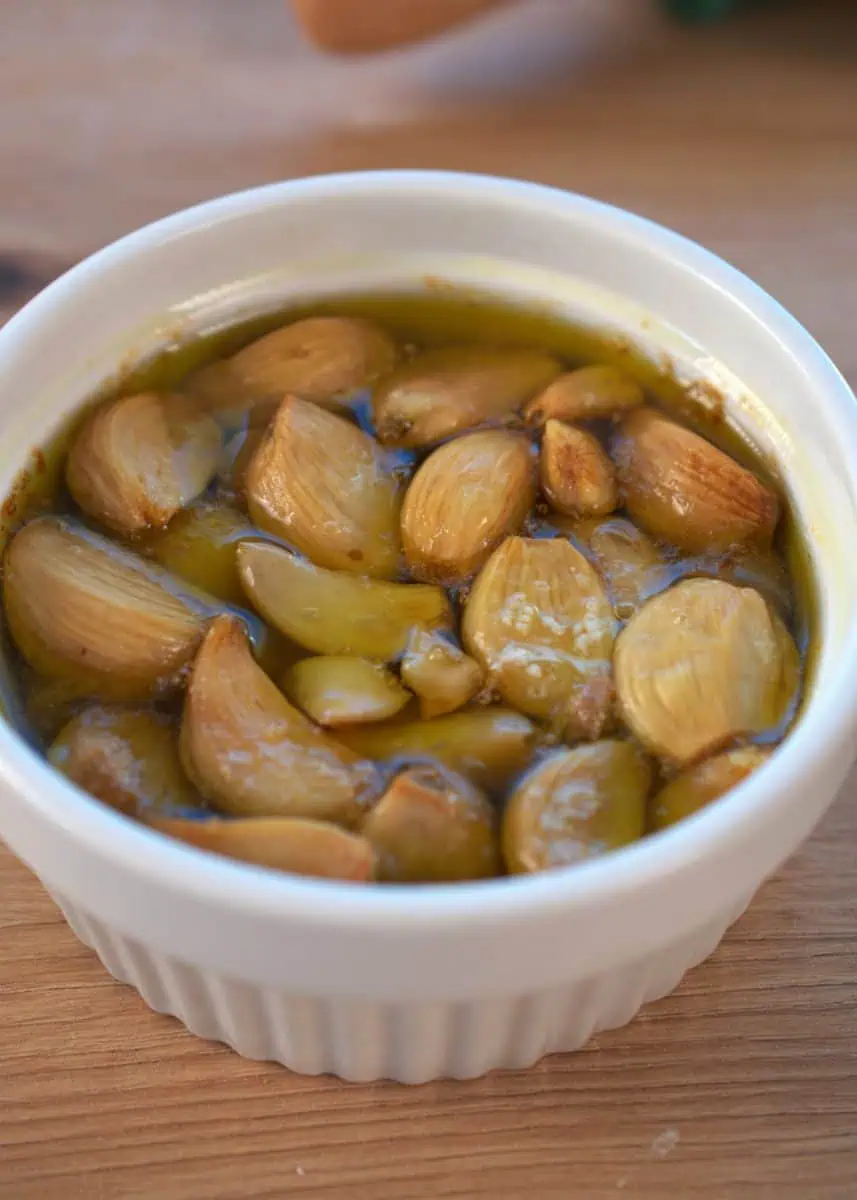
In the older version of this, we used whole garlic heads, but this time we decided to peel the garlic and place it in a ramekin with oil and salt. The only difference I see is that when you roast the whole garlic head, you miss some of the garlic in the skin; this way, you can use all the garlic without wasting any.
Cover the garlic with aluminum foil to prevent it from burning and make sure it has time to cook until golden brown. Bake at 302 F (150 C) for about 1h and 45 minutes. This will give the garlic a super soft texture as it slowly cooks.
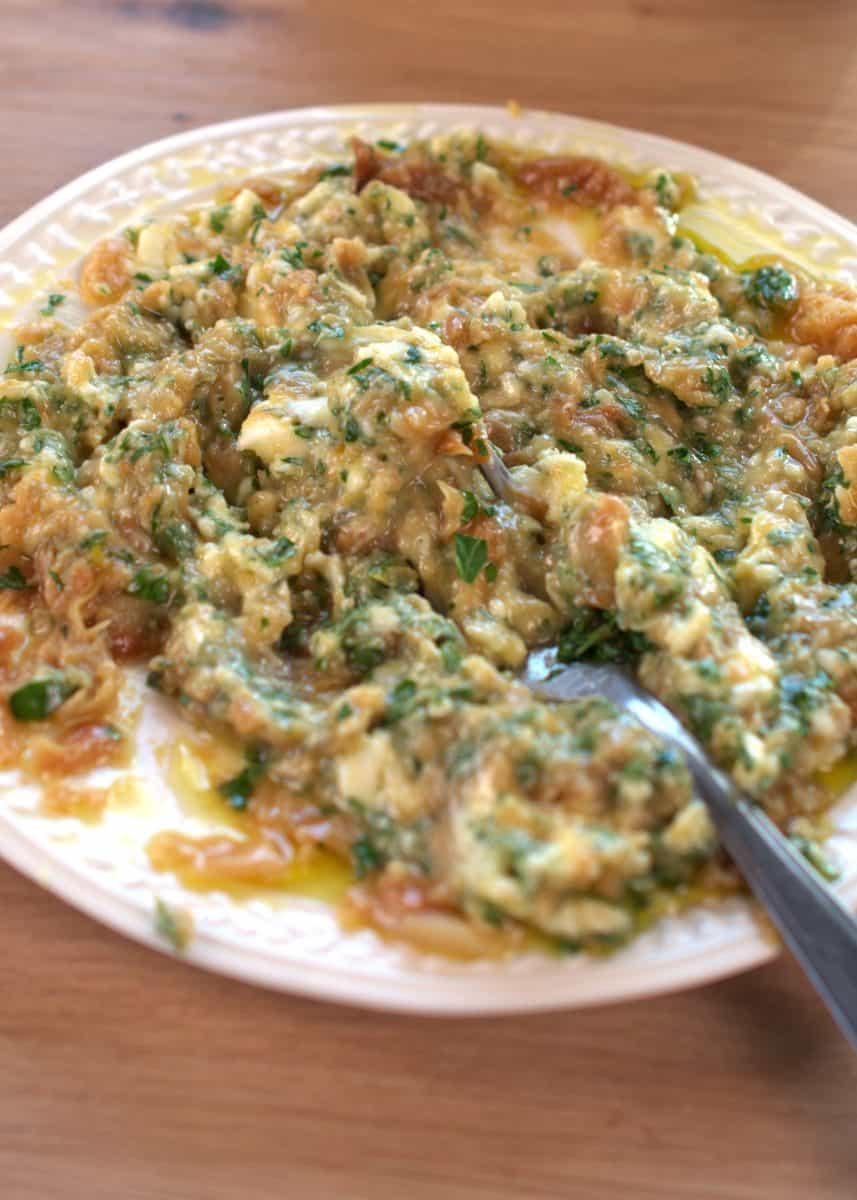
To make garlic butter for garlic rolls, you need to use soft butter. Leave it at room temperature for at least 1 hour before you use it.
Mash the perfectly cooked garlic with butter and chopped parsley. It will become a nice paste; you can add some of the leftover oil from the garlic, as it will hold a lot of flavor.
Best tips for cheese garlic rolls
- Knead on low speed for 15 minutes. After 15 minutes, you can add the soft butter and knead for 10 minutes. Adding butter after with a strong structure when rising, it will have a soft and tender crumb.
- Temperatures are very important, don’t proof the dough in a cold environment. We are using a dough proofer set at 80F (27C), and we let it proof for 1h and 30 minutes, and then, after shaping for 30 minutes.
- Don’t rush the proofing time; it is necessary for a soft dough. If you don’t proof it, it will become a hard rock dough.
- Use fresh parsley, I believe it makes a big difference in flavor and tastes just so much better.
- Feel free to swap the chosen cheeses for any other of your liking.
Grab the right tools.
For this recipe, we are going to use tools that we normally have in our houses. We mention the use of a stand mixer, but if you don’t have one, you can do the same thing, using your hands.
- Stand mixer bowl or a mixing bowl: here you will need to prepare the dough mixture and knead the dough until soft.
- Ramekin: to cook the garlic until soft and golden brown. If you don’t have one, you can use any baking dish you can find.
- Aluminum foil: cover the garlic to prevent it from burning before it’s even cooked.
- A rolling pin: roll out the dough to prepare the garlic rolls
- Knife: You will need a large knife to cut the dough into strips to prepare the rolls. There’s a different list of options on how to cut them below.
- A fork or masher: mash the garlic easily.
- Dough proofer: not necessary, but very convenient to use if you have it. I think it’s something worth investing in when you have lots of dough in your house.
- Offset spatula or spoon: to spread the butter mixture over the dough.
 Buy Now →
  Buy Now →
 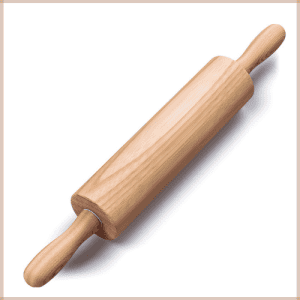 Buy Now →
  Buy Now →
  Buy Now →
 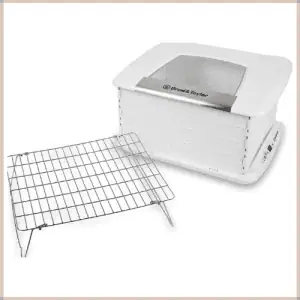 Buy Now →
 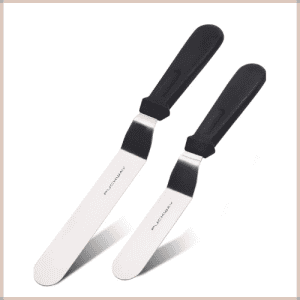 Buy Now →
 Recipe elaborations and order
- Start cooking the garlic; it takes a lot of time.
- Prepare the dough.
- Grate the mozzarella and parmesan cheese. Chop parsley.
- Prepare the garlic butter.
- Assemble.
This is the order we followed, as we think it’s what makes the most sense. While the garlic is cooking, you can prepare the dough so you don’t have to wait for the garlic to cook. Prepare the ingredients that go inside the rolls while you wait.
For example, grate the mozzarella cheese and parmesan. And chop the parsley. Prepare the garlic butter and assemble.
How to prepare the dough
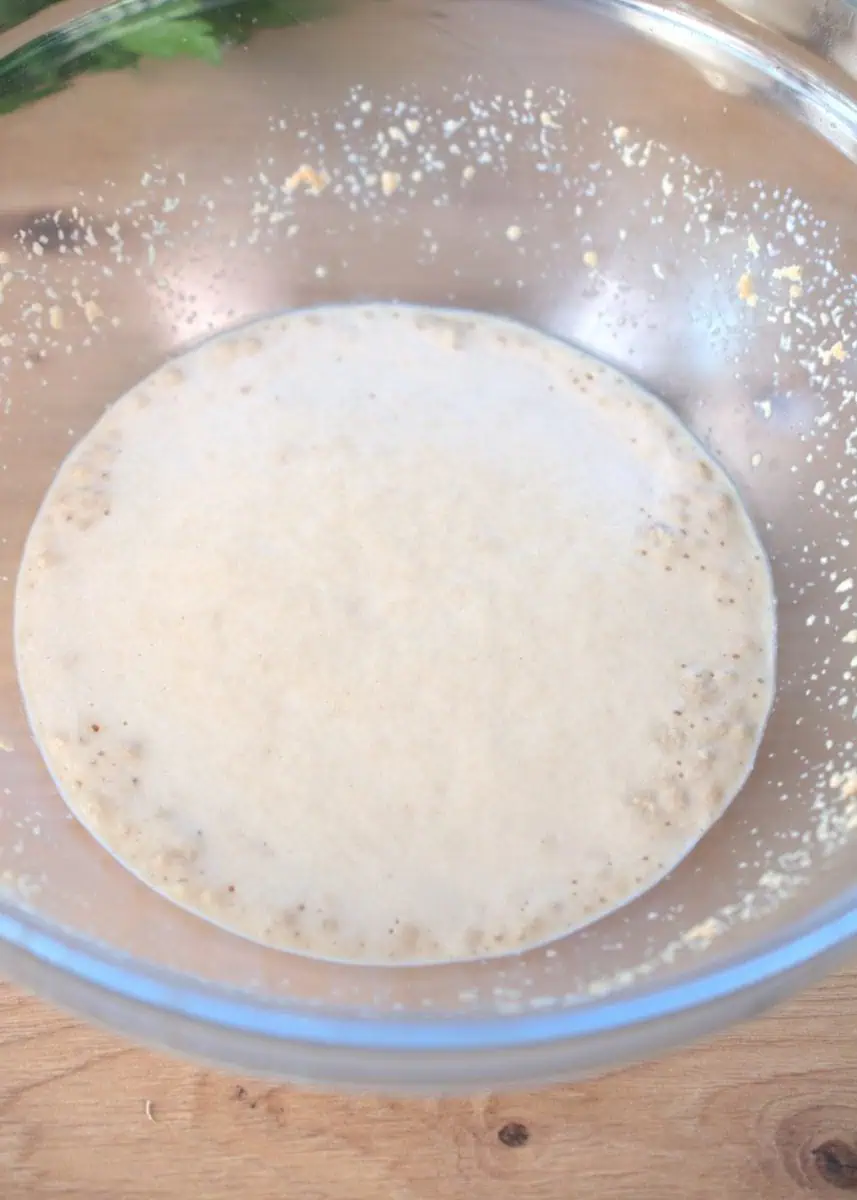
Start by preparing the sponge mixture. This mixture is active dry yeast, honey, and warm milk. You mix it and let it sit for 10-15 minutes, and the top of the mixture should become foamy. In this step, if you notice the yeast didn’t react, it might be due to different things: temperature, milk too hot or too cold, or the yeast is old and not fresh, which means it won’t work.
If there’s no reaction from the yeast, it’s best to start from zero using another yeast.
Once you have the sponge, you can add the rest of the dough ingredients minus the butter, which we are going to be adding in the last 10 minutes.
How to cut cheese garlic rolls
There are different methods; everyone has their own favorite. I’ll tell you all the options you have that I know of so you can choose whatever is your preferred method.
- Cut into strips. Roll out the dough, spread the garlic butter, add cheese, and then cut into strips. Roll each strip individually. I love using this method, so I have more control over the final shape of the roll. I don’t worry about squishing or flattening the rolls accidentally.
- Traditional way, roll out the dough, spread the prepared garlic butter, add the cheese on top, roll the dough tightly into a log, and then slice with a knife. It’s fast and efficient. The only thing I don’t like about this method is how you squish the shape too much.
- Using a kitchen twine or unscented dental floss. Roll out the dough, spread the garlic butter, sprinkle the cheese, roll the dough tightly into a log, grab a long piece of twine, and put it under where you want to cut the roll. Bring the tops together and cross them, applying pressure; this will cut the rolls.
Different fillings to try
- Try using different cheeses; some people have tried this with blue cheese, and they have loved it. It’s always best to choose your favorite cheese for a recipe unless something else is requested instead.
- Caramelized onions. We have a recipe where we did exactly this and it was SOOO good.
- Birria…just wait, and you’ll find out soon!
How to enjoy the day after
We all know homemade enriched doughs are not the same as those of days gone by. The first day, it’s super soft and pillowy. The next day, it’s drier and just not soft. If you reheat it properly, you can have it taste fresh every day.
I personally recommend you freeze it. Any leftover bread rolls you have, freeze them and then microwave them from frozen to defrost. This is my favorite way of reheating any doughy dessert, donuts, rolls, or breads. It always tastes just like fresh.
If you choose to store it in the fridge, it’s good to enjoy it for up to 4 days. Make sure to reheat them every time before you eat the cheese garlic roll so it has the best flavor and texture.
*Any food you freeze needs to have a date and a name added to the container or freezer-safe bag. Make sure you are storing it in a bag or container made to go to the freezer so it can stay safe.
If you try this recipe, make sure to leave us a review below, select as many stars as you think this recipe deserves, and leave a small comment, we appreciate every review you can give. And don’t forget to follow our brand-new Facebook page!
Print
Buttery cheese Garlic Rolls, everyone will love them!
- Prep Time: 20 minutes
- Cook Time: 2 hours 25 minutes
- Total Time: 4 hours 45 minutes
- Yield: 6 Garlic rolls
- Category: Appetizer
- Cuisine: American
Description
Buttery Cheese Garlic Rolls – These rolls are incredibly soft, fluffy, and loaded with melted, bubbly mozzarella cheese. So addictive, you won’t be able to stop at just one! Here, you’ll find the best melt-in-your-mouth garlic cheese rolls recipe that’s perfect for any occasion.
Ingredients
GARLIC ROASTED
- 3 garlic heads, peeled
- 4 tbsp extra virgin olive oil
- Pinch of salt
DOUGH RECIPE
- 2 eggs
- ½ cup (120 ml) warm milk
- 2 1/2 tsp(8 g) active dry yeast
- 1 tbsp honey
- Slightly over 1 ¾ cups (230 g) all-purpose flour
- 1/3 cup (50 g) bread flour
- 1 1/2 tsp salt
- 1 tbsp granulated sugar
- 2 ½ tbsp (35 g) soft, unsalted butter
ROLLS FILLING
- 1 tbsp chopped fresh parsley
- 2 cups, after shredded (200 g) mozzarella cheese
- ½ cup, freshly grated (45 g) parmesan cheese
GARLIC BUTTER
- 3 ½ tbsp (50 g) soft, unsalted butter
- 3 tbsp parsley
- Pinch of salt
- Previously roasted garlic
EGGWASH
- 1 egg, beaten
Instructions
-
Start by roasting the garlic. Peel 3 garlic heads and place them in a ramekin, drizzle 4 tbsp of extra virgin olive oil, and just a pinch of salt. Cover in aluminum foil and bake at 302 F (150 C) for about 1 hour and 45 minutes.
-
Prepare the dough. Grab a mixing bowl or a stand mixer bowl and combine ½ cup (120 ml) warm milk, 2 ½ tsp (8 g) active dry yeast and 1 tsp honey. Stir and let this mixture sit in a warm environment for 10-15 minutes, or until you see a foam layer on top.
-
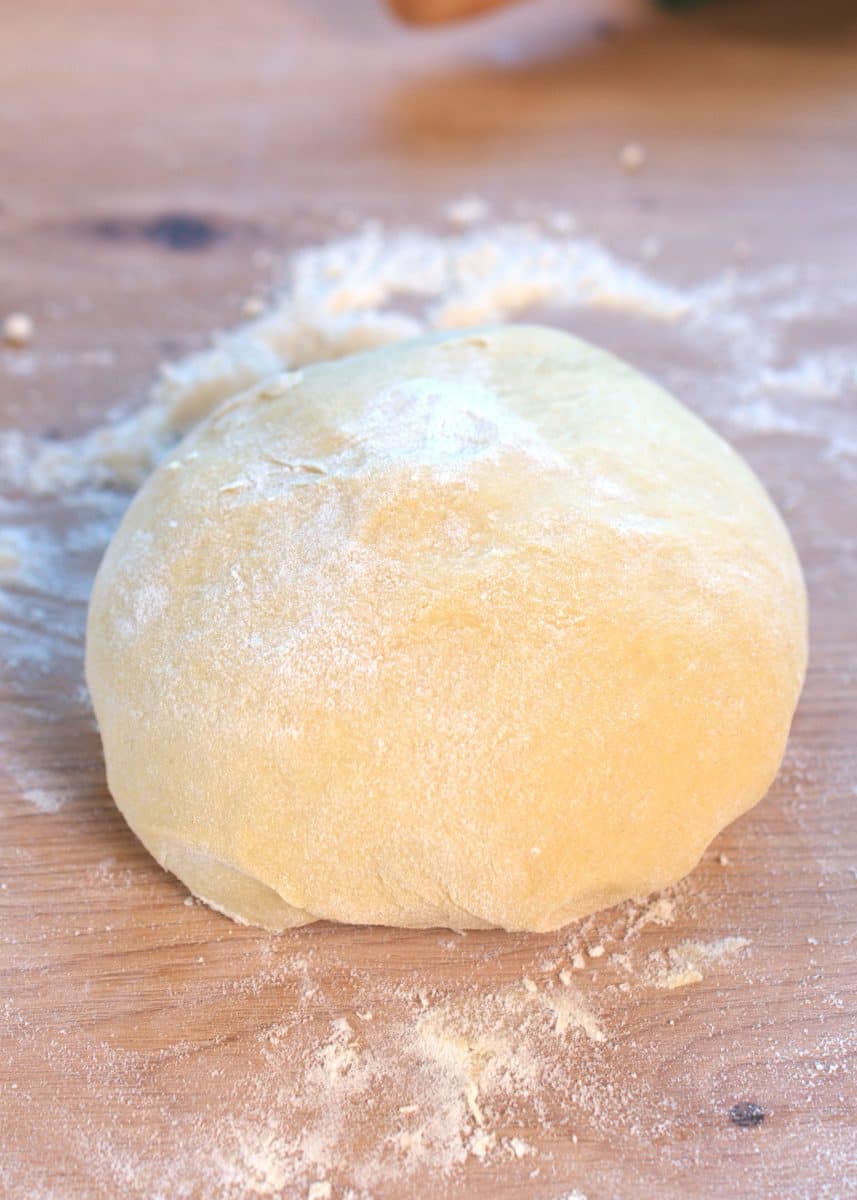
To this mixture add 2 eggs, slightly over 1 ¾ cups (230 g) all-purpose flour, 1/3 cup (50 g) bread flour, 1 1/2 tsp salt, and 1 tbsp granulated sugar. Use a stand mixer with the dough hook attachment and knead the dough on medium- low speed for 15 minutes. After 15 minutes, add 2 ½ tbsp (35 g) soft, unsalted butter. Knead for 10 extra minutes. The dough should be very soft and slightly sticky.
- Let the dough proof for 1 hour and 30 minutes to 2 hours, at a temperature of 80.6 F (27 C).
- While the dough proofs, chop parsley to have about 4 tbsp, and grate mozzarella to have 2 cups (200 g) and to have ½ cup (45 g) of parmesan cheese.
- Prepare the garlic butter, in a bowl or plate, mash 3 ½ tbsp (50 g) soft unsalted butter, 3 tbsp fresh and chopped parsley, a pinch of salt, and the previously roasted garlic
-
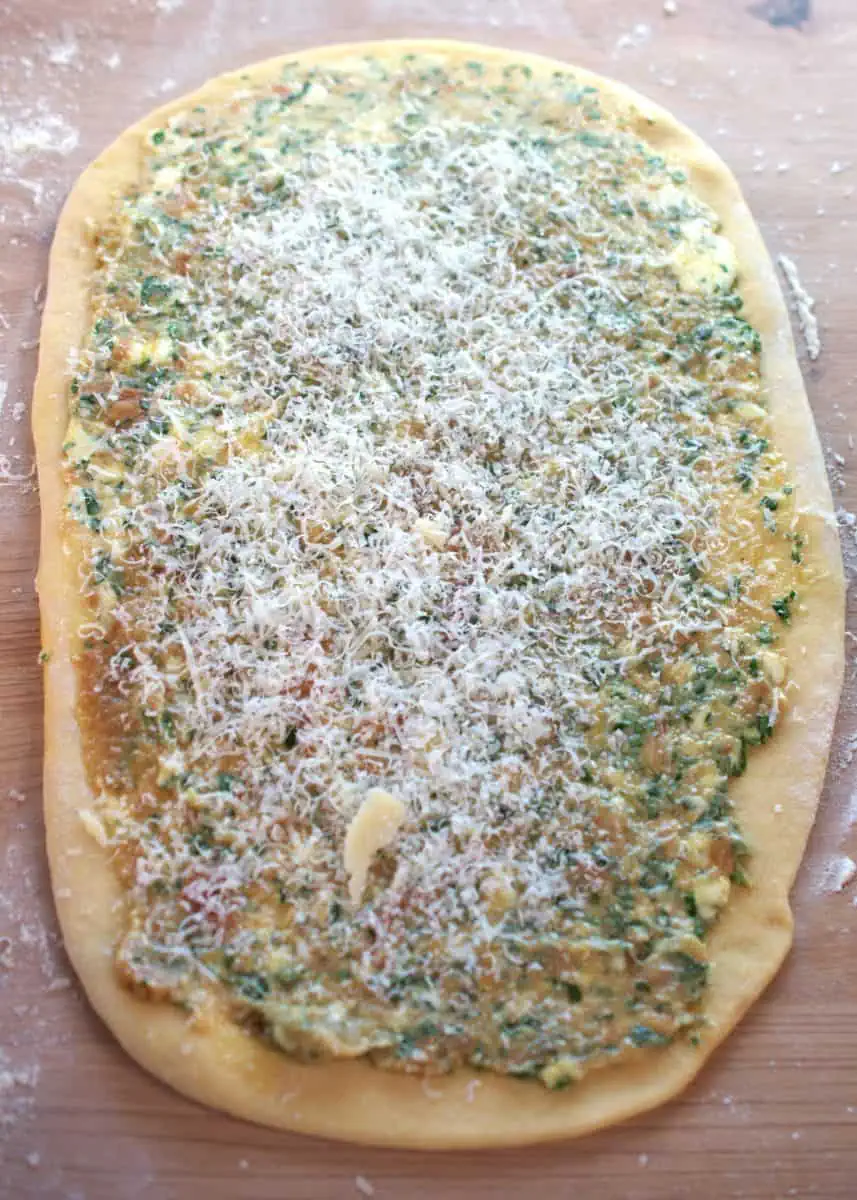
Roll out the dough, spread the prepared garlic butter, add the 2 cups (200 g) of mozzarella cheese and ½ cup (45 g) parmesan cheese.
-
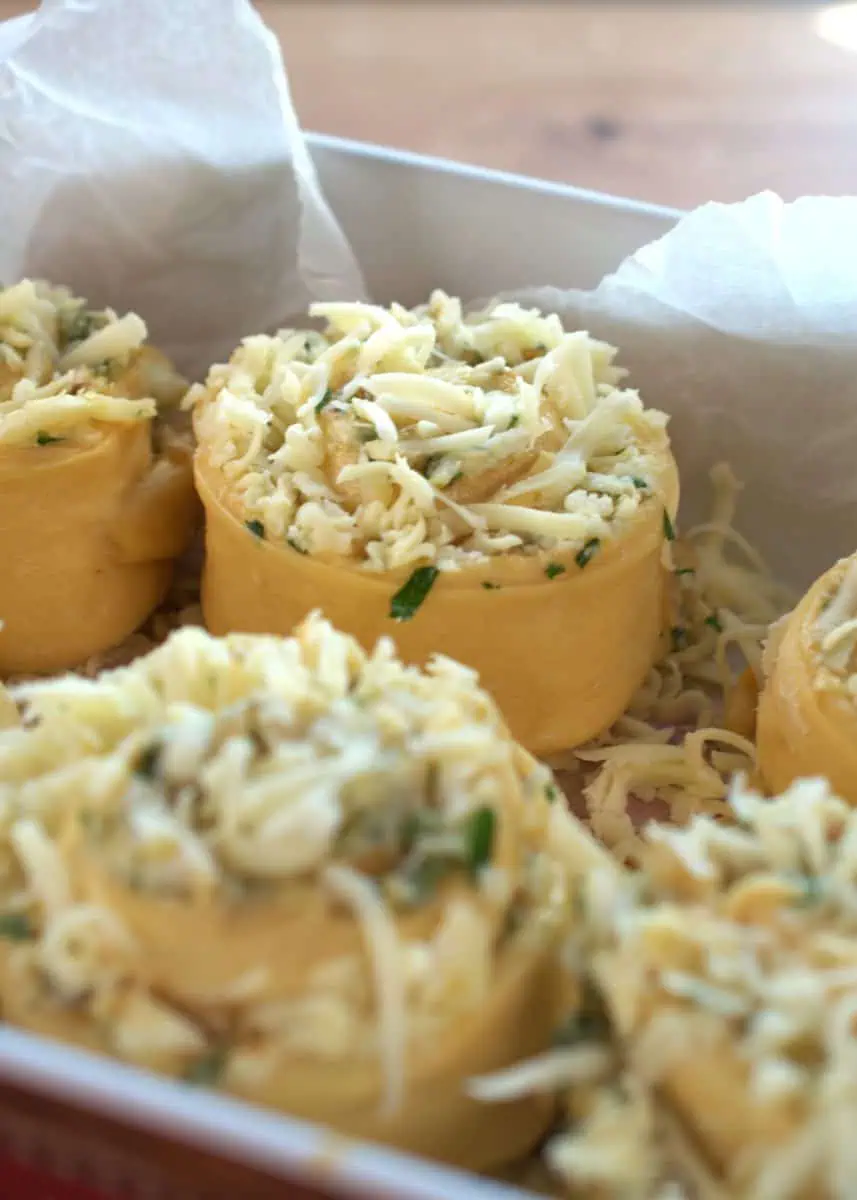
Cut the dough into 6 strips and roll each one individually. Place them in a prepared pan with parchment paper. proof again for 30 more minutes.
-
Preheat the oven to 355F (180 °C), beat one egg to prepare the egg wash, and brush each one of the rolls with the egg. Bake for 25-30 minutes.


Notes
If you try this recipe, please leave us a review on our website! And if you have any questions, feel free to ask in the comments—I’ll try to reply as fast as I can. Happy baking!
Nutrition
- Serving Size: 1 roll
- Calories: 470 kcal
- Sugar: 6 g
- Sodium: 720 mg
- Fat: 25 g
- Saturated Fat: 12 g
- Unsaturated Fat: 10 g
- Trans Fat: 0.5 g
- Carbohydrates: 43 g
- Fiber: 2 g
- Protein: 18 g
- Cholesterol: 105 mg
ARCHER'S FOOD
Easy and delicious recipes


Made these today but the dough just didnt turn out as soft and fluffy as it shouldve, the amount of flour required in the recipe was too much for mine, but the yeast, milk, honey mixture fluffed up really nicely, im going to adopt this method for other buns. Or maybe it was due to the salt.
I made this recipe today and my dough didn’t turn out as its seen in the videos …mine dough was breaking and crumbly and its been an hour and it hasn’t risen. I have followed the recipe to the t but don’t know what to do
Hello, the dough is not a super fluffy dough and if you feel like its a little o the drier side if you made sure you added all the ingredients add a little more of milk, all flours absorb humidity different that’s why some people have a little too sticky dough others drier. Its super important to check if the yeast is active as we mentioned in the recipe, if you don’t see it being active it won’t rise, other reasons why it may not rise properly is if the temperature is too cold in your house, always make sure its being proofed in a warm place. Make sure you’re not confusing dry milk powder with the milk I had someone message me and they accidentally used only 20 g of milk because they didn’t read milk powder.
It was so yummy thanks for the recipe!
What’s the difference between purpose flour AND bread flour?
Bread four has higher protein content which helps with stability helps keep the shape, all purpose flour has less protein content and makes really fluffy dough
Bread flour has cornstarch in it
Metric measurement says 25 grams of butter, and US measurement say “1 bar”. Which is correct?
I have no control over the cups measurements. But 25 g is definitely not 1 bar it should be about 1 1/2 tablespoons of butter.
25g of butter is roughly 1.5tbsp. 1 “bar” or stick is around 113g
I made this recipe & it come out divine, I recommend it to anyone who wants to try them, I made modification, instead of roasting the garlic for 2 hours I boiled it,I wanted eggless so I substituted, 1/4 cup plain yogurt for each egg & baked in an Airy fryer at 160 degrees for 20 mins on bake function, turned it over & baked for a further 5 mins
i made it and it turned out AMAZING
I’m so glad you liked them!
my dough is not rising can i leave it on the counter overnight and see if it rises by morning?
Yes. The dough needs warm environment to rise properly. If it wot rise after 1h and 30 minutes you can leave it longer
I tried it and the dough did not turn out smooth, it was so crumbly, how do I fix that?
This dough is not smooth is a little on the drier side, if its crumbly add a little more of milk, make sure you added he right amount of milk, butter and egg or yolks.
This is my second time in a month making this recipe because it is simply so good. The first time making it I left out the milk powder and instead of mozarella I used Gouda because that is what I had. Came out so good.
This second time making it, I wanted to double the recipe but I only had one packet of active dry yeast left so I doubled everything except the yeast. Mixed the dough and let it cold ferment in the fridge overnight, about 16 hours and then followed the recipe as is. Came out so good again. The best recipe, I will now use this recipe as my “garlic bread” going forward.
Thank you so much for this recipe!
Thank you so much I’m so glad you like this recipe!!!
Ester
is it necessary to add egg yolks in the dough? for how long should i knead the dough if im kneading it by hand?
does it require unsalted butter or just the regular one?
You can use salted or unsalted whatever you prefer
I made this recipe today for my wife and daughter and I must say it was a big hit. It turned out perfect 👌. We loved the fluffy cheesy garlic butter flavor. They came out just like the picture. I followed the directions to the T and My wife and daughter said please keep this recipe. Thank you so much.
im so glad they loved this recipe!
Hi there, I haven’t made these yet, but I would like to use the sourdough starter that I made instead of the active yeast. Which ingredients would I have to swap to have the same result? Thank you in advance!
I’ve made this twice but the dough will only ever rise a little and every time my dough dies I also die a little on the inside. It stays mostly dense and won’t become fluffy. It looks as smooth as the dough in the video except I can still see bits of milk powder in it once it’s finally in a ball. Perhaps I am not kneading enough. Though whenever I use a mixer with dough hooks it stays stuck it the hooks or doesn’t reach the hooks so it doesn’t actually knead anything. I’m thinking that since I’ve been doing it by hand, I get tired before I do it long enough? I know the yeast is active and I leave it to rise in perfect temperatures. Ok one thing I just thought of is that my milk powder is nonfat.. I’ll try making this without milk powder or perhaps I will buy a different kind.
hello Lilly! I do think using milk powder without fat makes a big difference, try this recipe without using the milk powder. If you are kneading the dough with a stand mixer, maybe there’s not enough dough for the mixer and you would have to double the recipe for the mixer to work. Make sure you do 1- the active dry yeast activation. 2. kneading the dough properly until you see it becoming smooth and elastic. 3. first proof, in a warm place, if if proofs somewhere cold it will take forever, see reference pictures to see how much it should grow, but keep in mind we use a proofing machine with controlled temperature so ours could be a little more proofed than the rest. then shape it and proof again. then, bake. you could check the youtube video that is attached with the recipe so you have an idea of the textures of the dough in tis recipe.
Guys I asked chat GPT and it gave me these tips so BEWARE. I was desperate after attempting this recipe like 4 times. This experimenting has been expensive ngl.
It said that the fats of the butter and the egg yoke can slow rising, so it suggested adding the egg yokes and butter in at separate steps. (I used X1 scale)
Yeast mixture- The same except Chat GPT suggested slightly less honey. Around 5 grams less.
Dry ingredients- Flours, and sugar first. Milk powder as well if you’re including it. I didn’t. No SALT yet.
Now combine the yeast mixture with the dry ingredients and only ONE egg yoke.
Lastly, add in the second egg yoke, small amounts of the butter at time, THEN the salt.
I do not know how accurate that is for certain BUT slowly kneading in small splashes of warm milk at a time definitely helped a lot at softening the dough and giving it strength with more elasticity, allowing it to rise when it wouldn’t before. It still didn’t come out perfectly but it was definitely much better than every other time I’ve tried. Take what you like from my experience 🙂
I made these three times now and I’m so happy with how well it turns out every time!
I had remaining garlic butter the first time I made it so I put it on a pastry sheet and rolled it out and it tasted good as well..
Will definitely make this again and again:)
thank you so much for your comment im so happy you liked it!!!
Tried the recipe but substituted butter with oil for the dough and also spread tartar cream instead of the butter and garlic paste and I’ve also put some sliced chicken and the recipe came out just as amazing i really liked it although the dough wasn’t that fluffy but it was still delicious
Hi! My dough is currently rising… Wel sort of? It only became 10% bigger 🙁 I followed the recipe, I did add milk powder. Maybe that is the problem? It is rising in 29/30° Celsius. Can someone maybe tell me what I am doing wrong?
i was skeptical of trying this recipe thanks 2 the comments . i did notice that it was updated around 4 days ago , so why not . it was amazing !!! the dough was nice and stretchy , though it was a bit sticky but that’s normal . the dough rose beautifully , it took around an hour to double in size but it’s warm where i am . baked them for around 40 minutes since my oven is more on the cool side ? don’t know if that makes sense . anyway , thank you so much for the correction this is a great recipe .
Thank you so much!
Perfect, the dough was beautiful and golden, I added milk as you advised in the reviews, and it worked really well, I highly recommend doing it, it was super good
Hello Lou, thank you so much! I’m so glad you liked it!
theyre fab!! the only thing is they didnt really taste like garlic, so now when i make them i use 3 garlic heads
Hello Maya!
Thank you so much for your review! Could it be for the quality of the garlic? I’ll check this recipe with another garlic to see if it needs adjusting. Every time I make it, it tastes a lot like garlic. Thank you so much,
This recipe looks wonderful! Would this recipe work with 400g of gluten-free flour and all the rest of the dough ingredients listed? Would like to make it for my GF sister.
Hello. I tried it yesterday and it was ABSOLUTELY delicious. My family loved it and they literaly DEVOURED it <3 <3
I kneaded the dough by hand since I don't have a stand mixer and it turned out very well. I made the mozarella myself. The garlic butter is delicious, I made a bunch that we will eat with toast. And since I love garlic, I doubled the amount of garlic in the recipe. The end result made my entire house smell like a garlic lover paradise.
I will make it again on the weekend. Thank you so much for this amazing recipe
Hello! IM SO HAPPY everyone loved it! Wow thats so amazing! Thank you so much for your review!
i made these for my bf and family. they loved it sm!!! 🥹🥹🥹 it was so YUMMM
AW I’m so happy everyone loved it!
How does it work if I do the first rise( ferment) in the fridge overnight?
Also if a tangzhong is used?
I made this twice and followed the recipe perfectly. I should have read the comments first. The dough is incredibly dry and crumbles. The recipe ratio is way off.
I’m having the same issue. I followed the recipe exactly and I’m getting the driest dough. I used a stand mixer AND hand kneaded the dough to achieve something similar to the photos/video, but no luck. I’m currently on hour 3 of waiting for it to rise in an 85* environment. It rose a tiny bit but again, nothing like the photos/videos. I also added small amounts of milk to the second dough while mixing to see if it helped.. not so much. I will follow through on the recipe as soon as it rises a tad bit more!
1
1%2527%2522
Also picture shows four rolls but recipe says cut dough in 6 pcs?.
Hello, merry Christmas.
If in the recipe says 6 pcs it’s 6 pcs, ignore the number of rolls you see in the picture.
Liquid measurement not correct
90 grams is not 1/3 cup
My dough also didn’t rise despite having the right conditions and following the recipe. I am very sad.
Just tried this recipe and it is truly amazing ! We loved it and I am planning to try different versions (like gorgonzola and walnuts or pesto verde). Thank you for this flavorful recipe !
Thank you, Aurelie! I’m so glad you loved it!
Pesto with this recipe sounds amazing, I might test it soon!
I let my dough rise for 3 hours and it barely rose sadly. I did knead by hand, but I make bread all the time and it rises just fine so I don’t know what went wrong:(
I didn’t use the milk powder and my yeast is not dead and foamed up quite a bit. My house is cold, but I put it in warm places so it was never cold.
Crumbly dough and had to keep adding milk. Dough never rose, even with it very warm during proofing. Ill need to follow an american recipe cuz those actually work. Should have read the comments before wasting ingredients on this. Not sure how others turned out how it was suppose to. I followed directions perfectly. Oh well
I made these today, they were good, my boyfriend rated It 8/10. I have Just a few things to say, my dough did not rise as much as It needed and It took much longer to bake than what the recipes stated. Also the garlic butter was sooo good.
The 2 stars is just for the idea, the recipe for the dough is horrible. I need to modify it for it to work. But then is good, but I think that the dough is the most important part sooo..
We loved it. I made it in an 8×8 pan and actually got 12 small rolls, which worked perfect! Thank you sm for this recipe.
Hi Bri! Thank you so much for your nice comment!
I made this recipe a few days ago, everything seemed to look great except the dough, the amount of flour in the recipe was not enough at all, I had to add probably 3 more cups to make the dough right. In the end after baking, it tasted good but kind of bland and it was not as chewy as I thought it would be, the smell was FANTASTIC though!
I’m so curious about how you made this recipe using a total of 5 cups. It will definitely taste bland if you are using this amount of flour.