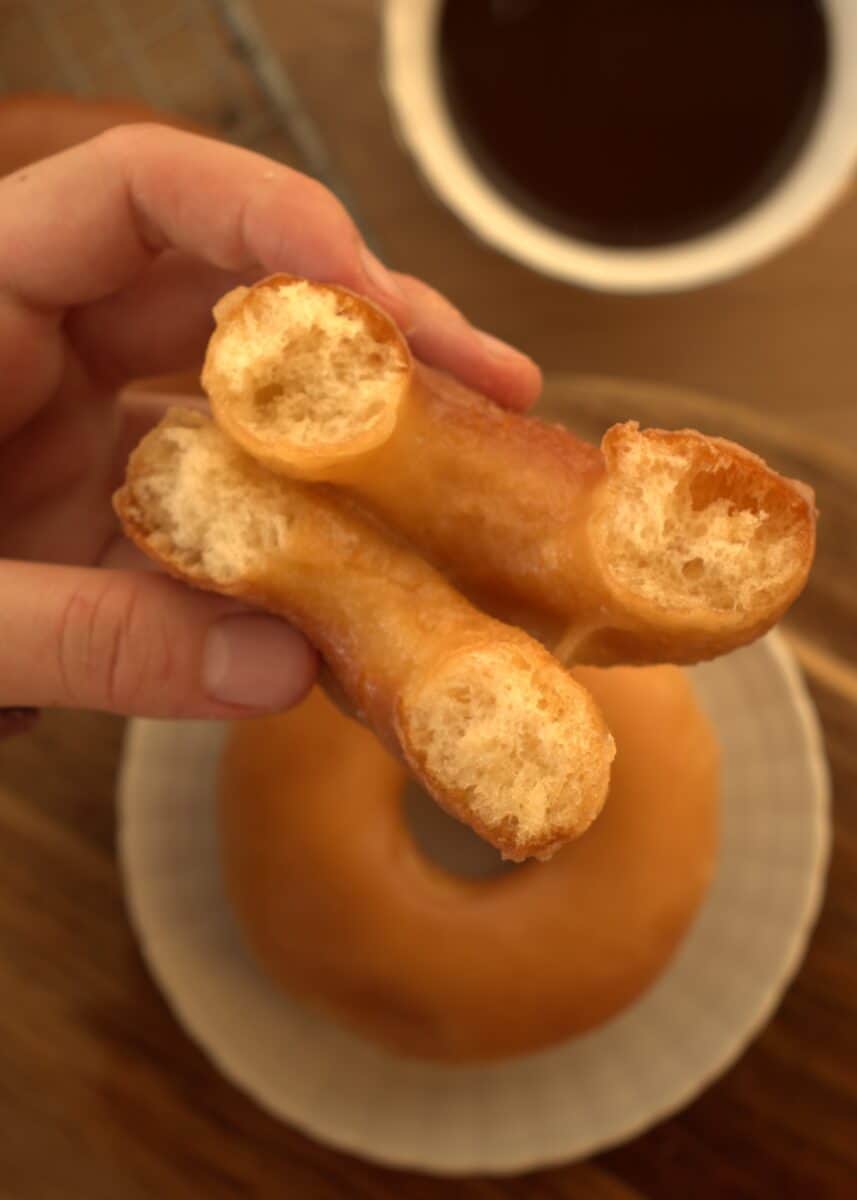
Maple-glazed donuts
These Maple Glazed Donuts are everything you could ever want in a fall bake. Soft, fluffy, and coated in a rich maple glaze made with real maple syrup, they bring that cozy sweetness we all crave once the leaves start to turn. The flavor is deep, comforting, and absolutely perfect for anyone who loves maple desserts or seasonal baking.

If you’ve been looking for a homemade donut recipe that feels special yet simple to make, this one will become your new favorite.
The warm aroma of maple syrup fills the kitchen while they bake, making every bite taste like autumn. Serve them fresh for brunch, dessert, or a weekend treat — these donuts are a must-try for fall baking fans and maple lovers alike.

In the Archer’s Food kitchen, we’ve made all kinds of delicious donuts — from our classic glazed donuts to the irresistible Nutella-stuffed ones — and they’re always a big hit.
This time, we decided to go for something extra cozy and perfect for fall baking: Maple Glazed Donuts. The homemade maple glaze is absolutely everything — rich, sweet, and full of that warm flavor that makes every bite feel like autumn comfort in donut form.
Why you will love my maple glazed donuts
I am a devoted donut enthusiast. my boyfriend often brings home classic glazed donuts, and I adore them, but today I was craving maple donuts. this recipe delivers everything a fall bake should be: soft, fluffy, and drenched in a rich homemade maple glaze that tastes like autumn in every bite.
- Soft and fluffy texture that stays tender bite after bite.
- Surprisingly easy to prepare using simple pantry staples and straightforward steps.
- Impeccable deep maple flavor thanks to high quality maple syrup.
- A homemade maple glaze that elevates ordinary donuts into a cozy seasonal treat.
- Clear step by step instructions so even novice bakers can succeed.
- Ideal for fall baking, brunch menus, coffee pairings, and anyone who loves maple desserts.

Ingredients you need and why
Every ingredient in this maple-glazed donut recipe has a purpose — and together, they create that perfect soft, fluffy texture with a rich maple flavor that feels like fall in every bite.
- Milk: Warm milk helps activate the yeast and adds richness to the dough, giving the donuts a tender crumb and soft texture.
- Active Dry Yeast: This is what makes your donuts rise beautifully. Always make sure your yeast is fresh and properly activated so the dough becomes light and airy.
- Sugar: A small amount of sugar feeds the yeast and gives your donuts that perfect touch of sweetness even before glazing.
- Flour: All-purpose flour gives structure and elasticity to the dough. It balances softness and strength so your donuts stay fluffy but hold their shape.
- Egg: Adds moisture and richness to the dough, making the texture smoother and softer while enhancing the flavor.
- Butter: Butter makes all the difference — it gives the donuts their rich, melt-in-your-mouth taste and helps create a tender crumb.
- Salt: A small amount of salt enhances all the other flavors and keeps the dough balanced, never overly sweet.
- Vanilla Extract: Brings a warm, subtle flavor that pairs perfectly with the maple glaze, adding depth to the dough itself.
- Oil (for frying): Choose a neutral oil with a high smoke point. It ensures your donuts fry evenly without absorbing too much oil or burning.
- Maple Syrup: The star ingredient of this recipe. Use pure maple syrup for the best flavor — it gives the glaze its authentic taste and cozy fall aroma.
- Powdered Sugar: Helps form the smooth, silky glaze that coats the donuts beautifully.
 Buy Now →
  Buy Now →
  Buy Now →
  Buy Now →
  Buy Now →
  Buy Now →
  Buy Now →
  Buy Now →
  Buy Now →
  Buy Now →
 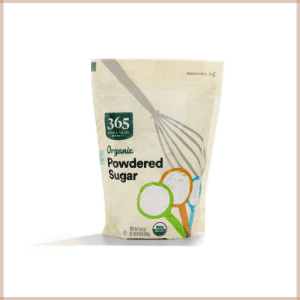 Buy Now →
 Special Tools
- Mixing bowls (various sizes)
- Measuring cups and spoons or a kitchen scale
- Wooden spoon or silicone spatula
- Stand mixer or hand mixer
- Rolling pin (if making rolled donuts)
- Donut cutter (round or shaped)
- Baking sheet
- Parchment paper squares
- Deep fryer or heavy-bottomed pot (for fried donuts)
- Candy or deep-fry thermometer (for oil temperature)
- Slotted spoon or spider skimmer (for removing fried donuts)
- Cooling rack
- Small saucepan (for maple glaze)
 Buy Now →
  Buy Now →
  Buy Now →
  Buy Now →
  Buy Now →
  Buy Now →
  Buy Now →
 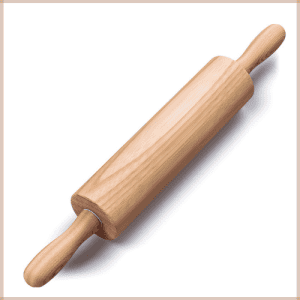 Buy Now →
  Buy Now →
  Buy Now →
  Buy Now →
  Buy Now →
  Buy Now →
  Buy Now →
 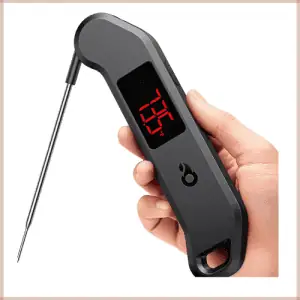 Buy Now →
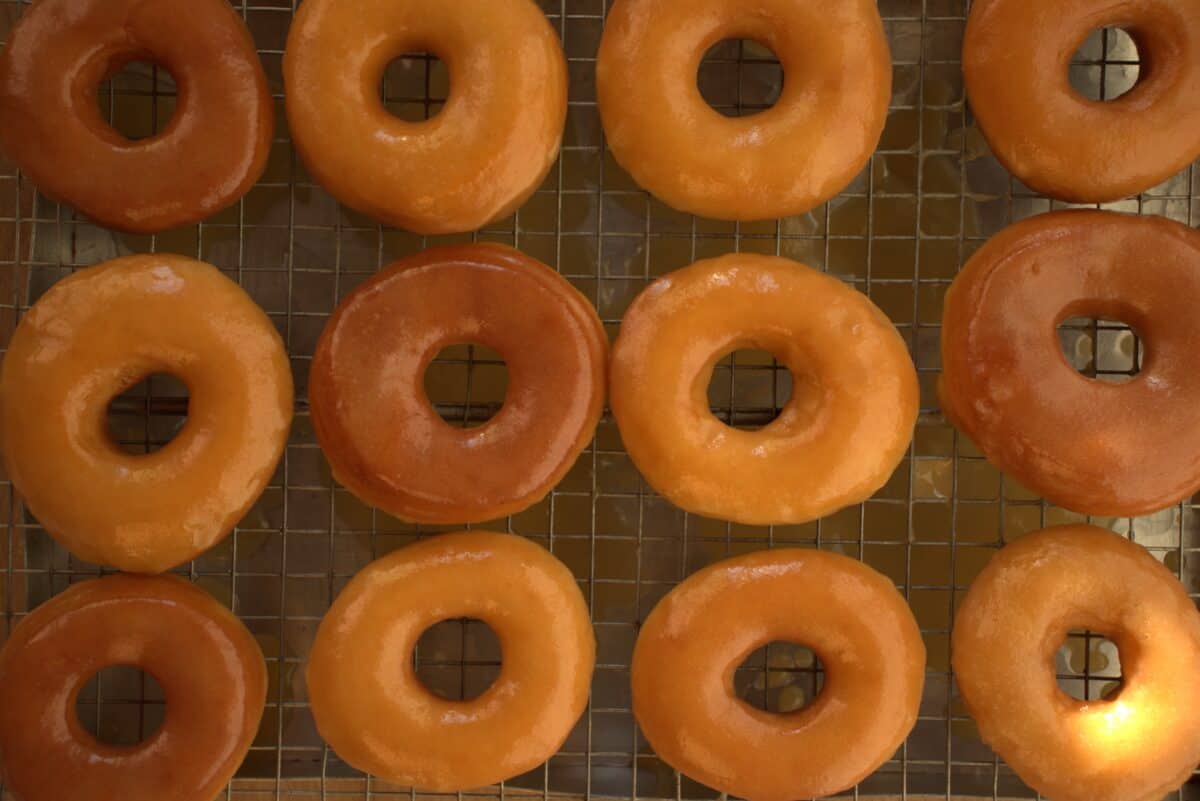

Step by step overview, Maple glazed donuts
1. Start by combining yeast, warm milk, and sugar in a small bowl. Let it rest until it becomes frothy and bubbly. This creates a light, airy base for the dough and ensures your donuts will be soft and fluffy, the perfect start to a cozy fall baking session.
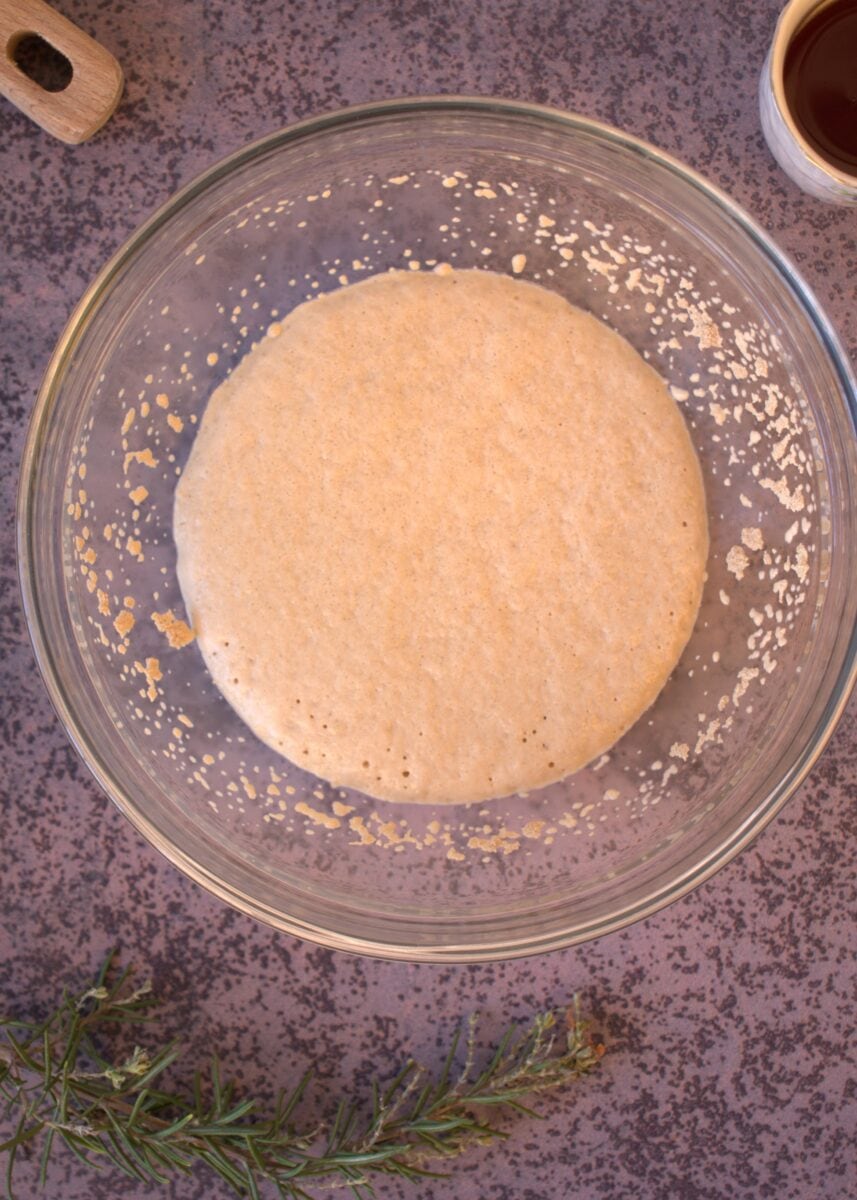
2. Add the rest of the ingredients to the frothy sponge, excluding the butter, and mix until everything comes together into a smooth dough. This initial mix develops the structure of the donuts.
3. Once the dough is smooth, knead in the butter until fully incorporated and the dough is smooth.

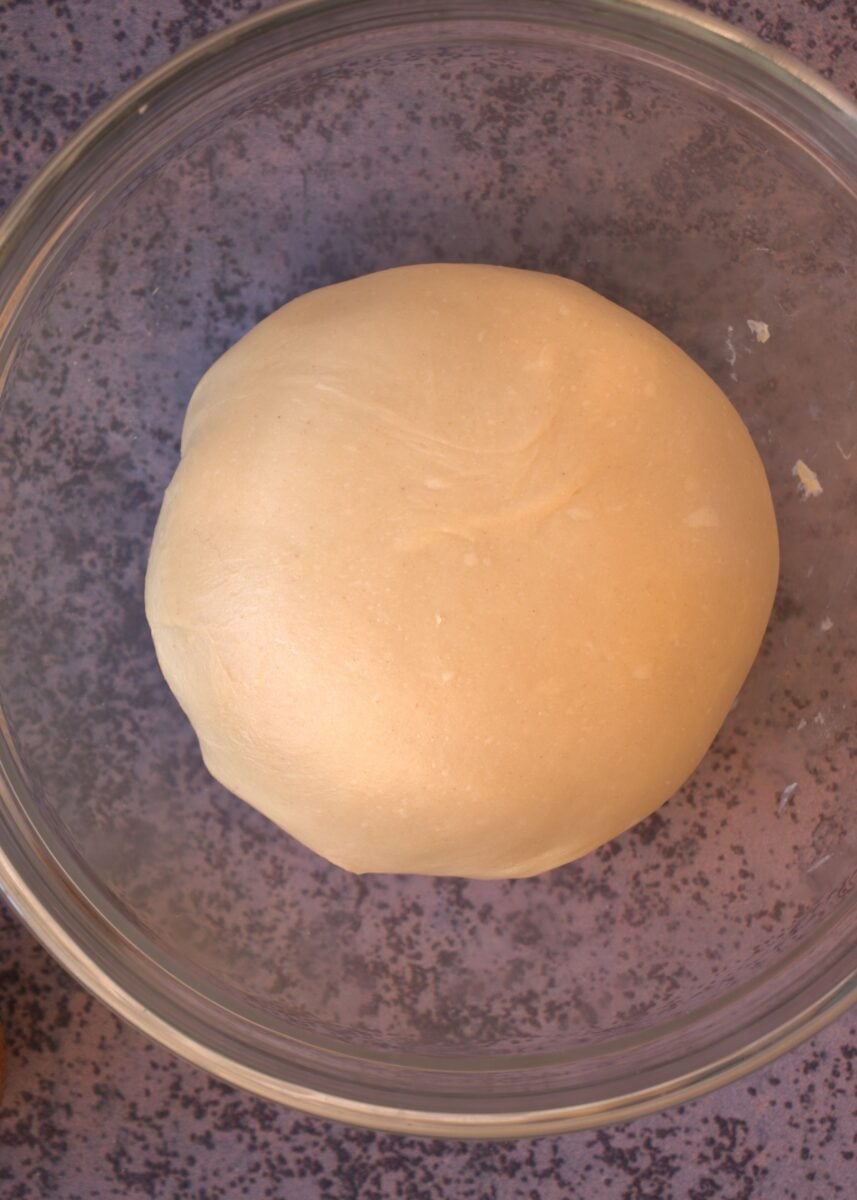
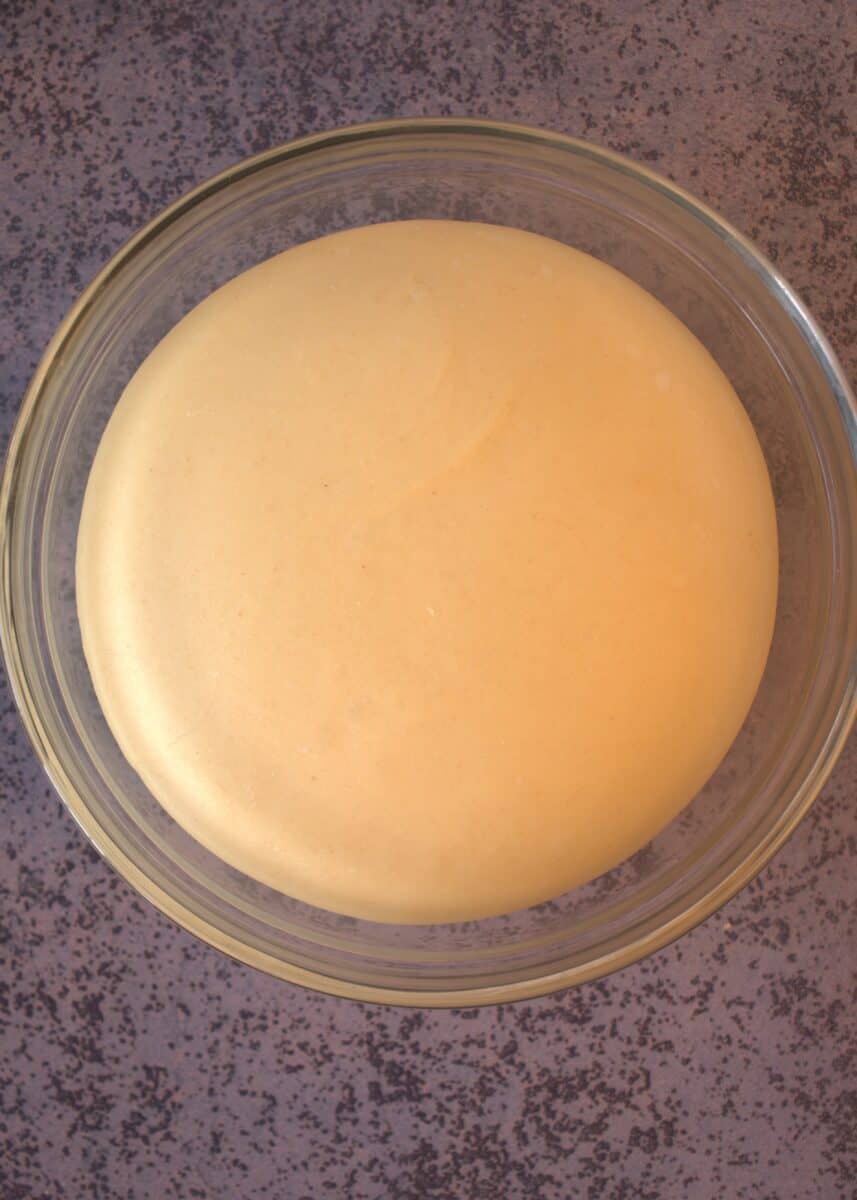
4. Place the dough in a lightly greased bowl and let it proof until it has doubled in size.
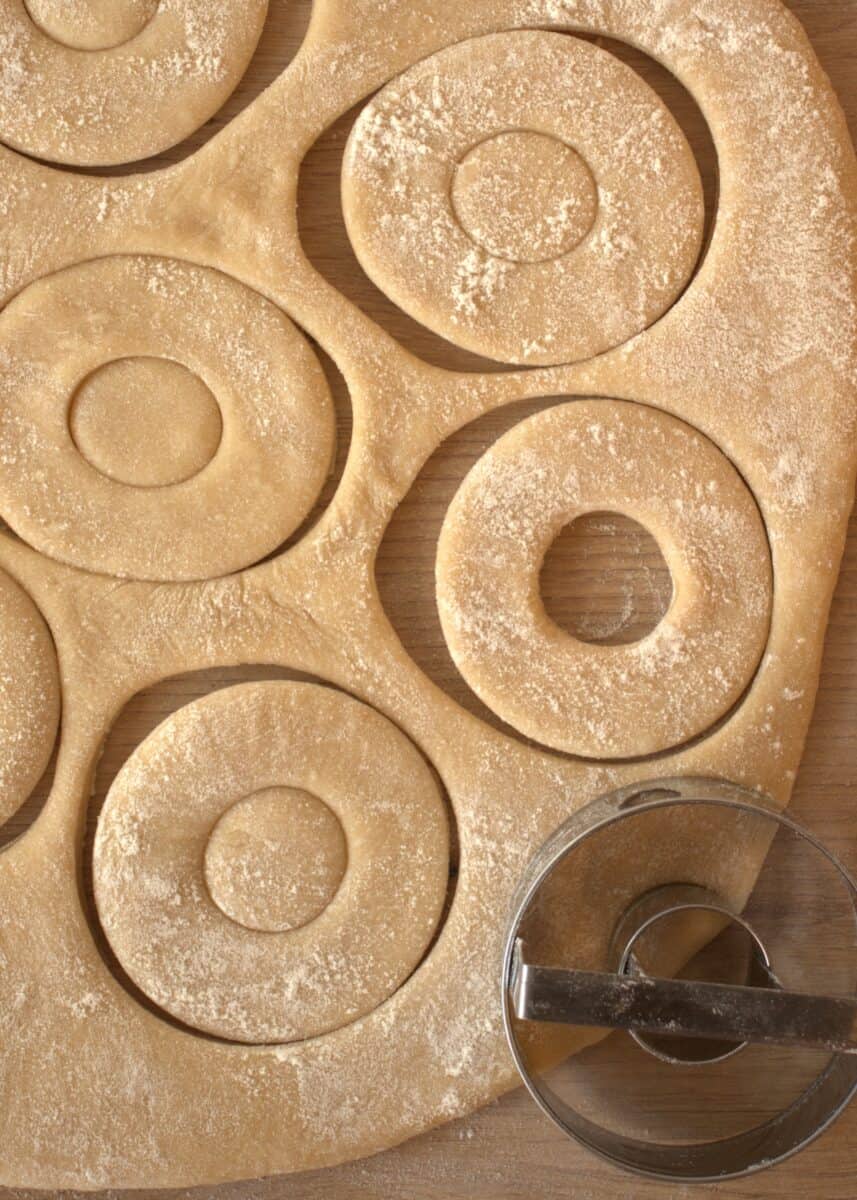
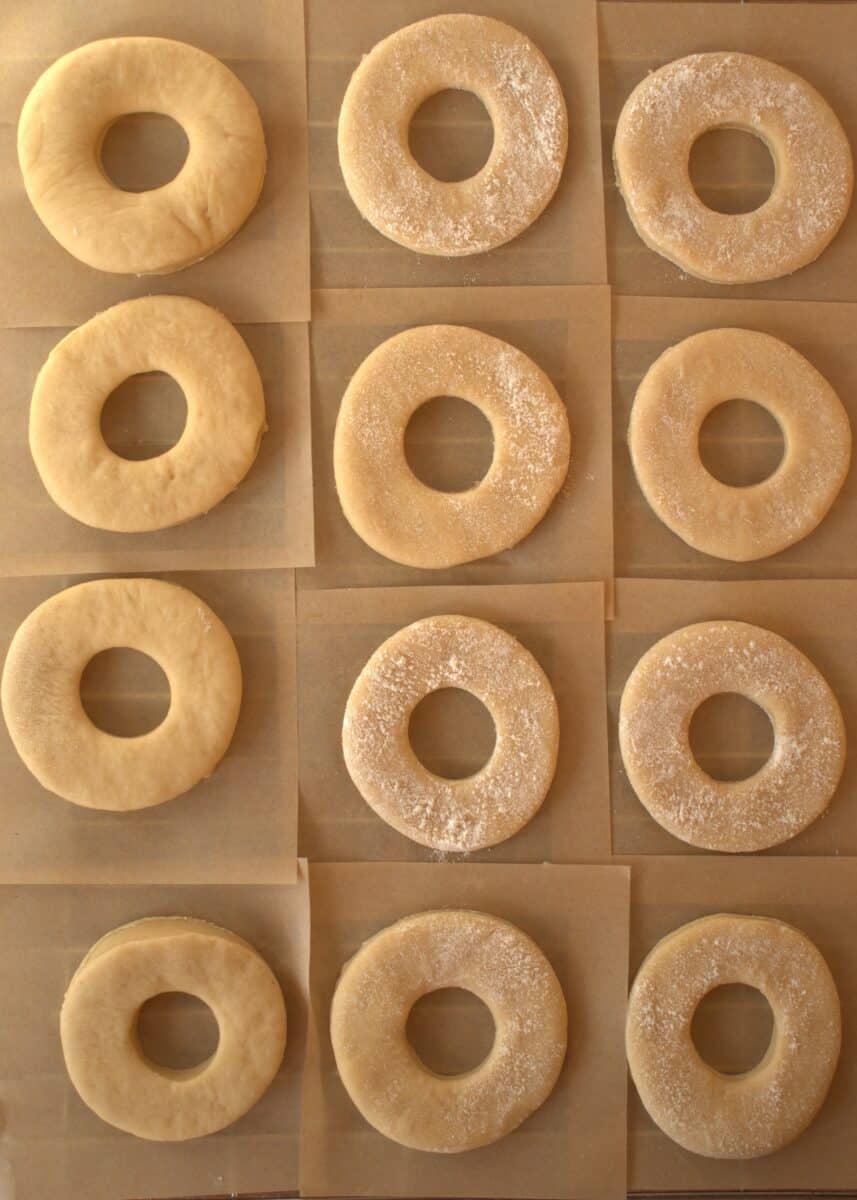
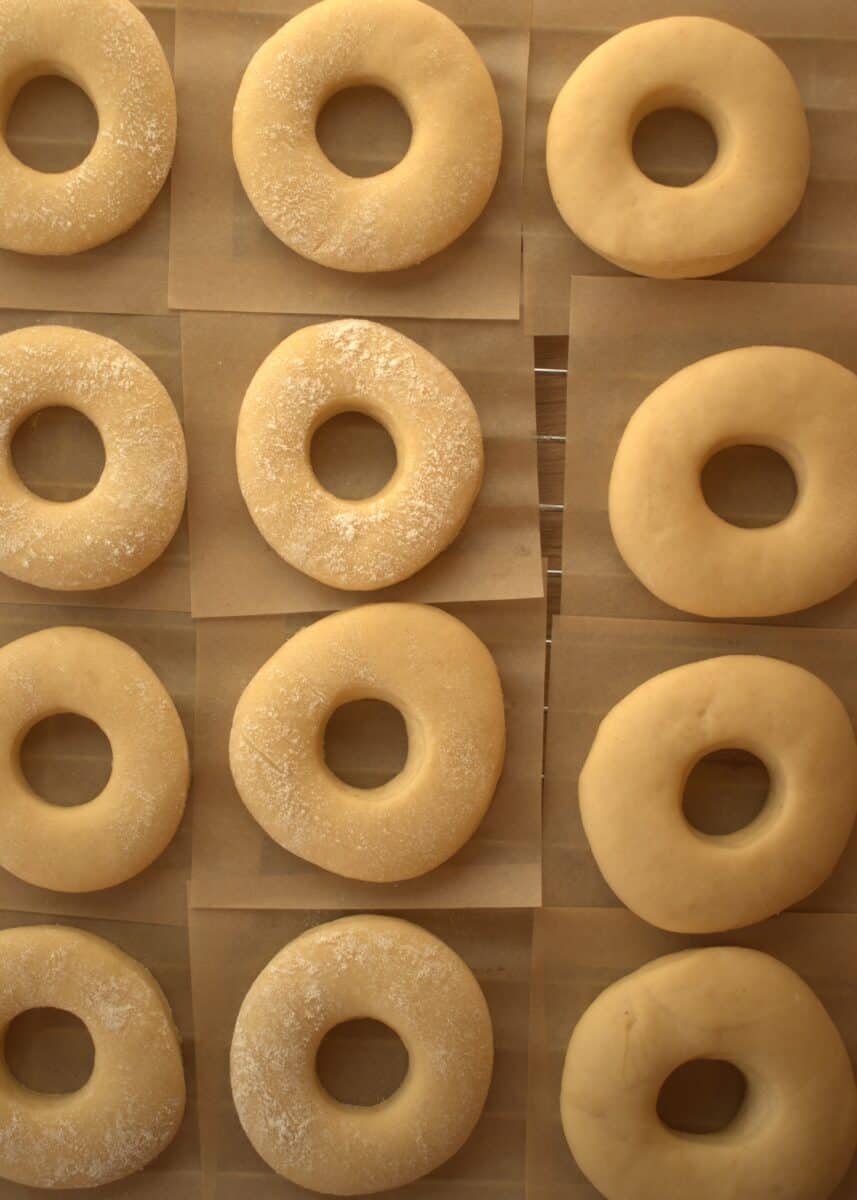
5. Gently roll the dough out on a lightly floured surface to your desired thickness. Cut out donut shapes using a donut cutter or round cutters. Keep scraps to re-roll and use for extra donuts.
6. Place the shaped donuts on a baking tray lined with baking paper and let them rise again until puffy.
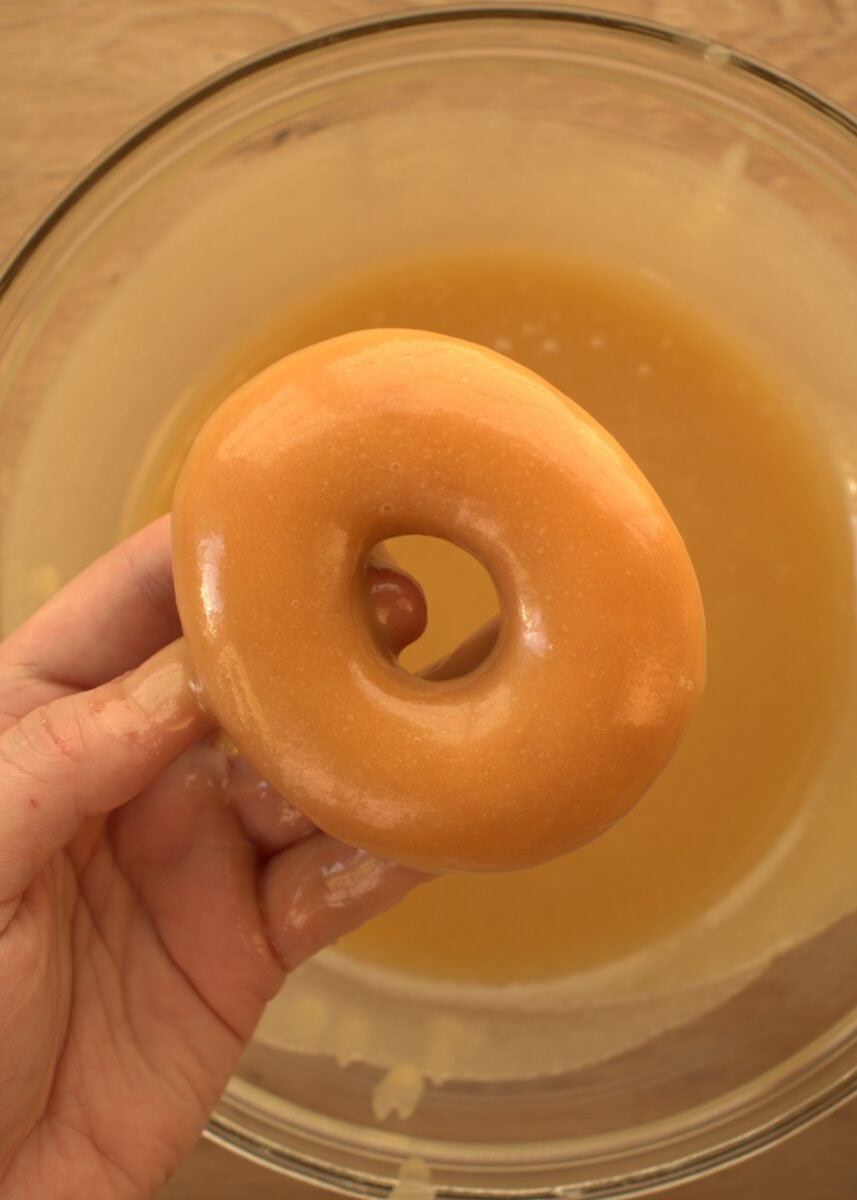
7. Combine maple syrup, powdered sugar, and butter in a small saucepan over low heat. Stir until fully melted and smooth. For an extra glossy finish, blend the glaze with a hand blender to achieve a silky consistency perfect for dipping.

8. Carefully fry the donuts in neutral oil heated to the right temperature for golden, evenly cooked donuts. Fry until golden brown on each side.
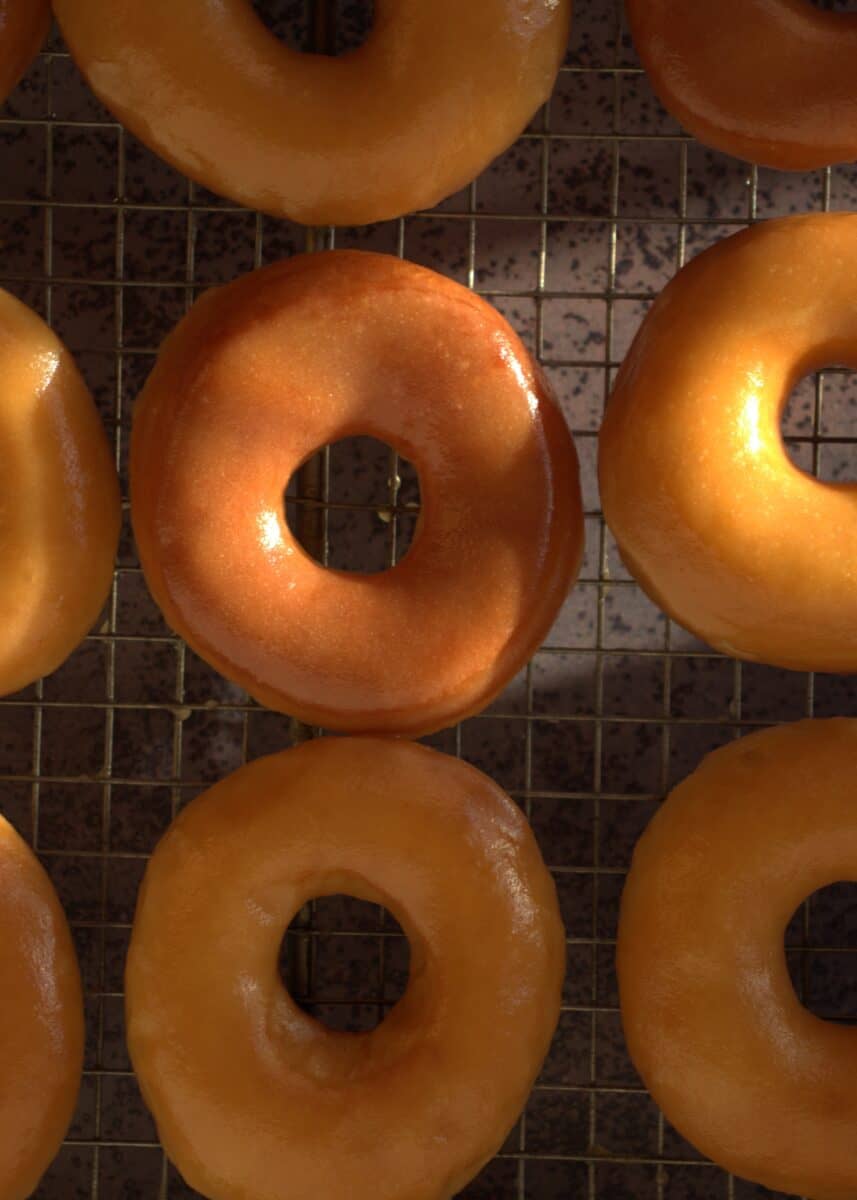
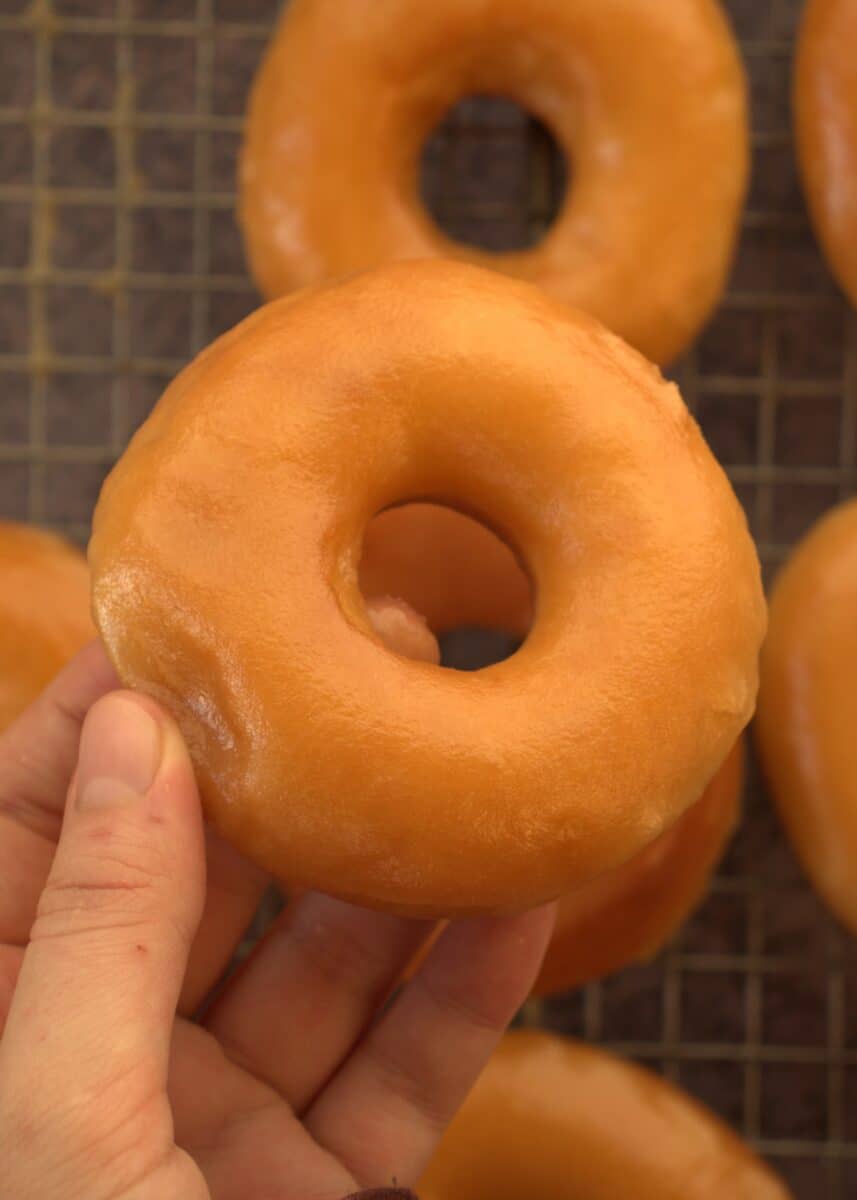
9. While still warm, dip the fried donuts into the maple glaze, allowing excess to drip off. Place them on a cooling rack to set. The glaze will harden slightly but remain soft and sticky, creating a rich, maple-forward finish.
Maple Syrup Glaze
This maple syrup glaze is the ultimate finishing touch for your cozy fall baking. Bursting with rich maple flavor, it adds the perfect sweet, warm coating to your homemade donuts.
To make the glaze, combine powdered sugar, butter, and high-quality maple syrup in a small pan. At first, the mixture may look lumpy, but as it gently heats, the sugar dissolves and the butter melts, creating a smooth, uniform glaze. Once fully combined, remove the pan from the heat and cover the glaze with plastic wrap, pressing it directly onto the surface to prevent a skin from forming.
For an extra silky finish, you can use a hand blender to smooth the glaze completely. You can also adjust the consistency to your liking: add more powdered sugar for a thicker glaze or more maple syrup for a thinner, pourable glaze.
This glaze turns out beautifully glossy, flavorful, and irresistibly maple-forward — the perfect way to complete your soft, fluffy homemade donuts and elevate your fall baking.
Make the Perfect Donut Dough
Creating soft, fluffy, and flavorful donuts takes precision, but you don’t have to experiment endlessly — you’ve just found the perfect recipe. These donuts come out consistently light, airy, and absolutely delicious every time.
The key to perfect donut dough lies in a few essential tricks:
- Frothy sponge: Start by letting the sponge fully activate until it becomes frothy. This ensures the yeast is alive and ready, giving your donuts their signature light texture.
- Proper proofing: Allow the dough to proof fully. Skipping this step or shortening the time will result in dense donuts. The dough should double in size and feel soft yet structured.
- Perfect dough consistency: Ingredients are measured for ideal stickiness and structure. The dough is slightly tacky but manageable, which is essential for shaping and frying.
- Butter timing: Add butter only after kneading the dough for 14 minutes. Then knead for an additional 10 minutes to fully develop gluten and create a tender crumb.
- Temperature control: Proof dough at a consistent 27°C to 29°C (80°F to 85°F) for optimal rise. Fry donuts at 175°C to 180°C (350°F to 355°F) for a golden, evenly cooked finish.
- Draining: After frying, place donuts on a cooling rack to remove excess oil and keep the texture light.
Following these steps guarantees donuts that are soft, flavorful, and perfectly fluffy — the ultimate fall baking treat.
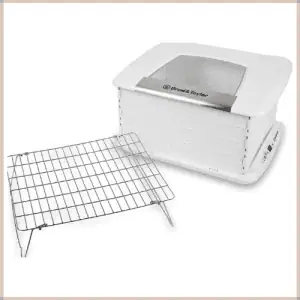
Pro Tip: Using a Dough Proofer
For consistently perfect donuts, I always use a dough proofer. If you love baking regularly, this is an investment worth making. A proofer keeps your dough at the ideal temperature and humidity, so you don’t have to worry about cold drafts, hot weather, or unpredictable air conditions affecting your rise. With a proofer, your donuts will proof evenly every time, giving you reliable, soft, and fluffy results.
 Buy Now →
 How to Shape Donuts
Shaping donuts can be done in several ways, depending on the tools you have. For this recipe, we use a donut cutter, which makes creating perfectly uniform shapes quick and easy.
If you don’t have a donut cutter, you can use a cookie cutter for the outer circle and a smaller cutter for the center hole. No cutters at all? No problem — simply roll the dough into equal-sized balls, flatten them slightly, and use a bottle cap or similar object to create the center hole.
When rolling out the dough for cutting, aim for a thickness of about 0.4 cm (or just under ½ inch). This ensures the donuts are not too thick, allowing them to fry evenly while remaining soft and fluffy on the inside.
Shaping your donuts carefully helps them cook perfectly and look professional — a simple step that makes a big difference in your cozy fall baking.
Different Proofing Times for Donuts
Proper proofing is key to achieving soft, fluffy, and flavorful donuts. Based on my experience, here’s what works best:
- Yeast mixture: At a controlled temperature of 27°C to 29°C (80°F to 85°F), let the yeast mixture proof for 10 to 15 minutes, or until it becomes frothy and active.
- After kneading: Once the dough has been kneaded, proof at 27°C to 29°C (80°F to 85°F) for 1 hour and 45 minutes. This develops the structure and flavor of the donuts.
- After shaping: Once the donuts are shaped, proof them again at the same temperature for another 45 minutes to 1 hour.
Temperature control is crucial. If the environment is warmer, the dough may need slightly less time. In colder conditions, allow more time for proper rise. Maintaining consistent proofing ensures your donuts are perfectly airy and soft — essential for any cozy fall baking session.
My Best Tips for Perfect Donuts
Making donuts that are soft, fluffy, and full of flavor requires attention to a few key details. Here are my top tips for success:
- Use fresh, active yeast: Make sure your active dry yeast is fresh and not expired. Old yeast can prevent proper rising and result in dense, heavy donuts.
- Add butter at the right time: Incorporate butter only after kneading the dough for about 14 minutes. This helps develop gluten for a tender, structured crumb.
- Proof properly: Give the dough enough time to proof. Underproofed donuts can turn out dense and dry, while properly proofed dough creates light, airy donuts.
- Glaze care: When making the maple glaze, cover it with plastic wrap pressed directly onto the surface to prevent a skin from forming.
- Mind thickness and frying temperature: Donuts should not be too thick, and the oil temperature should be controlled. Frying too hot can brown the outside too quickly while leaving the inside undercooked.
Following these tips will help you consistently create the perfect fall-inspired, maple-glazed donuts — soft, flavorful, and irresistibly cozy.

Delicious Variations
Maple glazed donuts are versatile and can be adapted in several ways to suit your taste:
- Swap the milk: You can replace milk with water. The texture will remain soft and airy, though the flavor may be slightly less rich.
- Creative toppings and pairings: Enjoy your donuts with crispy bacon for a sweet-and-salty twist.
- Different shapes: Shape the dough into classic donuts, or try beignets! Follow our original beignet recipe and drizzle the maple glaze on top for a decadent variation.
- Perfect accompaniments: Serve your donuts with a hot cup of coffee, warm milk, or rich chocolate milk to enhance the cozy fall experience.
These simple variations let you customize your donuts while keeping them soft, fluffy, and irresistibly maple-forward — perfect for fall baking and maple lovers everywhere.
How to Store Maple Glazed Donuts
Homemade doughs, like our Biscoff donuts or Nutella brioche, tend to dry out if not stored properly, so storage and reheating are key to keeping them soft and fluffy. Here’s how to ensure your donuts stay delicious:
- Short-term storage: Place your donuts in an airtight container at room temperature. Reheat slightly in the microwave before serving to restore their warmth and fluffiness. Eating them warm is always best for maximum flavor and texture.
- Long-term storage: If you won’t eat all your donuts the same day, freezing is the ideal option. Let them cool completely, then store in an airtight container or freezer bag. When ready to enjoy, reheat gently in the microwave or oven to bring back their soft, fresh-baked texture.
Following these tips will keep your maple-glazed donuts perfectly moist, fluffy, and ready for cozy fall mornings anytime.


Maple-glazed donuts
Indulge in the cozy flavors of fall with these soft, fluffy, and irresistibly sweet maple-glazed donuts. Perfect for breakfast, brunch, or a comforting treat with your favorite hot beverage, this recipe combines the perfect homemade dough with a rich, flavorful maple glaze made from high-quality maple syrup. Easy to follow and ideal for donut lovers, these donuts bring the warmth and comfort of fall baking straight to your kitchen.
- Total Time3 hours 35–40 minutes
- Yield14 donuts
- DietVegetarian
Ingredients
For the Donut Dough:
- 100 ml (½ cup) milk
- 10 g (2 tsp) active dry yeast
- 1 tbsp granulated sugar
- 280 g (2 ¼ cups) all-purpose flour
- 2 tbsp vanilla extract
- 50 g (¼ cup) granulated sugar
- ½ tsp salt
- 1 egg
- 40 g (3 tbsp) butter
- Vegetable Oil for frying (enough to reach about 5 fingers deep in your pan)
For the Maple Glaze:
- 300 g (1 ¼ cups) maple syrup
- 200 g (1 ¾ cups) powdered sugar
- 2 tbsp butter
Instructions
- Combine milk (warm, around 37°C / 98°F), sugar, and active dry yeast in a large mixing bowl.
- Let it rest for 10–15 minutes until frothy and bubbly. This ensures the yeast is active and ready for fluffy donuts.
- Combine the frothy yeast mixture with flour, sugar, vanilla, salt, and egg.
- Knead the dough for 14 minutes, then add the butter and continue kneading for another 10 minutes until smooth, elastic, and slightly sticky.
- Place the dough in a lightly greased bowl, cover it, and proof at a controlled temperature of 27–29°C (80–85°F) for 1 hour and 45 minutes, until it doubles in size.
- Roll out the dough to about 1 cm (½ inch) thickness.
- Use a donut cutter to cut the donuts. You can use a cookie cutter instead, a big cutter, and a smaller one.
- Place shaped donuts on a tray and proof again for 45–60 minutes at 27–29°C (80–85°F) until puffy.
- In a saucepan, combine maple syrup, powdered sugar, and butter. Heat gently, stirring until smooth and uniform.
- Cover with plastic wrap pressed directly onto the glaze. Blend lightly for a silky consistency. Adjust thickness by adding more powdered sugar for a thicker glaze or more syrup for a thinner glaze.
- Heat oil to 175–180°C (350–355°F).
- Fry the donuts in batches until golden brown on both sides. Remove and let them drain on a cooling rack to remove excess oil.
- Dip warm donuts into the maple glaze for full coverage.
- Allow glaze to set for a few minutes before serving.
- Serve the donuts warm for the best flavor and texture. Perfect with coffee, hot chocolate, or milk for a cozy fall treat.
- Prep Time: 40 minutes
- Cook Time: 10–15 minutes
- Category: Breakfast, Dessert, Snack
- Method: Frying
- Cuisine: American, Fall Baking Diet: Vegetarian
Nutrition
- Serving Size: 1 donut
- Calories: 280–300 kcal
- Sugar: 18–20 g
- Sodium: 150 mg
- Fat: 12 g
- Saturated Fat: 7 g
- Unsaturated Fat: 5 g
- Trans Fat: 0 g
- Carbohydrates: 36–38 g
- Fiber: 1 g
- Protein: 5 g
- Cholesterol: 50 mg