
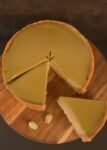
No Bake Vanilla Pistachio Cheesecake
There’s something truly special about a dessert that feels both a little fancy and wonderfully simple.
This No-Bake Vanilla Pistachio Cheesecake is exactly that—a creamy, dreamy treat that requires no oven and feels like a warm hug in dessert form.
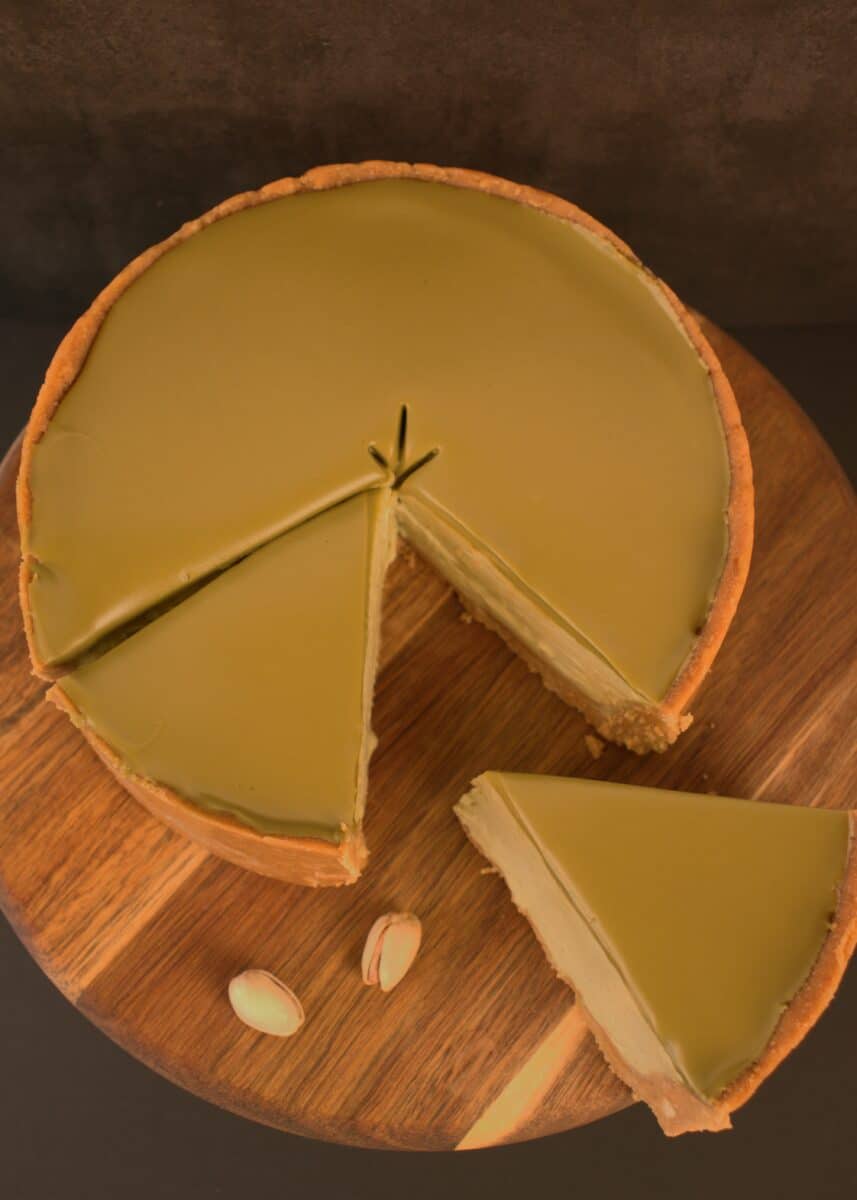
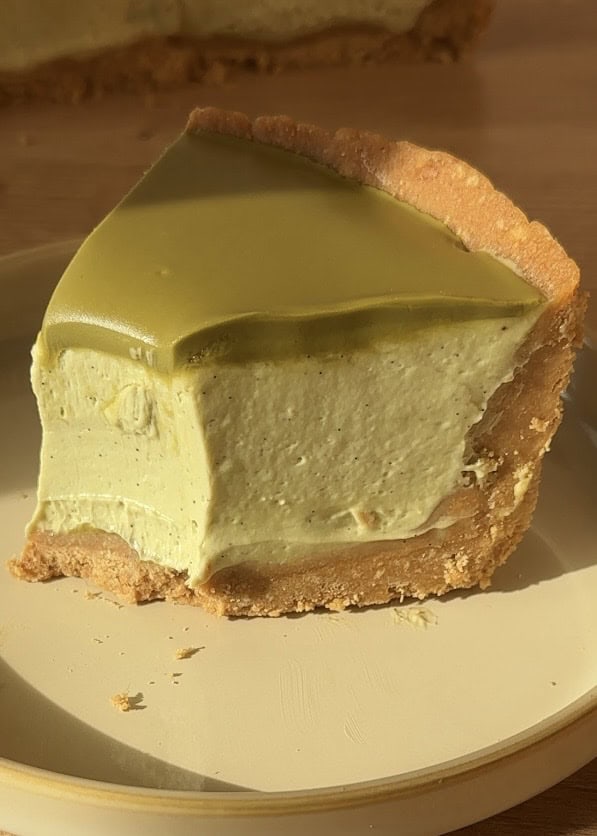
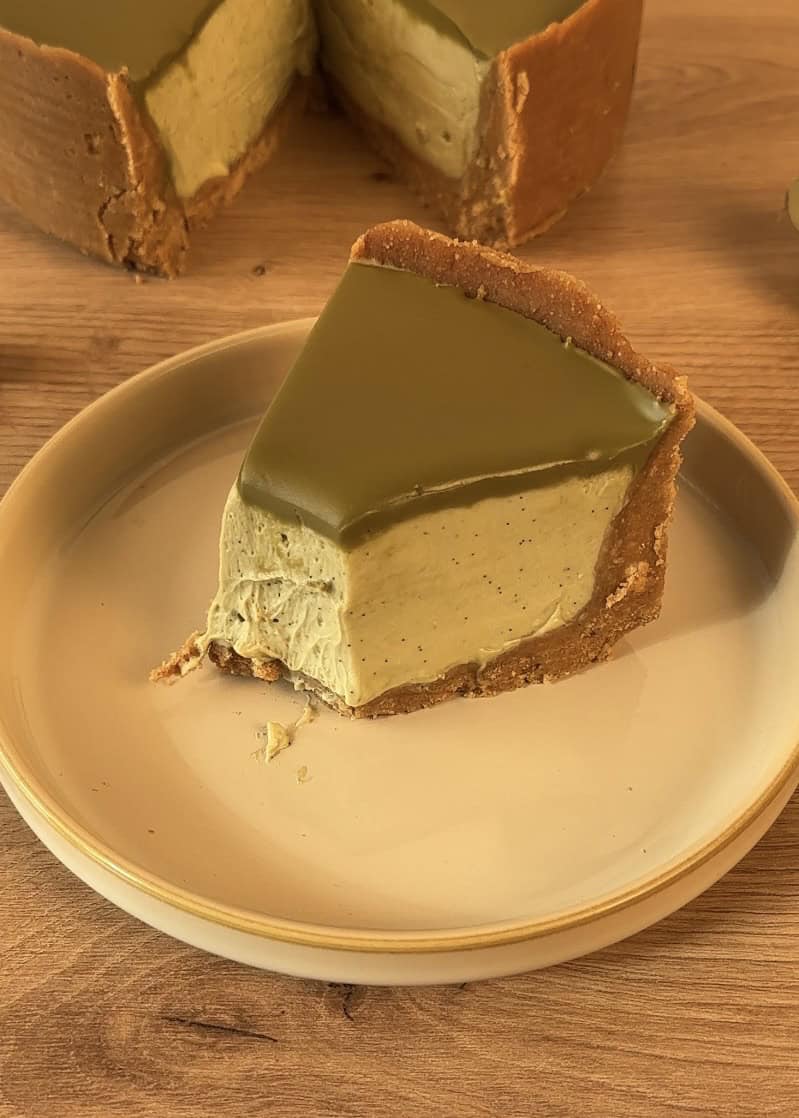
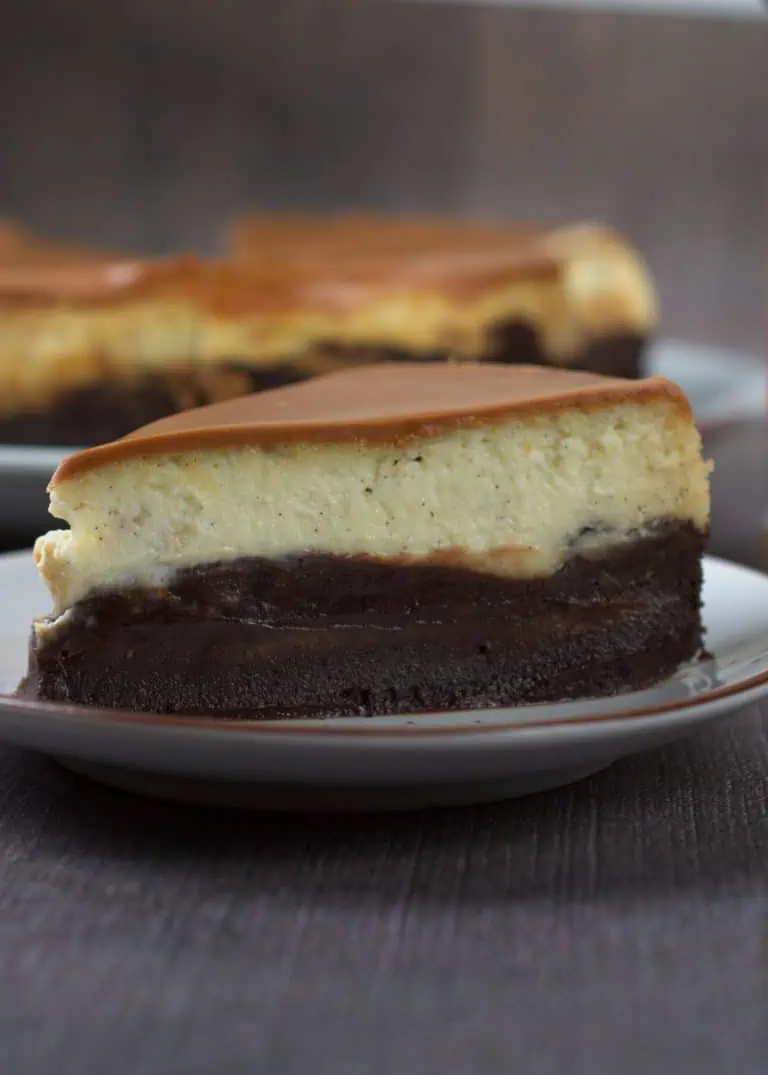
Picture a buttery biscuit crust, a velvety-smooth filling flecked with real vanilla beans and swirled with rich pistachio spread, all topped with a glossy pistachio glaze.
It’s the kind of dessert that looks like you spent all day in the kitchen, but secretly comes together with ease.
Whether you’re celebrating something special or just turning an ordinary Tuesday into something sweet, this cheesecake is here to make the moment feel a little more magical.
So grab your favorite mixing bowl—let’s make something beautiful together.
Here’s the delicious breakdown:
- A buttery, crunchy biscuit base that gives you the perfect contrast to the creamy filling.
- An ultra-smooth, velvety cheesecake layer packed with real pistachio spread and flecked with gorgeous vanilla bean seeds.
- A simple, glossy pistachio topping that seals the deal, adding an extra layer of flavor and a professional finish.
It’s nutty, it’s creamy, and it’s an absolute dream for any pistachio lover.
Why you’ll Love this Recipe
- You will adore this recipe because it delivers a restaurant-quality dessert without any of the stress. No water baths, no cracking, no oven needed!
- It’s the ideal choice for anyone who loves the sophisticated flavor of pistachio.
- Get ready for a flood of compliments, as the beautiful green hue and elegant appearance are guaranteed to impress everyone at the table.
- Best of all, we’ve kept the entire process simple and straightforward, and have included every detailed step and tip you need right here to ensure your success.
The idea for this cheesecake came from our endless love for no-bake desserts and the constant requests for more pistachio recipes.
We took our classic no-bake cheesecake formula and gave it a nutty, sophisticated upgrade.
Honestly, the way the vanilla enhances the pistachio is a game-changer. It’s a simple fact: anything with that vanilla-pistachio combo is just a good idea.
Ingredients and Why they Matter
Here’s a little breakdown of why we’re using these ingredients and how you can swap them if needed. For the exact quantities in both grams and cups, you’ll find the full list in the recipe card at the bottom of the post.
- Biscuits: We’re using simple digestive biscuits for that classic, neutral, buttery base that lets the pistachio shine. You can easily swap them for graham crackers.
- Pistachio Spread: This is our star. It gives that authentic, sweet, and nutty flavor and the gorgeous creamy texture. Make sure you get a smooth spread, not crunchy!
- Cream Cheese: Using full-fat, room-temperature cream cheese is crucial for that perfectly smooth, lump-free filling we all dream about.
- Heavy Whipping Cream: This is what gives our filling its light, mousse-like texture. Just make sure it has at least 35% fat so it whips up properly.
- Vanilla Beans: Using the real thing is non-negotiable here! Those tiny seeds give you the most incredible fragrance and flavor that you just can’t get from extract. They make the dessert feel extra special.
- Butter: Melted butter is what binds our biscuit base together, ensuring it’s firm and not a crumbly mess.
 Buy Now →
  Buy Now →
  Buy Now →
  Buy Now →
 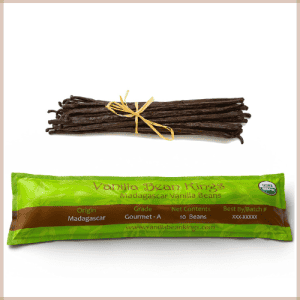 Buy Now →
  Buy Now →
 Special Tools and Why We Use Them
- Springform Pan: Essential for a clean release! The removable sides allow you to easily unmold the beautiful cheesecake without damaging it.
- Food Processor: The easiest way to crush your biscuits into fine, even crumbs for the perfect crust. (Alternative: a zip-top bag and a rolling pin.)
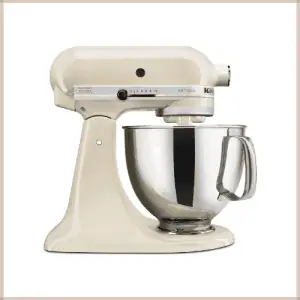
- Electric Mixer: Highly recommended for whipping the heavy cream to soft peaks with minimal effort. (Alternative: a manual whisk and some serious dedication!)
- Spatulas: We’ll use two: a sturdy spatula to mix the cream cheese and pistachio spread, and a flexible silicone one to gently fold in the whipped cream and scrape the bowl clean.
Equipment to make a Vanilla Pistachio Cheesecake
 Buy Now →
 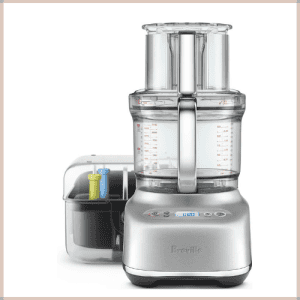 Buy Now →
 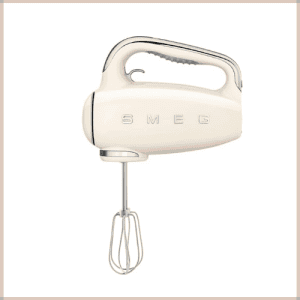 Buy Now →
  Buy Now →
  Buy Now →
 No Bake Vanilla Cheesecake Step By Step Overview

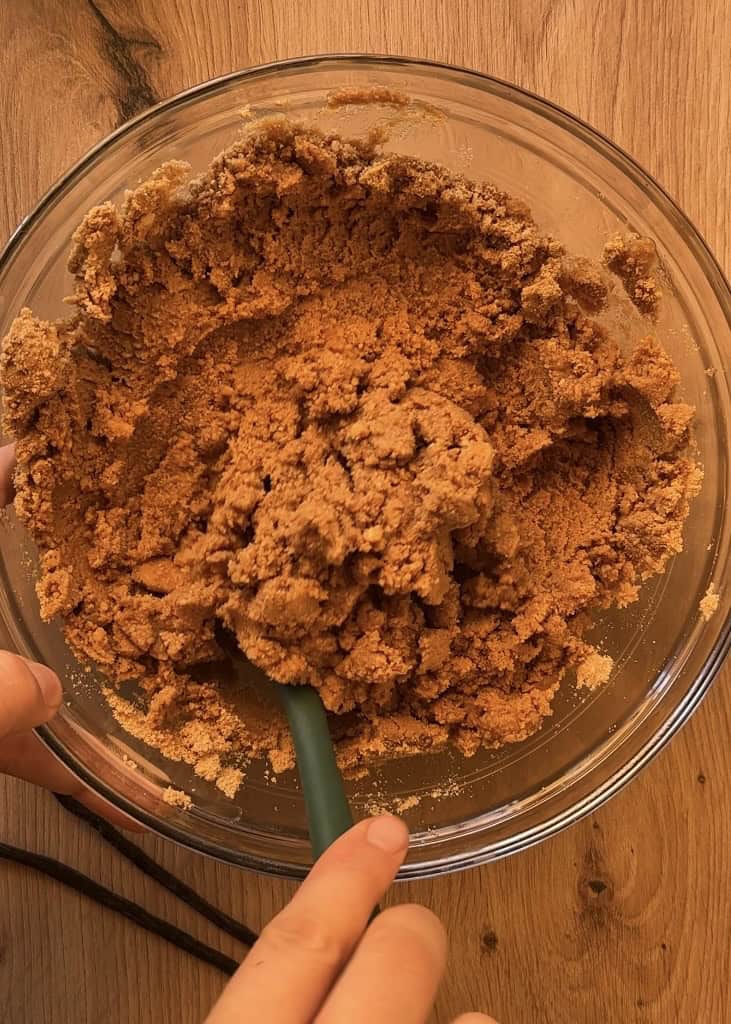
1.Blitz the biscuits into fine crumbs and mix with melted butter until it resembles wet sand.
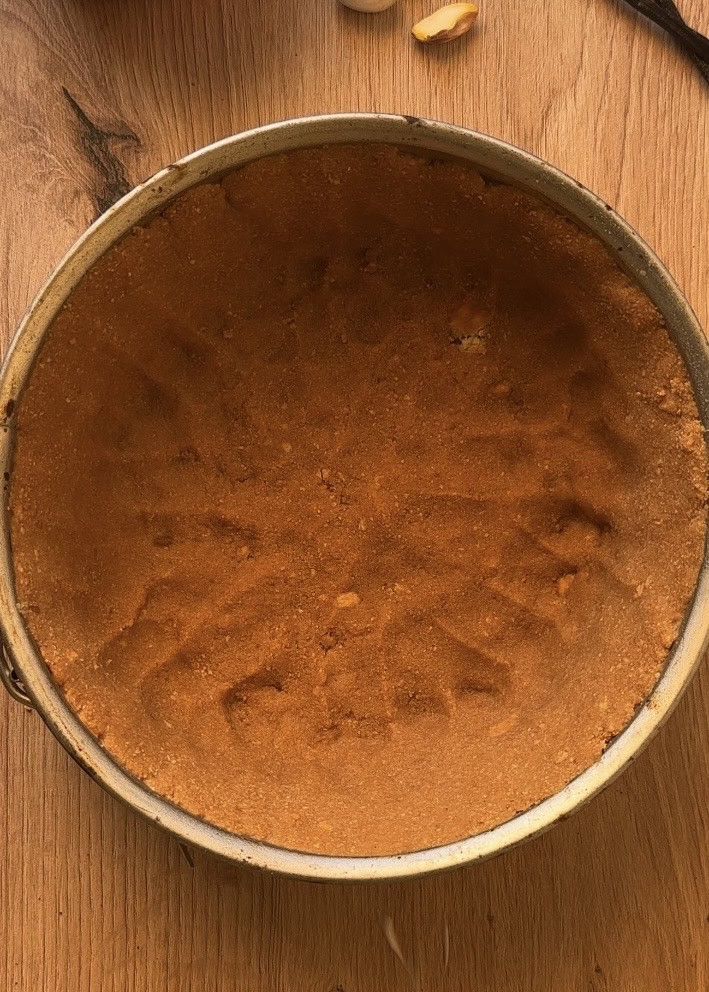
2.Press it firmly into the bottom and slightly up the sides of your springform pan. Chill it in the fridge while you make the filling.
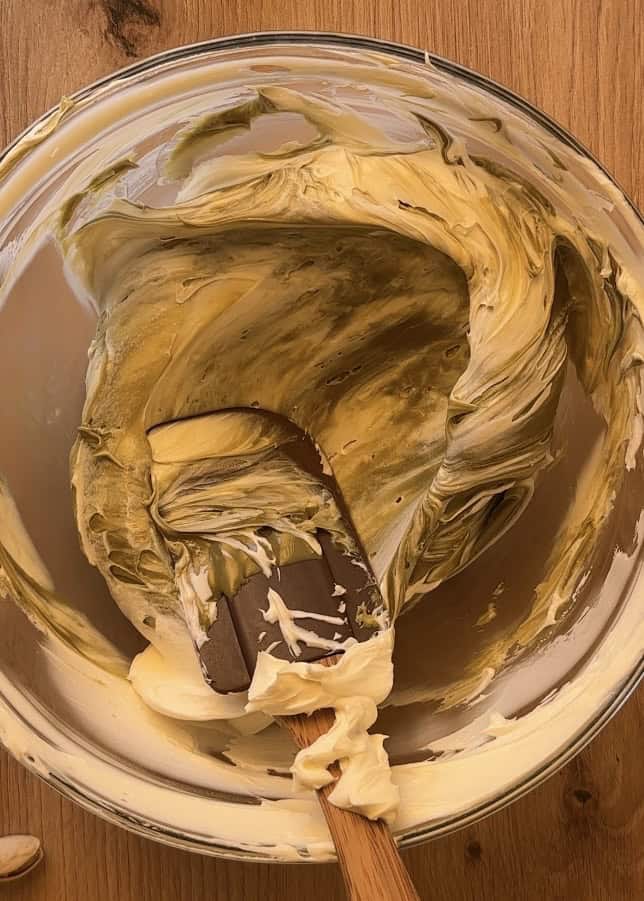
3.In a large bowl, use a spatula to gently work the room-temperature cream cheese with the pistachio spread until smooth and combined.
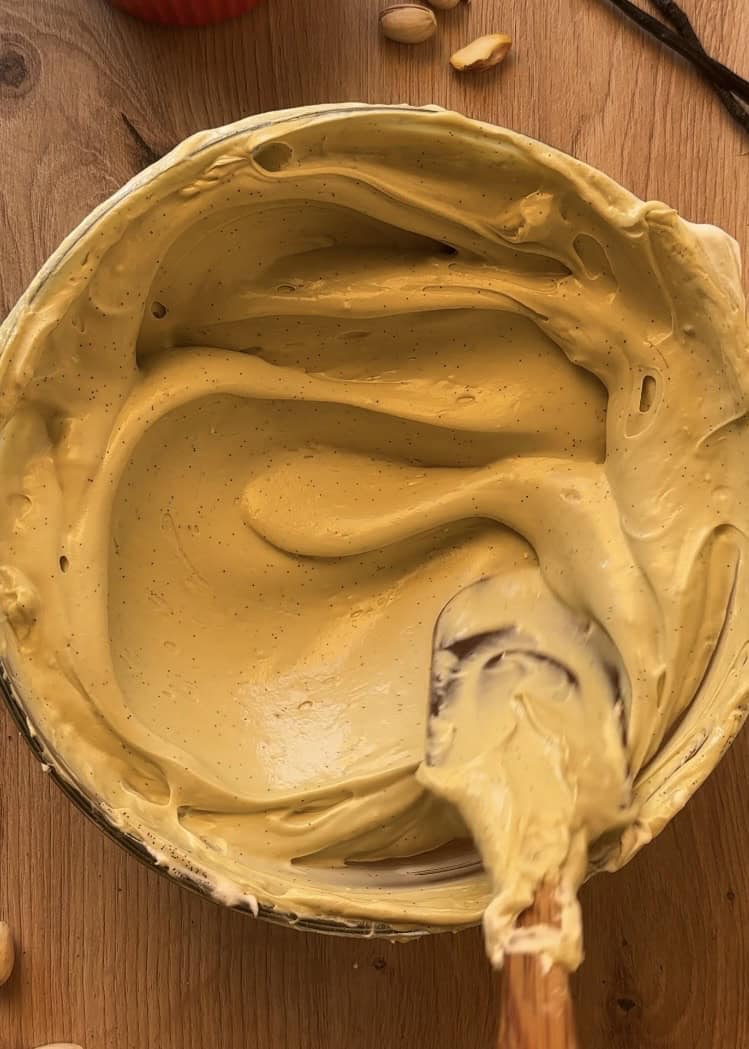
4.Split your vanilla beans lengthwise and scrape out the fragrant seeds. Stir them into the pistachio-cream cheese mixture until those beautiful black specks are evenly distributed.
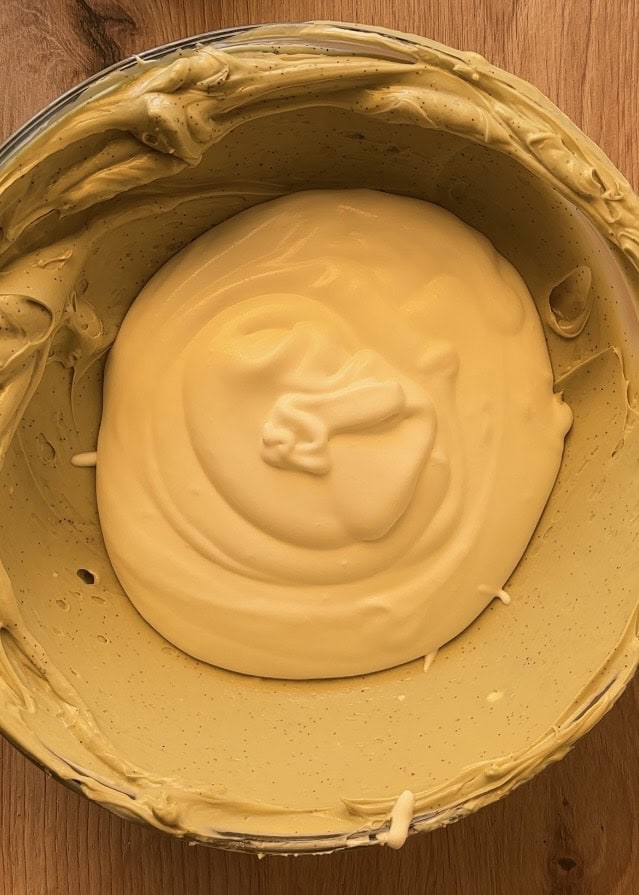
5.Add the pistachio-cream cheese mixture into the whipped cream. Use a spatula to gently fold them together just until combined and no white streaks remain. Overmixing can deflate the cream!
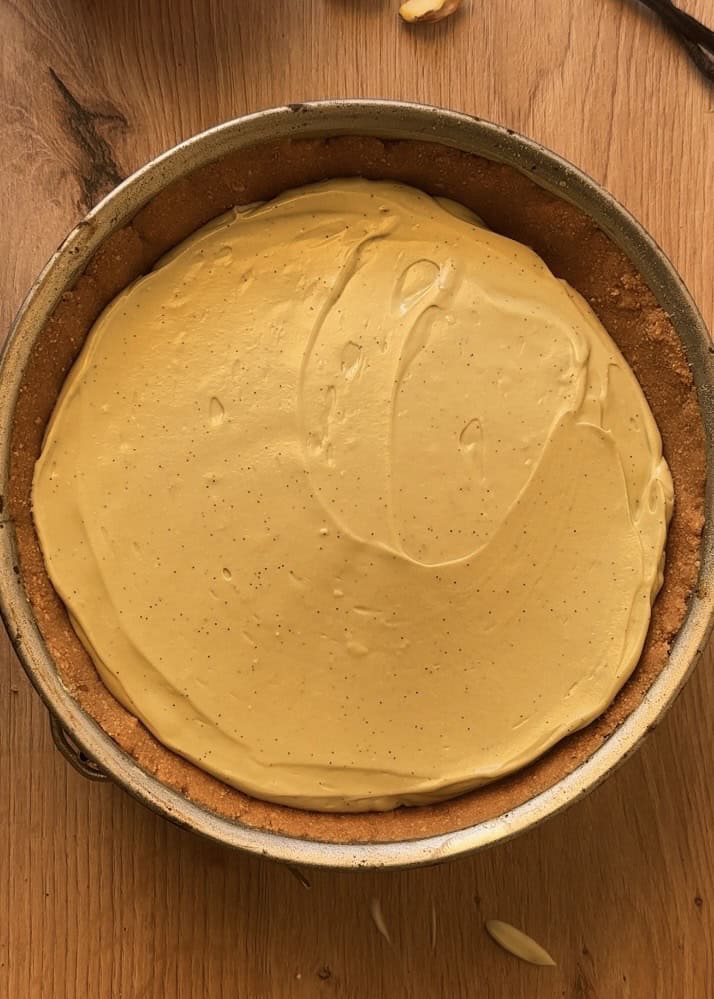
6. Pour the creamy filling over your chilled base and smooth the top. Cover the pan and refrigerate for at least 8 hours, or ideally overnight, until it’s completely firm.
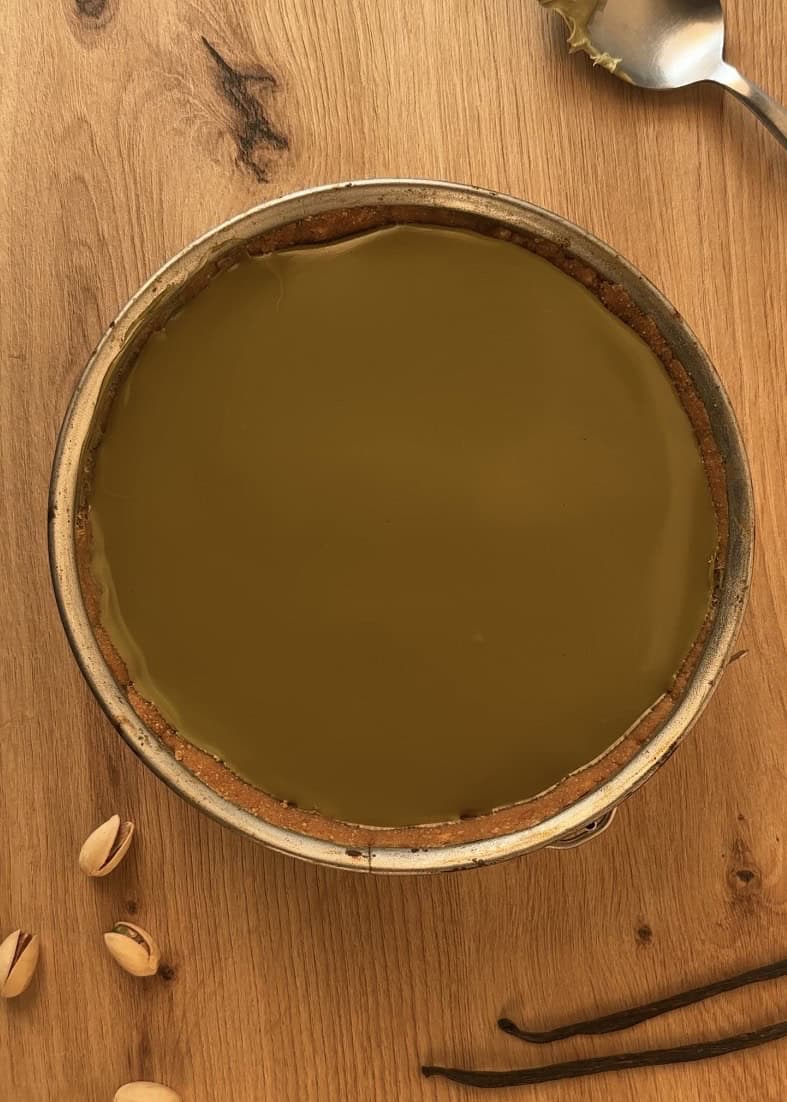
7.Before serving, gently warm the reserved pistachio spread and pour it over the set cheesecake, spreading it into a glossy, even layer.
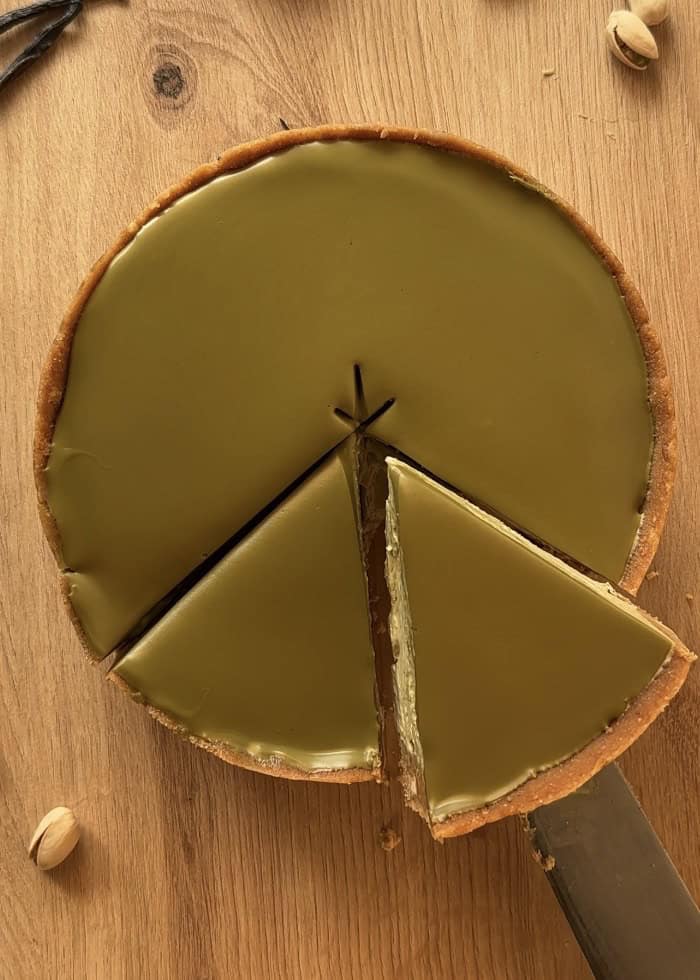
8. Slice and serve.
Best Tips for making a Perfect Pistachio Cheesecake
- Cream Cheese Temperature is Key: Make sure your cream cheese is truly at room temperature. If it’s cold, it won’t blend smoothly and can cause the melted chocolate to seize, creating stubborn lumps in your filling.
- Whip the Cream Right: For the whipped cream, your bowl and beaters must be completely clean, dry, and cold. Any grease or residue can prevent the cream from whipping up properly. Whip just until soft peaks form—over-whipping will make it grainy.
- Don’t Overmix the Filling: When folding the whipped cream into the cream cheese mixture, use a spatula and be gentle. You want to keep all that air you whipped into the cream to maintain a light, mousse-like texture.
- Chill Thoroughly: This is not a suggestion—it’s essential! The long chill time (at least 8 hours) is what allows the cheesecake to set properly so you get those perfect, clean slices.
- Check Your Cream’s Fat Content: This is non-negotiable! Your heavy whipping cream must have at least 35% milk fat. Anything less simply will not whip up and hold its structure, leading to a runny filling.
How to Store your Cheesecake
Refrigeration:
- Always store the cheesecake in an airtight container or wrapped tightly with plastic wrap
- Place it in the coldest part of your refrigerator (usually the back, not the door)
- The cheesecake will maintain perfect texture and flavor for up to 4 days
- For best quality, we don’t recommend keeping it longer than 4 days as the crust may become soggy and the filling can absorb refrigerator odors
Freezing for Long-Term Storage:
- Perfect for making ahead for special occasions!
- Yes, this cheesecake freezes beautifully!
- First, wrap the entire cheesecake tightly in 2 layers of plastic wrap
- Then wrap securely in aluminum foil or place in a heavy-duty freezer bag
- Label with the date – it will keep for up to 2 months in the freezer
- To serve, transfer to the refrigerator and thaw overnight (about 8-12 hours)
- Do not thaw at room temperature as this can affect the texture

Troubleshooting Common Mistakes
1.My filling is lumpy or grainy
This usually happens when your cream cheese is too cold!
If you spot lumps in your filling before pouring it into the crust, don’t panic. Simply press the mixture through a fine-mesh sieve—it will smooth everything out. For next time, make sure your cream cheese sits out until it’s truly room temperature.
2.My heavy whipping cream is too runny or-won’t whip properly!!
If your cream won’t whip properly, check three things:
Did you chill everything beforehand?
Even a tiny bit of grease or moisture can prevent whipping. If it still won’t whip, try placing your bowl and cream in the freezer for 10-15 minutes before trying again.
Is your cream at least 35% fat?
Is your bowl and whisk completely clean and dry?
Variation & Flavor Ideas
- Mascarpone Version: For an even richer, creamier texture, swap the cream cheese for an equal amount of mascarpone cheese. The flavor will be slightly less tangy and more decadent.
- Extra Crunch Decoration: After adding the glossy pistachio spread topping, immediately press a handful of finely chopped pistachios around the edges of the cake. This adds a wonderful crunch and makes it look professionally decorated.
- White Chocolate Pistachio: Fold 100g of melted and cooled white chocolate into the filling along with the pistachio spread for a sweeter, even creamier version.
- Cardamom Infusion: Add ½ teaspoon of ground cardamom and cinnamon to the biscuit crust. The warm, aromatic spice is a classic pairing with pistachio.
No Bake Vanilla Pistachio Cheesecake
Creamy no-bake vanilla pistachio cheesecake with a buttery biscuit crust and silky pistachio topping. An easy, elegant dessert that requires no baking – perfect for impressing guests!
- Total Time0 hours
- Yield10-12 servings
Ingredients
Crust:
- 250g (2 cups) digestive biscuits or graham crackers
- 60g (¼ cup) melted butter
Filling:
- 450g (16 oz) cream cheese, softened
- 4 vanilla beans, seeds scraped (or 2 tsp vanilla bean paste)
- 250g (1 cup) pistachio spread
- 75g (⅓ cup) granulated sugar
- 200g (¾ cup) heavy whipping cream (35% fat)
Topping:
- 200g (¾ cup) pistachio spread, warmed
Instructions
Prepare the Crust
- Place the biscuits in a food processor and blend until they form fine, even crumbs.
- In a medium bowl, combine the biscuit crumbs with the melted butter. Mix thoroughly until the mixture reaches a “wet sand” consistency.
- Transfer the mixture to a springform pan. Start by pressing it evenly up the sides of the pan, then press the remainder firmly and evenly into the bottom.
- Place the pan in the freezer or refrigerator to chill while you prepare the filling.
Make the Filling
- In a large bowl, use a wooden spatula to work the room-temperature cream cheese until it is soft and smooth.
- Add the pistachio spread and mix until fully combined and uniform in color.
- Split the vanilla beans lengthwise and scrape out the seeds with the back of a knife. Add the seeds to the cream cheese mixture and stir until evenly distributed.
- In a separate, clean, and dry bowl, whip the heavy cream and sugar together until soft peaks form.
- Gently fold the whipped cream into the pistachio and cream cheese mixture until no white streaks remain.
Assemble and Set
- Remove the chilled crust from the freezer. Pour the filling into the crust and smooth the top with a spatula.
- Cover the pan with plastic wrap and refrigerate for at least 8 hours, or ideally overnight, until the cheesecake is completely set.
Decorate and Serve
- Once set, gently warm the pistachio spread until it is fluid but not hot.
- Pour the spread over the chilled cheesecake and use an offset spatula to spread it into a smooth, even layer that covers the entire top.
- Return the cheesecake to the refrigerator for about 10 minutes to allow the topping to set slightly.
- Slice, serve, and enjoy!

Notes
- For the best texture, ensure your cream cheese is at room temperature before you begin.
- If you can’t find vanilla beans, you can substitute with 2 teaspoons of high-quality vanilla bean paste.
- When whipping the cream, make sure your bowl and beaters are completely clean and dry for the best volume.
- For a decorative touch, add a few tablespoons of crushed pistachios to sprinkle around the edges of the cheesecake after adding the crust to the pan.
- To create perfectly clean slices, dip your knife in hot water and wipe it dry between each cut.
- This cheesecake can be made 1-2 days in advance, making it perfect for entertaining.
- Store any leftovers covered in the refrigerator for up to 4 days.
- Prep Time: 20 minutes
- Chill Time: 6+ hours (set overnight recommended)
- Category: cheesecake, Dessert
- Method: No-Bake
- Cuisine: American/Modern
Nutrition
- Serving Size: 1 slice
- Calories: 420 kcal
- Sugar: 28 g
- Sodium: 160 mg
- Fat: 32 g
- Saturated Fat: 18 g
- Unsaturated Fat: 12 g
- Trans Fat: 0 g
- Carbohydrates: 35 g
- Fiber: 1 g
- Protein: 7 g
- Cholesterol: 90 mg


The texture and the flavor were absolutely amazing I could not get enough of your recipes. I will be trying more of them in the future, and I’m always satisfied with how they turned out. Thank you!
Flavor is great! The amount of butter called for in the crust is way too little in my opinion. I ended up with a severely dry crust, which isn’t bad, it just doesn’t support the overall cake. I’d make again but double or possibly triple the butter for the crust portion.
Delicious! I made it for friends-giving and everyone loved it!!
How can I make the pistachio spread from pistachios?
I recommend buying it to save time. If that’s not an option, we haven’t uploaded any recipes for pistachio spread at the moment, but I’m sure you can find amazing recipes online!
hi, can I substitute the sugar for 1:1 sugar replacement Erythritol & Monkfruit?
Greetings, is pistachio paste as the the pistachio spread. Thank you in advance. I have made the paste for baklava. Would it be the same thing?
Great recipe! My entire family loves this!
Thank you so much! I’m absolutely thrilled that your family enjoyed it!